
Ready to take your photography to the next level? Our expert guide to the best camera accessories will help you narrow down the exact essentials you need to consider.
Once you start getting more and more into photography you quickly realise that there are certain tools that are essential to make your life easier, and your photos more creative.
Some of these accessories are necessary for your camera to work, and some will simply help you take better photos.
After the success of our popular best travel cameras article (helping over 2 million photographers to date!) we received countless emails from people asking what photo camera accessories we use and recommend.
Whether you’ve bought the best travel camera you can find or are just a hobbyist, trying to choose the best camera accessories is something you seriously need to consider.
Our Expert Guide to the Best Camera Accessories and Essentials
With the thousands of photo camera accessories on the market these days it can be quite overwhelming trying to figure out what every photography actually needs.
Even more confusing is trying to determine how much you should spend on what. How can one SD card be worth $5, while another one is $200? Why do some tripods come in at over $1500?
And camera bags? Don’t even get us started on the different choices in camera bags…
Well never fear, because after working as professional photographers for a decade we have worked our way through the endless options and have now narrowed down the exact camera essentials budding photographers need, right down to the best brands and products!
We’ve put together this camera accessories list, not necessarily just for the professionals out there, but also for the entry-level and amateur photographers who want to know where to start.
All of these are products that we’ve owned, used, or had personal experience with in our journey going from complete amateurs to professional travel photographers.
We don’t recommend something that we wouldn’t use ourselves, or tell our best friend to buy.
If you already know what you are looking for, jump to the top camera accessories you are interested in:
Table of Contents
- Our Expert Guide to the Best Camera Accessories and Essentials
- Best SD Memory Cards
- Best Extra Batteries
- Best Tripod for Travel
- Best Full Size Tripod
- Best Portable Light
- Best Circular Polarising Filter
- Best Neutral Density Square Filter Systems
- Best Remote Shutter Release/Intervalometer
- Best Camera Strap
- Best Camera Bags
- Cleaning Kit
- External Hard Drive
- Conclusion to Our Top Camera Accessories and Essentials
This isn’t a comprehensive list of every single camera attachment on the market. Instead it is mainly for the recommended camera accessories that most photographers would need.
We’ve left out the high-end specialist accessories like microphones (side note, we love the Rode Videomic) sliders, gimbals and light boxes, because these aren’t the kinds of things most photographers need.
But if you are interested in these types of camera equipment leave a comment below and we’ll give you our top recommendations!
Now, let’s dive into the article.

Best SD Memory Cards
In order for digital cameras to save photos, you are going to need to buy memory.
This is the most common camera accessory, and the absolute first thing you should be looking at after you buy your digital camera (along with a SD card reader to import your images).
An SD (Secure Disk) card is the small memory chip that goes into your camera that will store all your photos and videos. Every digital camera on the market needs one of these cards to work.
Where it can get confusing is when you start looking at size and speeds. Let’s start with size to give you an idea of what each memory card can hold, remembering that larger capacity means more photos.
Note – For this assessment we are using a 16 megapixel camera shooting in JPEG mode as the base.
- 8gb – 1430 images
- 16gb – 2861 images
- 32gb – 5722 images
- 64gb – 11,444 images
- 128gb – 22,888 images
Now you might look at that and think, “Wow, I would never take 5000 images! A 32gb memory card will last me forever!” and you might be right.
But it’s important to keep in mind that each camera model will have a different size file, and if you shoot video, or photos in RAW card format, then this will chew up your memory faster.
Let us give you an idea of how much memory we use as professional travel photographers – We only shoot in RAW and depending on the camera we use, each file is around 24mb (or 48mb image quality for our Sony A7Riii’s larger camera sensor).
This means we can take about 1333 photos on a 32gb memory card. Seems like a lot? Well, we can easily go through 2 or 3 memory cards on a heavy day of shooting.
One cool thing to consider now is that memory is getting cheaper and cheaper, and a 32g card and SD card reader can be bought for as little as $20 in some places (for a low quality one). So don’t even consider getting anything smaller.
But we don’t necessarily recommend going out to buy a bunch of 128gb (or 256gb) memory cards either, for two reasons:
- Not all cameras can read cards that are larger than 32 or 64gb. We made that mistake when we bought 128gb cards for our old GoPro and it couldn’t read them.
- If you take all your photos on one large SD card and you lose it/have it stolen/it gets corrupted, then you will lose all your photos in one go.
For that reason alone we recommend buying either 32gb or 64gb memory cards, despite the limited capacity.
Now let’s look at speed and ‘class’ of SD cards.
The transfer speeds of an SD card is measured in mb/s, or megabytes per second, and is properly known as the ‘Maximum Read Speed’.
The class of memory card is actually an outdated metric these days as all newer memory cards will include the transfer speeds as well.
However they still include the number on your SD cards these days, and they come in Class 2,4,6 and 10.
Hot Tip – You will need a class 10 memory card.
Just like storage, speed on memory cards is improving rapidly as cameras come out with better features so let’s look some common write speeds to see what you’ll need as a minimum:
- 40mb/s – The absolute minimum you should be considering. Fine for taking low number of photos on a beginner camera if shooting in JPEG.
- 80mb/s – A much better speed that will be fine for taking a couple of photos in a matter of seconds. Ok for shooting in RAW.
- 90mb/s – Great for taking photos in JPEG if using burst mode, shooting exclusively in RAW, or if you are looking to film video as well.
- 95mb/s – What you’ll be needing if you shoot exclusively in RAW and hit the shutter frequently. Adequate for shooting in 4K.
- 150/260/300 or faster – You film cinematic 4K video or are primarily a sports or wildlife photographer. The best of the best. These higher speeds are often found on CF cards, but newer SD cards are matching these speeds now.
Make sure you also get a memory card reader if your computer or laptop doesn’t have a memory card reader built in.

OUR RECOMMENDATION – SANDISK EXTREME PRO
Sandisk Extreme Pro cards have write speeds at 170mb/s, meaning they’re are excellent for fast shooting and filming in 4K. Even if you aren’t planning on doing this kind of photography or video we recommend getting these anyway as they’re cheap, high quality and they will be fine to use if you ever upgrade your camera gear.
We suggest getting 64gb, but 128gb are also a great, cheap option these days.

Best Extra Batteries
Probably the second most important must have camera accessory you will need after SD cards is spare batteries. Trust us, there’s nothing worse than being out taking pictures and having your battery die on you.
When it comes to extra batteries you have two options – buy native batteries, or buy 3rd party batteries. There’s benefits to both.
Obviously if you own a Sony mirrorless camera, buying Sony batteries or a dedicated battery grip are going to be the best for it.
They are of the highest quality and more importantly you won’t have your warranty voided if for some very unlikely reason they damage your camera.
However native batteries are usually more expensive.
Going for a 3rd party battery is your next best option, and you can often pick up 2 spare batteries for the same price as one without jeopardising battery life.
But when you start to look at 3rd party batteries you can be overwhelmed with all the random brands out there.
So what batteries should you go for in your photography accessories list?
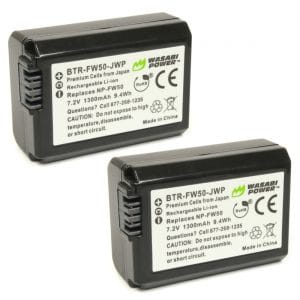
OUR RECOMMENDATION – WASABI POWER
Wasabi makes very good quality batteries to match almost any camera out there, from Canon to Nikon to Sony to GoPro and just about every other brand in between. The battery life is great, and also for the price of one native battery, you can often get two Wasabi Power batteries and a battery charger using USB C.
Of course we would always recommend authentic native batteries, especially if you have a high-end camera. But if you want to save some money…
Best Tripod for Travel
No list of photographic gear would be complete without one of these!
If you’re getting serious about photography and want an essential camera accessory, then you’ll have to buy a tripod to eliminate camera shake.
Tripods are honestly one of the most essential camera accessories any photographer can own, whether you’re trying to take photos in low light, long exposure shots, do time lapses, do steady filming or even just taking a photo of yourself in a cool location.
This is also one of those photo accessories that can range in price from very, very cheap to very, very expensive.
How much you want to spend really depends on your goal for photography, and your budget.
We’re not going to bombard you with a million different types of tripods (you can do that by reading our ultimate guide to the best travel tripods). Instead we’re going to focus on the best, lightweight and portable mini tripod you should get.
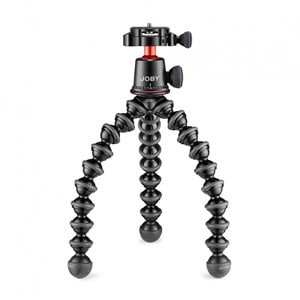
OUR RECOMMENDATION – JOBY GORILLAPOD
If you travel a lot or you like portability, then you definitely have to get the Joby 3K Gorillapod. the bendy leg sections allow you to place it on any type of surface, and even wrap it around poles or tree branches. It’s also strong enough to hold up to 3kg.
This little tripod comes with a ball head and is also awesome for vlogging, as you can extend your camera further and hold it steady.
Best Full Size Tripod
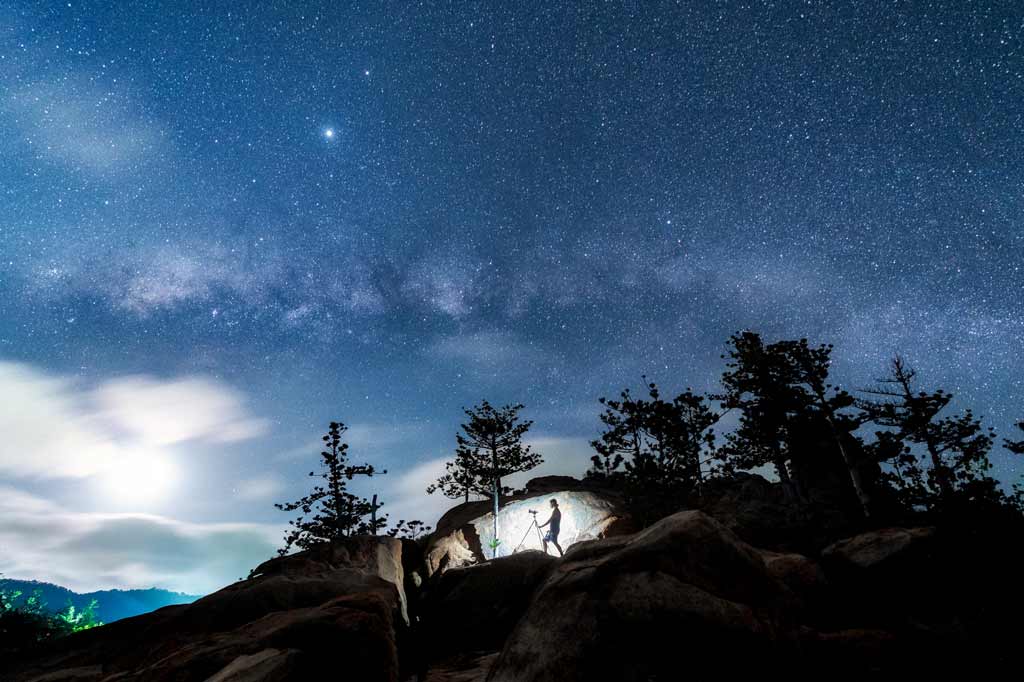
If you’re looking for the next step up, are serious about getting excellent landscape shots or shooting astrophotography, then you’re going to need a full-size sturdy tripod – something that’s more heavy duty and can withstand any kind of weather or heavy gear.
This is where tripods get expensive, and it’s not unheard of to see some going for close to $2000!
But don’t worry, you don’t need to spend that much to get something amazing! And having tested out dozens of tripods over the years, we can safely say that our personal recommendation (and what we use) is the Manfrotto BeFree GT XPRO Carbon Fibre.

OUR RECOMMENDATION – MANFROTTO BEFREE GT XPRO
Manfrotto make some of the highest quality tripods on the market, and their BeFree series offer the perfect blend of portability and strength.
We use and recommend the carbon fibre model as it’s so light, but can also take an absolute beating. Trust us – we’ve placed ours in crazy surf conditions and dropped it off cliffs and it’s still going strong.
Best Portable Light
You may be wondering why a portable light would make it onto the list of best camera accessories?
The reason is having a little LED light can help you add a huge amount of creativity and opportunities to your photos!
We use portable lights to mount on top of our camera when vlogging to light up our faces (also perfect when taking photos or people or subjects in dark rooms or at night), to illuminate a backdrop and even to add depth to scenes in low light.
The best ones out there are waterproof, can connect to your phone via Bluetooth and have different colour shields to change white balance.
Having tested a whole bunch of them, we now only use the Lume Cube 2.0
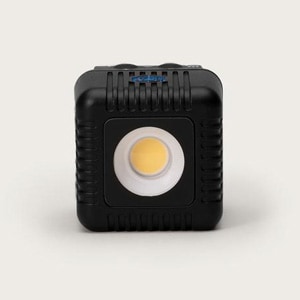
OUR RECOMMENDATION – LUME CUBE 2.0
Lume Cube have been the leaders in portable LED lights for photography for years, and their newest model the Lume Cube 2.0 takes their classic product and makes it even better!
It’s incredibly powerful, can adjust brightness, comes with tripod and hot shoe mounts and can even be used as a flash.
Best Circular Polarising Filter
Once you start to dive into the world of filters for your camera (no, not the Instagram kind), you’ll quickly become overwhelmed with all the different types there are out there.
Circular polarising filters, neutral density filters, graduated filters, UV filters, infrared light filters – the list seems to be almost never-ending.
But if you’re looking for the top recommendation for the first filter to buy and why, you need to check out CPLs, or circular polarisers.
These fantastic filters screw onto the front of your new lens and act to cut out glare in reflective surfaces, such as water, glass, snow, blue skies, etc.
Seriously, if you’re looking at stepping up your photography game and take better quality photos these are the best camera accessories you should consider.
Especially for landscapes (check out our top landscape photography tips here), a CPL will help make your images pop, even in the middle of the day.
They work by essentially having two neutral density filters screwed together that rotate in opposite directions.
By rotating the front filter it eliminates the rays of light that bounce off these surfaces.
Like most things when it comes to photography, you can either go as cheap or as expensive as you want with filters.
Our best tip though is to not buy a super cheap filter. These will just put a weird colourcast over your entire photo, which could look terrible once you start looking at them on the computer or in print.
Note – Many camera stores will try to sell you a UV filter or clear filters, and tell you that they are good for protecting your camera and lens. If you have any lens that is half decent we do not recommend these. Why would you spend $3000 on a high quality lens to put a $10 piece of crappy glass on the front?

OUR RECOMMENDATION – HOYA PRO1 CPL
When it comes to CPL filters, we’ve tried them all and Hoya come out as our absolute favourite brand!
Not only are they made of good quality, extremely durable glass, they create incredible, vibrant colours without any weird casting and their glare-cutting abilities are the best in the business.
Best Neutral Density Square Filter Systems
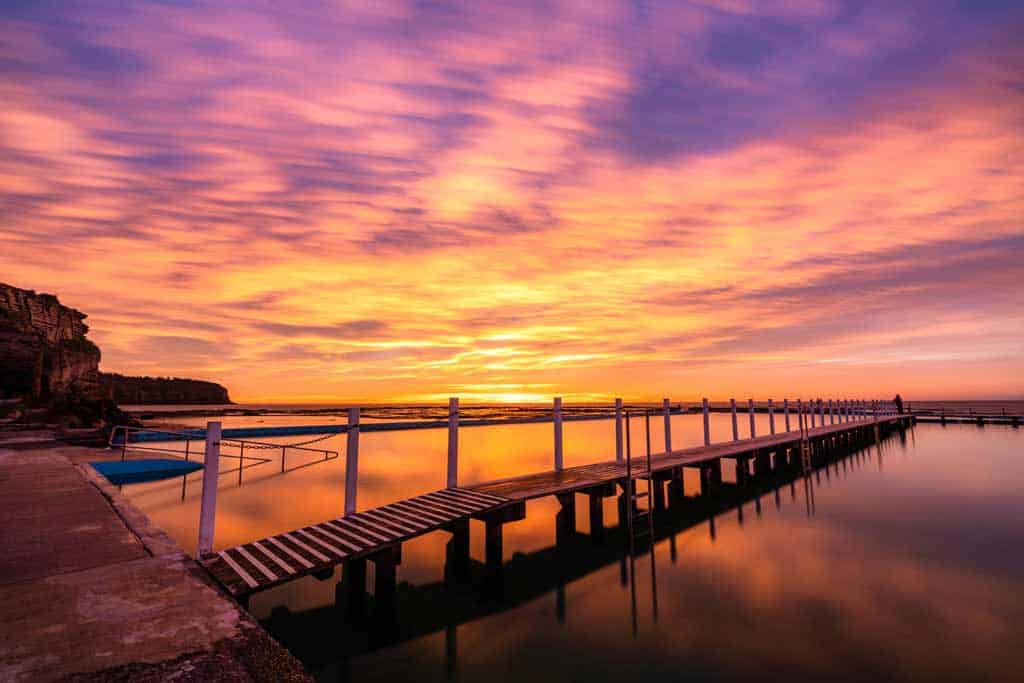
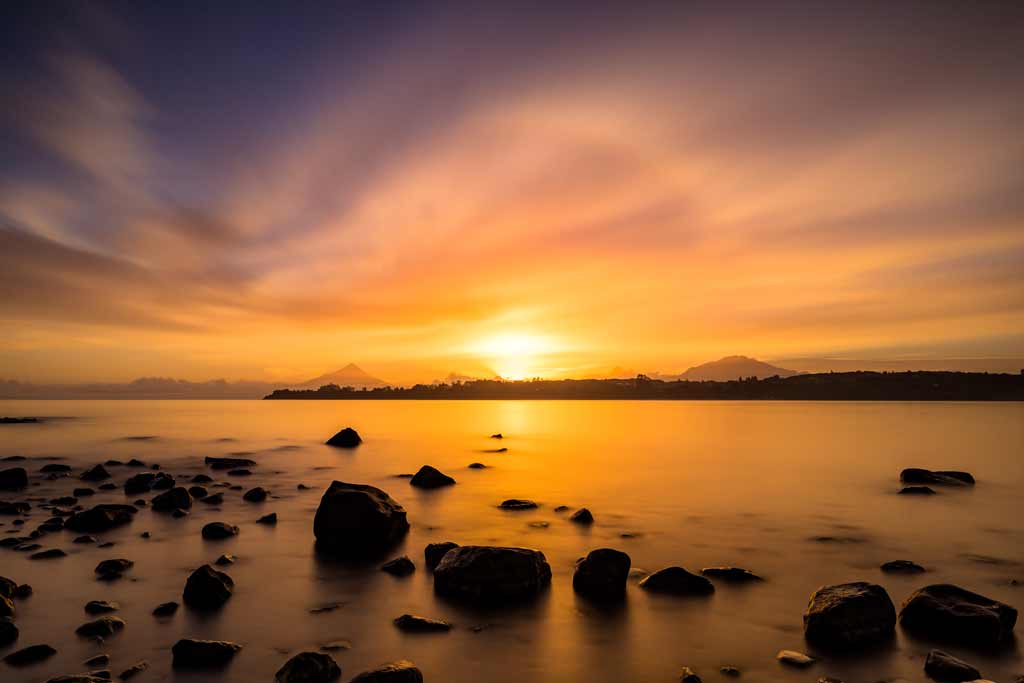
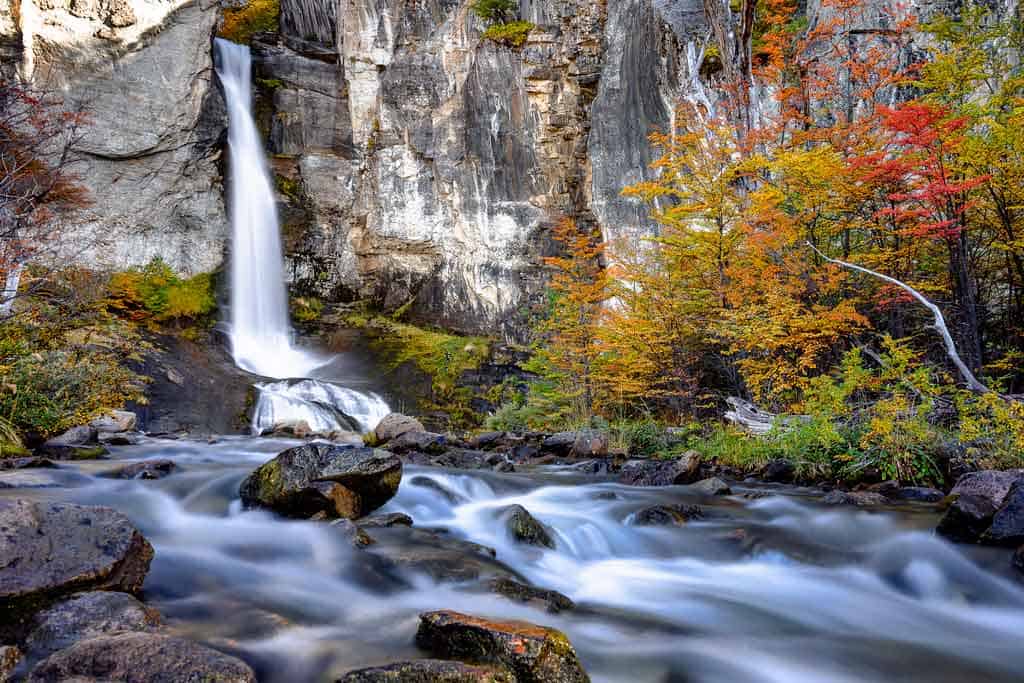
Neutral density filters are the dark pieces of glass that you put on the front of your camera that limit the amount of light hitting the sensor, allowing you to create long exposures and use a slow shutter speed, even in the middle of the day.
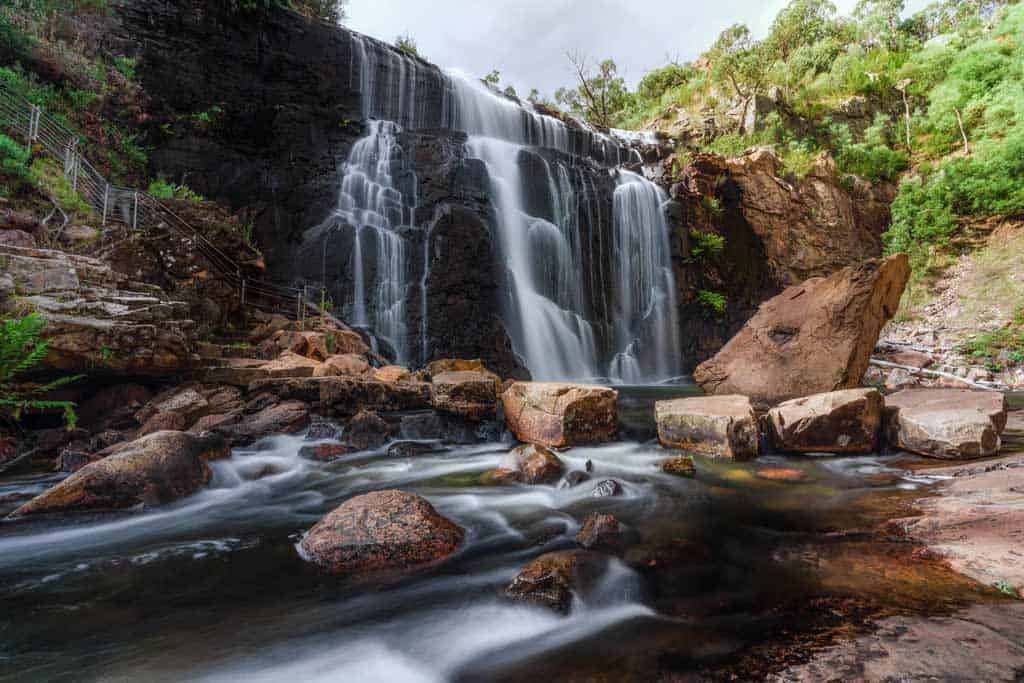
Not quite sure what we mean? Ever seen an image of a waterfall where the water is silky smooth?
That’s long exposures, and depending on the ambient light and if it was taken in the middle of the day, then neutral density filters were most likely used.
READ MORE: While you’re at it, check out our expert guide to waterfall photography tips to take your cascade images to another level!
The best way to purchase and use ND filters (or any filters if you’re using a multi-lens set up with different sizes), is by using a square filter kit that screws onto the front of your camera lenses.
The filters come in square glass panels, usually 100x100mm, 100x150mm or 150x150mm, and they slide into a holder that attaches to the front of your camera and lens.
They usually come with adaptors of different sizes meaning you can put one system on any thread size, and have no issues mounting to the front of wide angle lenses.
This falls more into the category of professional camera accessories, as they gives you greater freedom in what levels of density you apply to your photographs. Having larger filters also reduces vignetting in your images.
They are also a lot more expensive than screw-on filters, but if you’re serious about this type of artistic photography then it’s a great investment.
By having a square filter system you can get different stops of NDs (and stack them if you want), and have graduated filters and apply them to different parts of the shot.

OUR RECOMMENDATION – NISI FILTERS
NISI came onto the scene a few years ago and very quickly displaced the biggest names in the game thanks to their incredible quality filters.
There’s minimal colour casting with them and the aluminium holder is very solid. You can buy their filters separately, but it’s much better value to purchase them as part of a kit.
Best Remote Shutter Release/Intervalometer
Having a remote shutter release or an intervalometer is an excellent camera accessory for a whole range of different photography situations.
The first style is cable shutter releases, which plugs into the side of your camera using micro USB or USB C.
You push the button on the remote and it releases the shutter for you, so you can take a picture without disturbing the camera (think long exposure photos) or even if you’re not actually right next to the camera.
Intervalometers do the same thing, but with a few extra features. The most important of these is the ability to set the camera to continuously take photos, which is great for taking time lapse photography.
Both of these also allow for bulb photos, in case you want to do a long exposure past the standard 30 seconds allowed by most cameras.
The third one is for those that love putting themselves in the picture, but perhaps at a far distance – wireless remotes.
A wireless remote usually slides into the hot shoe connection on the top of your camera or connects via USB C.
Then with handheld remote controls you can press the shutter release from as far away as your device allows (sometimes over 100m!).
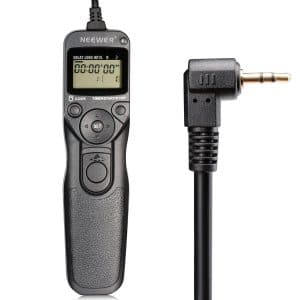
OUR RECOMMENDATION – ANY INTERVALOMETER
This is a bit of a general one, because in reality most intervalometers are the same. There’s no need to spend a lot on one (unless you want one with extra features or have a favourite brand). Just make sure you get one that fits your camera.
If you want to go very cheap, get a remote shutter release that allows bulb as well (by locking the button when you push it). Wireless transmitters depend on your budget as well.
Best Camera Strap
Most cameras will come with a standard strap that you can hang around your neck, and to begin with this is fine.
But if you want something a bit more comfortable (especially if you have larger cameras), you’re going to want to upgrade your neck strap.
You can get ones that have super thick padding, are worn like a harness or clip to the side of your belt. Some attach to the normal camera strap rings, while others screw into your tripod plate thread.
After using the standard straps for years, and having them dig into our necks and shoulders when being out in the field for hours at a time, we decided it was time to invest in better camera straps, and are glad we did when we found Peak Design!
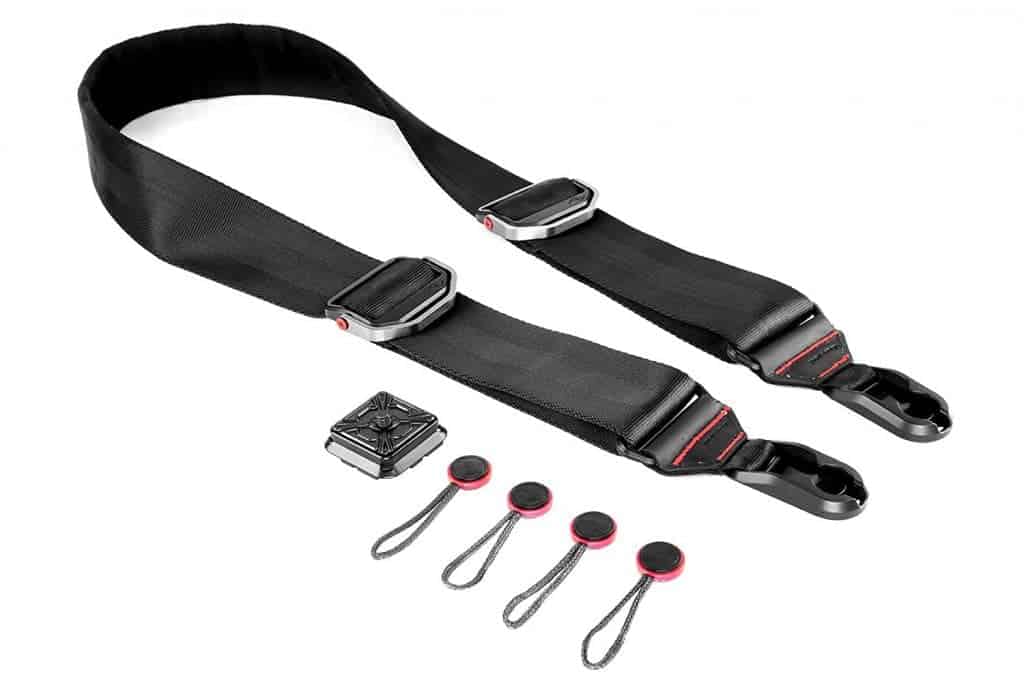
OUR RECOMMENDATION – PEAK DESIGN SLIDE
We’ve recently bought a couple of Peak Design Slide camera straps and love them. They are the same material as you find in seat belts, except they have extra padding, and on one side there is a rubber grip to stop it from moving off your shoulder.
It also comes with a solid tripod mount plate so you can mount the plate and attach the strap to it at the same time.
The thing that makes this neck strap unique though is the innovative metal slide, so you can adjust the length on the go. Peak Design also make great wrist straps for smaller cameras, and they have recently released new Coyote coloured straps made with 35% recycled nylon!
Best Camera Bags
Getting a camera bag is obviously a must have camera accessory that you will buy. Depending on whether you have a small point and shoot, a series of mirrorless cameras or a bunch of different bodies and lenses, you’ll need to get a camera bag to match whatever you’re carrying around.
READ MORE: See our brand new, comprehensive guide to the best backpacks for photographers!
You’ll have to decide what camera bag is best for you in terms of your activities as well. Do you just carry your gear from the car/house to your photography location, or do you go trekking for days at a time with it?
For us we are always out hiking so need a bag that not only fits all of our camera gear (including a large zoom lens or two), but on the other hand also holds clothes, jackets, snacks, water and more.
A camera bag should also be very durable, water resistant and have lots of padding (both inside and out).
This is quite a personal thing, but in our experience after using (and ditching) close to 20 different bags, there’s one main company you should start your search with.

OUR RECOMMENDATION – LOWEPRO WHISTLER 350AWii
The Lowepro Whistler 350AWii is finally the camera bag that answered (almost) all of our prayers, and we have two of them to carry around.
Not only is this camera backpack extremely padded, but the back-opening means you can drop you bag literally in mud or snow and still have complete, safe access to all your camera equipment.
It’s designed for winter sports photography, but we use it for everything.
Cleaning Kit
Keeping your camera clean with the right accessories is very important to have it perform at its best.
Wherever you go bits of dust and dirt will cover the camera, and if you have interchangeable lenses, you’ll probably end up with dust on the camera sensors as well. Not ideal!
Unfortunately there’s nothing you can do to stop every single bit of dirt getting on your camera, unless you decide to never take it out of its case. Instead you just have to get used to cleaning it.
These days you can get decent camera cleaning kits for very cheap. This is especially important when considering the best camera accessories for dSLRs.
You’ll definitely need a blower, microfibre cloth and some other items, so let’s get into it.
IMPORTANT – Whatever you do, don’t attempt to clean your sensor unless you 100% know what you are doing. If you scratch it, your camera is pretty much ruined. Using a blower to get dust specs off it is fine, but even then make sure you are careful. This is not to scare you, it’s just to save you from making a costly mistake. If your sensor is very dirty take it to a camera store to get professionally cleaned.

OUR RECOMMENDATION – GENERAL KITS
There’s no need to buy the most expensive kit out there, especially if you’re just a hobbyist. What you will need are some microfibre cloth wipes, a spot brush and a blower at the very least.
We recommend this kit, which has just about everything you need.

External Hard Drive
Once you get more and more into photography, you’re going to need a place to store all your photos. Images quickly stack up, and if you’re anything like us you want to make sure you don’t lose them.
Eventually you may get to the level where you need something dedicated like a NAS backup system, but until then external hard drives will be your friend.
You have two options when it comes to external drives – desktop hard drives and portable hard drives. We always suggest getting a desktop hard drive for your home, which you back everything up to, and a portable one for travelling.
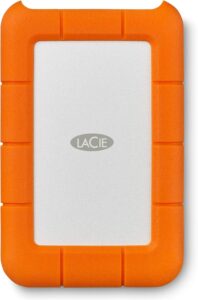
OUR RECOMMENDATION – LACIE RUGGED
Lacie Rugged hard drives are not only high quality, they are extremely durable! They come with a rubber case that protects them from being dropped
We recommend getting 4tb as a minimum. And if you don’t want to accidentally use your images, get at least two so you can keep two backups of all your photos.

Conclusion to Our Top Camera Accessories and Essentials
We hope our list of essential camera accessories has been helpful for you. Please feel free to reach out to us if you have any questions or ideas about what we should add to this article as well.
The most important thing, regardless of equipment, is just getting out there to take lots of nice photos! The more and more you practice, the better your images will get.
READ NEXT: Looking for GoPro-specific recommendations? Check out this post on the top GoPro accessories for any photographer!
What else would you recommend people get for the best photo camera accessories? Leave a comment below to let us know.
DISCLAIMER: Some of the links in this article are affiliate links, which means if you book accommodation, tours or buy a product, we will receive a small commission at no extra cost to you. These commissions help us keep creating more free travel content to help people plan their holidays and adventures. We only recommend the best accommodations, tours and products that ourselves or our fantastic editorial team have personally experienced, and regularly review these. Thanks for your support, kind friend!
The BEST Camera Accessories - Photography Essentials [2025]
We've spent a decade testing all the best camera accessories on the market, and in our comprehensive guide to the top camera essentials we dive into exactly...
5


11 thoughts on “The Best Camera Accessories to Level Up Your Photography”
A great list for sure. Just looking into a new camera – Canon EOS R7 mirrorless and I know when I get in store, I will want heaps of additional bits and pieces, good to have such a great article to guide. thank you!
Great info. I am planning a visit to Utah’s Parks. Your information and insights will be very helpful. One question I have do you have a recommendation for a Laptop?
Need a good travel type. No gaming, mostly photos, no videos and some Microsoft Office.
Hi Kirby, thank you for the kind comment. We both have MacBooks. We started off with 13″ MacBook Airs as they are lightweight and small. These are great for travel. Take care. 🙂
Good post with sound advice. Safe travels!
Thank you so much
Thank you for your advise. seems honest and reputable. I am considering a travel tripod and just wanted to let you know the link for Manfrotto tripod is not functioning. It loops back to same page in a new tab.
Thank you so much for that. We have fixed it now. We really appreciate you letting us know. If you have any questions don’t hesitate to reach out to us. 🙂
I am a huge photography fan and am always looking for new accessories to take with me on my travels. This list really helps. The GorillaPod is definitely a must have and one of the most handy and versatile tripods around. Never really tried a Square Filter so will have a look at the NiSi for sure. And I agree that when it comes to external hard-drives then WD is the best. Cheers.
Thanks for your comment Mike. Glad we could introduce you to a few more accessories. We love our square filters. NiSi is a great and affordable brand. We have loved using their filters. Have a great week.
I currently use a Sony A6000 as recommended by my wedding photographer. I really like it as a more budget-friendly camera. It’s great for learning photography and I will likely upgrade down the road. However, it’s pretty lightweight and my original purpose for buying was to have on on a backpacking trip! Thanks for sharing this comprehensive list!
-Rachel @ Backcountry Petite
That is a great camera. Definitely lightweight and compact. We have an A6300 that we film on and absolutely love it. Thanks for your comment. Happy travels Rachel 🙂