
If you’re looking for the best waterfall photography tips or just curious on how to photograph waterfalls, our professional guide will help you with everything you need to know.
Ever seen one of those ethereal and mesmerising pictures of waterfalls and wanted to create something similar?
Well in this article we’re going to teach you exactly how to shoot waterfalls like a pro.
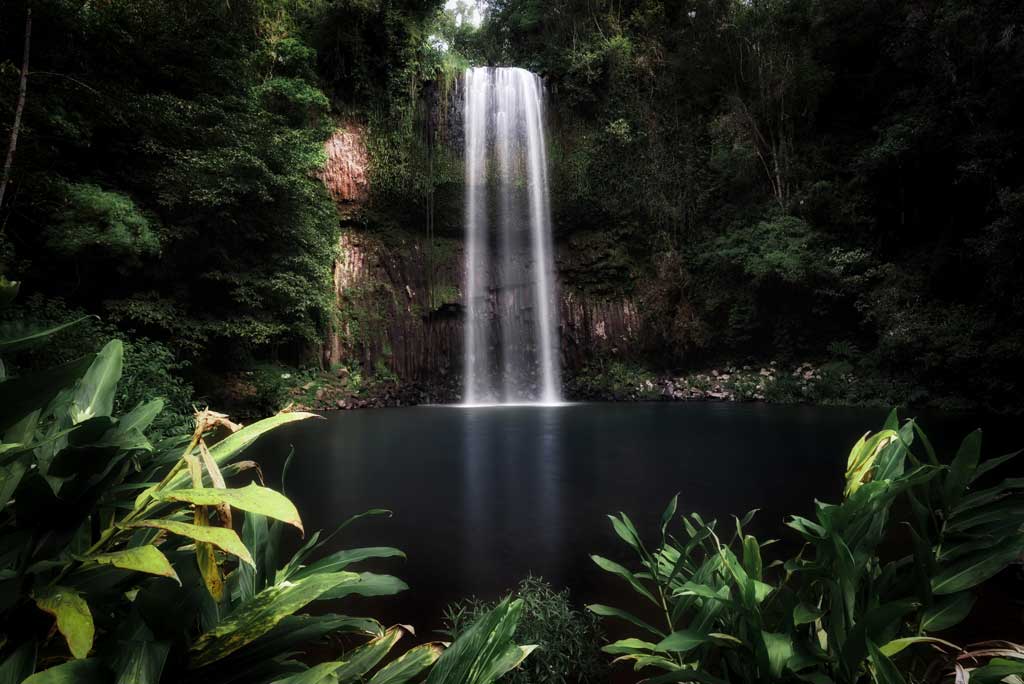
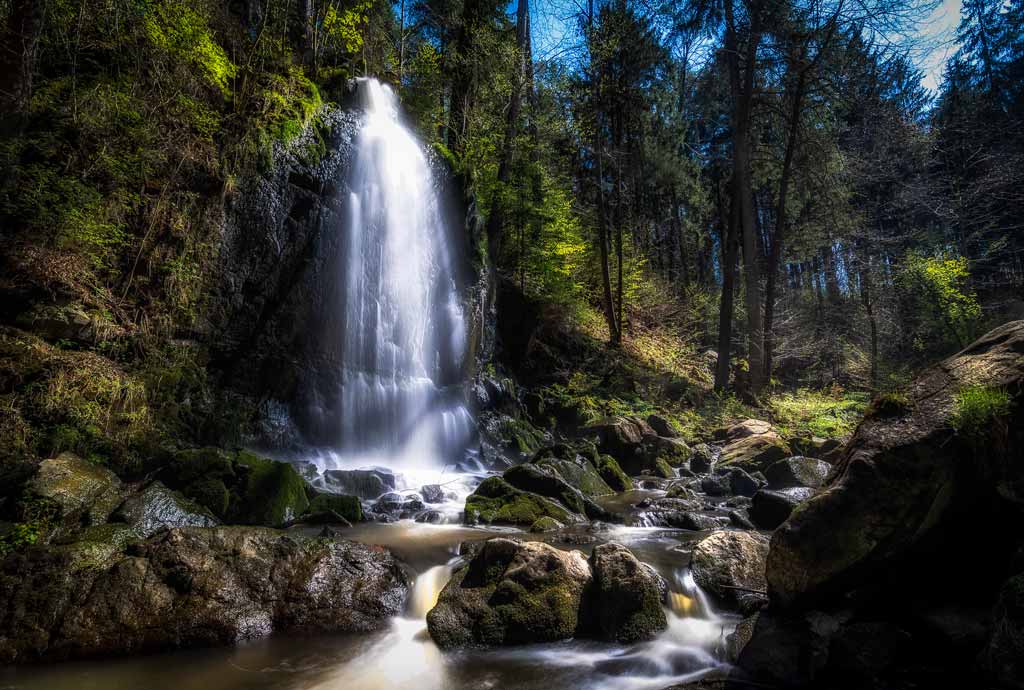
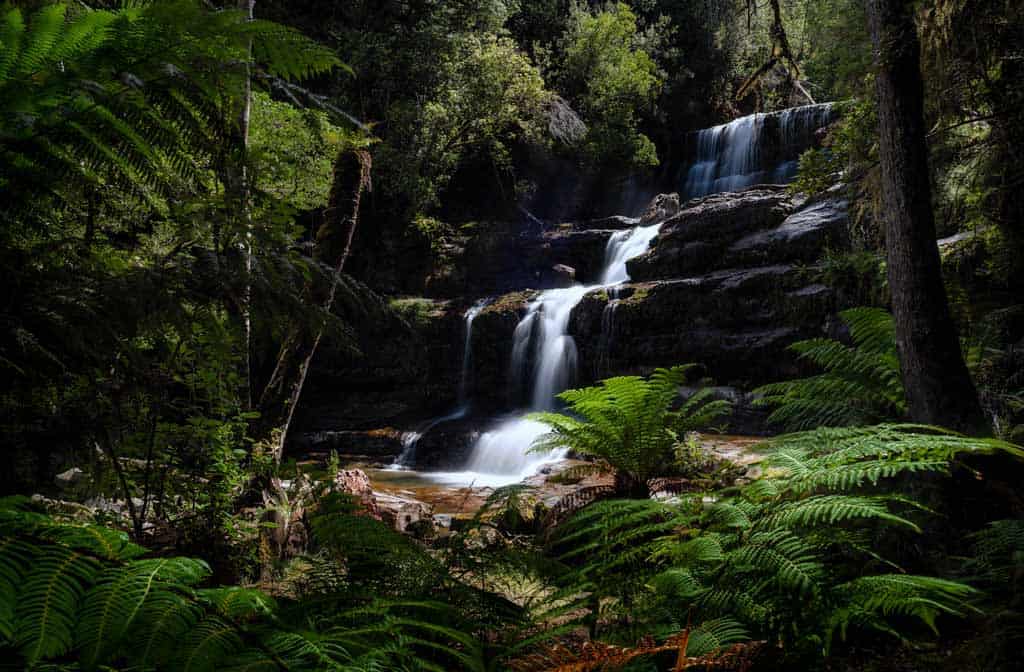
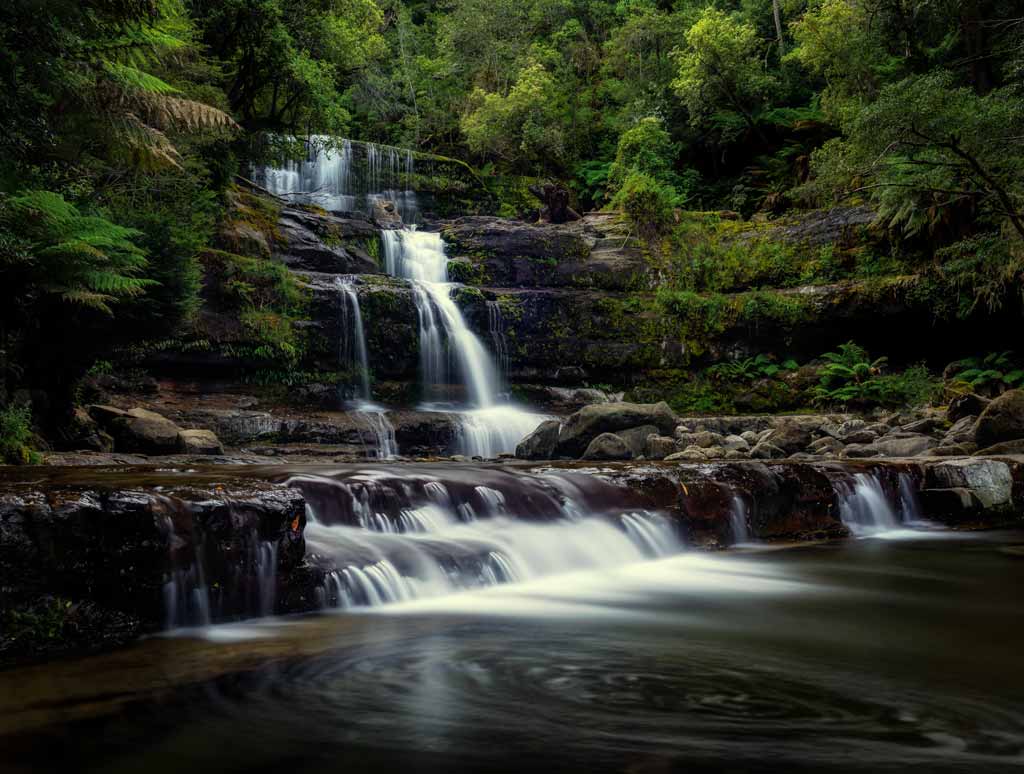
Capturing the silky movement of the water tumbling over rocks, between lush ferns and flowing through the cascades can take an ordinary picture and make it print-worthy.
We’ve been working as professional photographers for years, and while we’re best known for our travel photography, we have built up a bit of a reputation for our waterfall photography in particular.
One of the most common questions we get is about how to photograph a waterfall with that classic silky moving water flow, and today we want to share our tips and secrets with you!
READ MORE: Don’t miss our detailed guide on landscape photography tips!
Table of Contents
- How to Photograph Waterfalls – A Professional Guide for Beginners and Intermediates
- Buy a Camera That Can Shoot in Manual
- Use a Slow Shutter Speed
- Get Yourself a Sturdy Tripod
- Set Your ISO Low
- Experiment with Depth of Field
- Use a 2-Second Timer or Remote Shutter Release
- Look for Lighting, Framing and Composition
- Buy a Neutral Density (ND) Filter
- Don’t Forget a Circular Polariser Filter
- Use a Wide-Angle Lens
- Telephoto Lenses are Great for Compression
- Experiment with Exposure Bracketing
- Choose Your Focus Point
- Quick Waterfall Photography Settings Cheat Sheet
How to Photograph Waterfalls – A Professional Guide for Beginners and Intermediates
If you’ve never taken long exposure waterfall shots before, don’t worry – it’s surprisingly easy!
There’s just a few settings and technical aspects you need to know, then it all comes down to experimenting and creativity.
Let’s get into it!
Buy a Camera That Can Shoot in Manual
The first thing you need do is get yourself a camera that gives you complete control over all the camera settings. Also known as ‘manual mode’.
The good news is that you don’t need to go out break the bank to get one. In fact most new digital cameras now let you fully control things like shutter speed, aperture and ISO.
While it’s true that professional expensive cameras have higher quality, there’s no need for you to go out and buy the most expensive camera on the market.
Instead do your research (we recommend you check out this article we put together on the best travel cameras) and find one that fits in your budget.
Once you have the camera, you’re ready to go out and shoot waterfalls!
Use a Slow Shutter Speed
In order to make the water look silky smoothy you need to use slower shutter speeds to show the movement of the waterfall.
If you use a fast shutter speed, something like 1/2000 of a second, your camera will freeze every single water drop in the scene.
That can be fine if you want to emphasise the power of the falls, but if you’re trying to nail classic waterfall long exposures this is not the effect you want to have.
When you use a slow shutter speed, perhaps around 1-2 seconds, all of the water that moves during that time will blur itself onto the sensor. That’s what creates the silky look.
So what is the perfect shutter speed for waterfalls to use? This is entirely up to you, the size of the waterfall and your creative style!
A speed around 1/8 to 0.5 second will still show tendrils and lines in the water, while 30 seconds will often make the waterfall look like a milkshake.
Just play around with different speed settings in manual mode until you find something you like.
A good place to start is to first consider the size of the cascades.
If it’s a large, forceful waterfall, you can use faster shutter speeds like 0.5 second to start with.
If you’re shooting waterfalls that are smaller or without as much flow, use a longer shutter speed like 5 seconds and see how it looks.
Get Yourself a Sturdy Tripod
If you’re using a slow shutter speed it’s not just the movement of the water you have to worry about – you also have to consider the movement of the camera itself!
If your shutter is open and you bump or move the camera, everything will become blurry in the shot.
To eliminate this camera shake problem it’s best to set your gear on a sturdy tripod. This way the camera will stay perfectly still and you’ll be left with a sharp image.
Using a tripod also forces you to really think about the placement of your camera, which can be beneficial for composition and framing. More on that below.
If you’re wondering what the essential accessories for shooting waterfalls are, a tripod is right up there!
Set Your ISO Low
Using a low ISO does two things. The first is that is makes your sensor less sensitive to light, allowing you to keep the shutter speed slower without overexposing the image.
The second thing it does is minimise the amount of noise (or grain) you can see in the shot.
This is important because the less noise you have in your photo the cleaner it will be.
Start with ISO 100 if that is the lowest native ISO your camera will go, and increase it in small increments if you need to.
READ MORE: Check out our brand new photography guide answering the age-old question, “What is the exposure triangle?“!
Experiment with Depth of Field
The aperture on your camera lens affects the amount of light coming onto sensor, as well as the depth of field, or how much of the image appears to be in focus.
As a general guideline*, in landscape photography using an aperture of between f/8 and f/11 often yields a good balance of sharpness, focus and light.
For waterfalls photography the same is often true. If you don’t know where to start, set your aperture to f/11 and then adjust it to get the desired exposure.
If you are using a large aperture like f/2.8 you receive a higher amount of light (so you may need ND filters), but you also will have a shallow depth of field, meaning lots of the image will be out of focus.
That’s great if you want to add a real artistic style to your waterfall shot.
If you are using a small aperture like f/22 it lets less light in, so you might not need the neutral density filter and can still use a slow shutter speed.
A aperture of f/22 also makes most of the image appear in focus, but the image can actually lose sharpness due to what’s called diffraction. Just keep that in mind when choosing your aperture.
*This is just a guideline of course, and isn’t a hard rule. For more information on how DOF can change the way your image looks, check out this article.
Use a 2-Second Timer or Remote Shutter Release
Even with your camera sitting on a tripod, when you push the shutter button your hand is going to move the body and lens ever so slightly.
This could result in a little bit of motion blur across the whole waterfall photo. It might not be enough to notice on the camera’s LCD screen, but when you zoom in, look at it on a computer monitor or go to print it, the blur becomes much more obvious.
To remove that risk it’s important to use the in-built timer feature on your camera. A 2-second delay is usually enough, but if you’re using a long telephoto lens, you might need to use 5 or 10 seconds.
Alternatively you can use a cable shutter release, or wireless remote to open up the shutter.
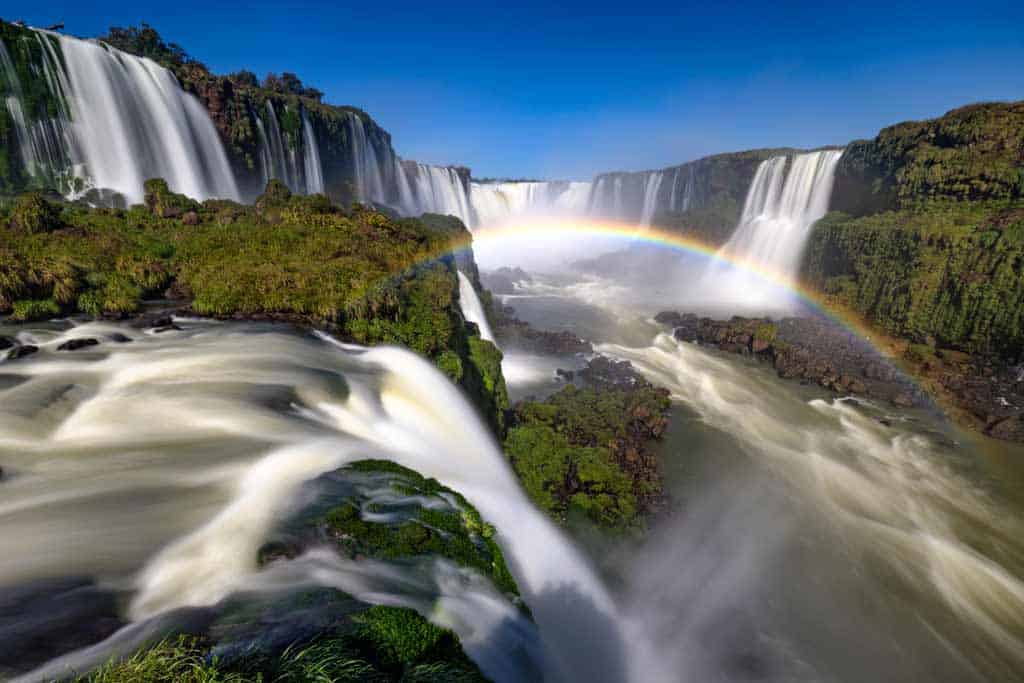
Look for Lighting, Framing and Composition
Don’t get too caught up on the settings for waterfall photography. The most important thing is to make sure you get the basics right, and that is lighting, framing and composition.
When you’re setting your camera up for photographing waterfalls, pay careful attention to the way the entire shot looks.
Don’t just focus on the waterfall, also look for the way water flows through the scene, the surrounding environment (trees for example) and the edges of your frame.
At the end of the day if you’re trying to master the art of how to take pictures of waterfalls and don’t get the basics right, your shot will never look any good.
Check out all the posts on our travel photography blog!
Bonus Tip – Shoot on Cloudy Days
Trying to predict the lighting for waterfalls can be very difficult, and depending on what time of day you are there you may end up with different parts of the fall lit up and other parts in complete darkness.
To ensure you get even lighting for your waterfall photoshoot, try shooting on overcast days, or during blue hour when the sun won’t have any influence on the scene.
Buy a Neutral Density (ND) Filter
Neutral density filters are a tinted piece of glass that you place in front of your lens to restrict the amount of light that hits the sensor, therefore being able to use a slower shutter speed.
When it comes to shooting long exposure photography on bright days, using an ND filter for waterfalls is essential so you don’t blow out the light.
This way on a very bright day you can set the ISO to 100, have an aperture of f/8 or f/11 and still have the shutter speed open for 3, 5, 10 or 30 seconds (depending on conditions).
You can get different grade tints depending on how much light you want to restrict (known as ‘stops’) and the most popular ones are 3-stop, 6-stop and 10-stop ND filters.
If you can only afford one for waterfall photography, we recommend getting a 6 stop ND filter.
Personally we use and love NiSi Filters. They’re not cheap, but their Starter Kit has everything you need to start taking your long exposure photography to the next level.
Don’t Forget a Circular Polariser Filter
The sun can cause harsh reflections on water (as well as on rocks and leaves) that really distract from the overall beauty of the image.
To reduce this we recommend using a circular polariser (CPL) filter.
Simply screw a polarising filter on the front of your lens and slowly rotate the front filter until you notice all the reflections disappear in the water.
Polarising filters also darken the image, so it’s like having an ND filter thrown in.
Definitely one of our best tips for how to take waterfall pictures that pop and look clean, and an essential accessory in our opinion.
If you’re not using the above NiSi kit we recommend above that comes with one and neutral density filters, Hoya make our favourite go-to CPLs.
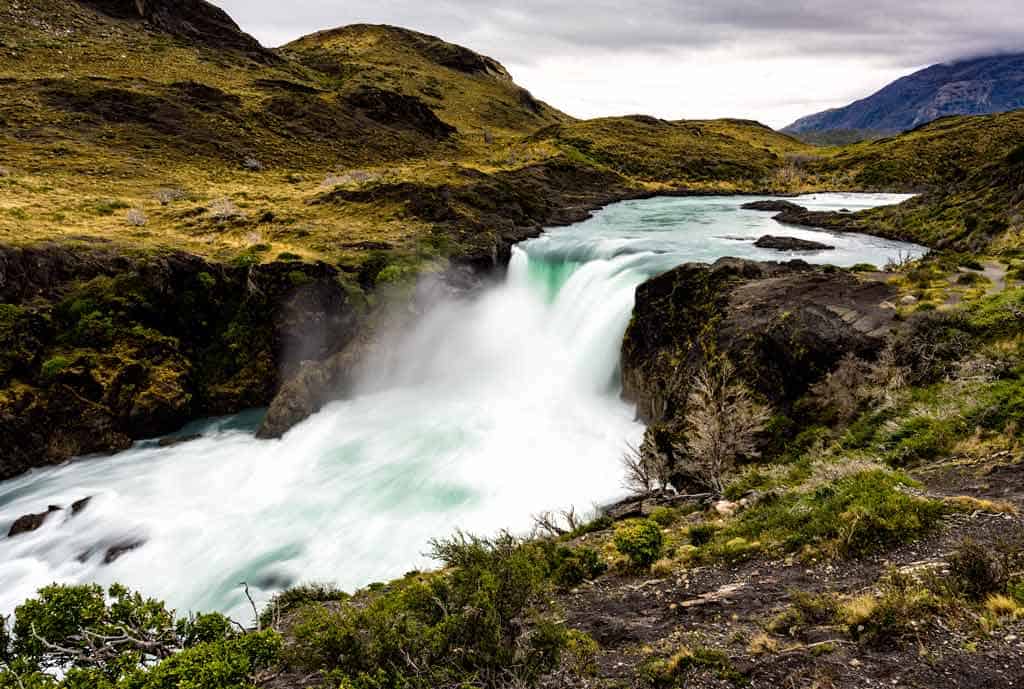
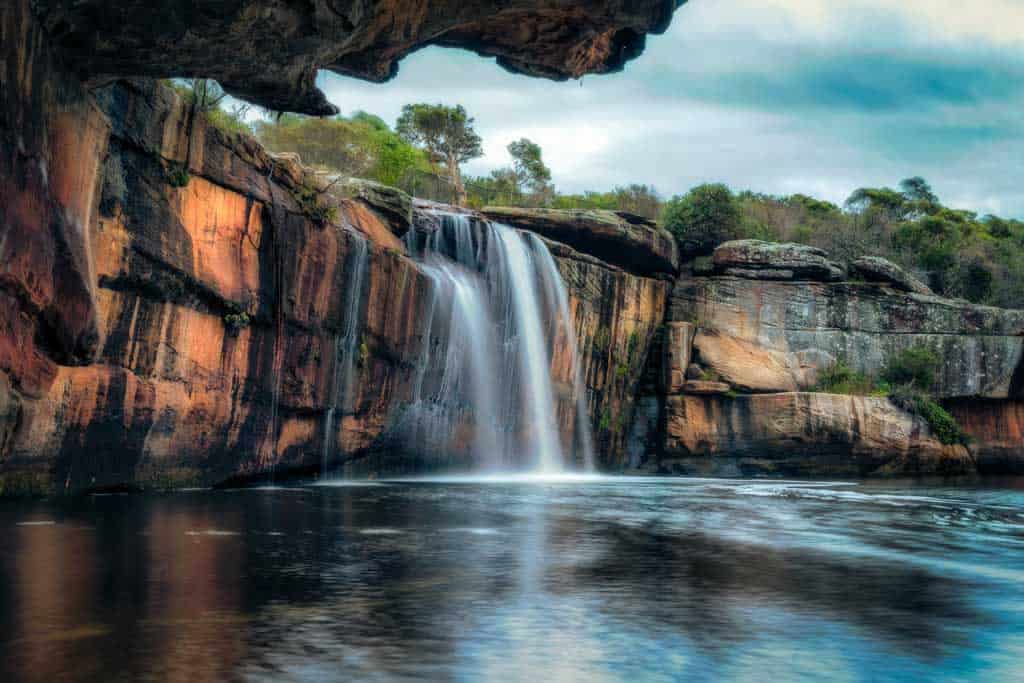
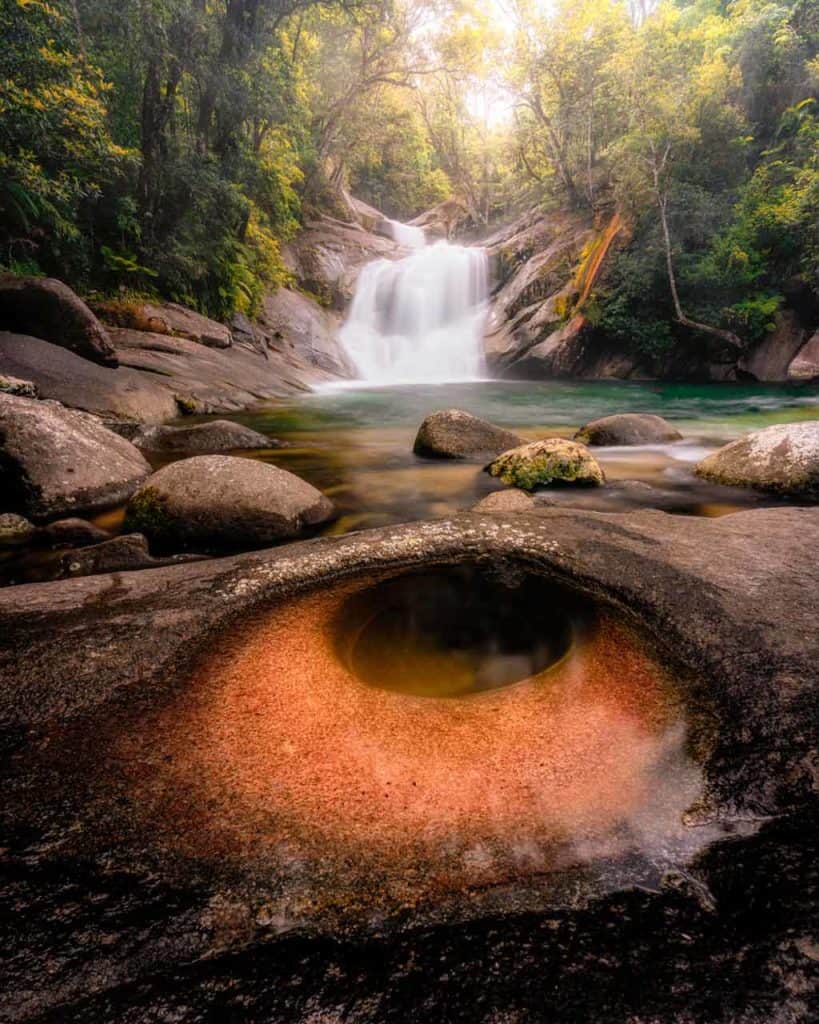
Use a Wide-Angle Lens
Using a wide-angle lens for waterfall photography is one of the best perspectives you can create, as it allows you to get close to the cascades and still capture everything in one scene.
Using a wide lens also allows you to really find unique leading lines in a shot.
As an example you can place the camera close to the river in front of the waterfall and use rocks or other interesting elements to draw the eye up to the falls.
Telephoto Lenses are Great for Compression
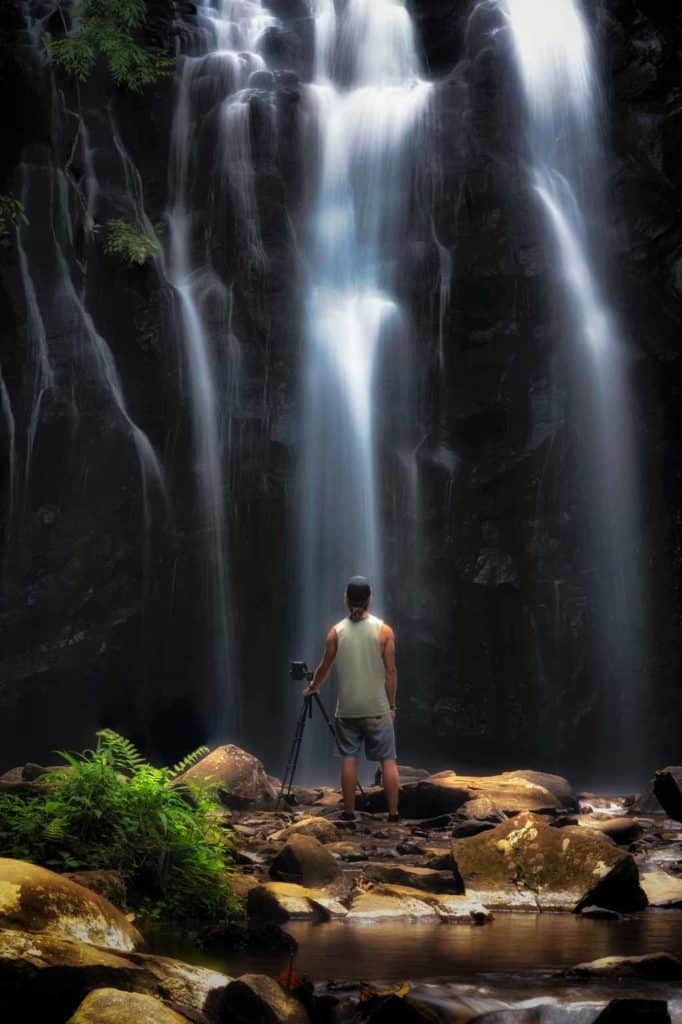
On the opposite end of the spectrum, a telephoto (long zoom) lens creates an optical illusion known as lens compression, which appears to make the background look much closer to the foreground.
This little photography hack can allow you to place something in front of the waterfall, like a person, zoom in and give the waterfall the look of being much larger.
To really make the most effect it helps if you can walk away from the waterfall far enough to look back and zoom in without cutting out parts of the scene.
Experiment with Exposure Bracketing
If you’re a bit more of an expert photographer or have some experience with Adobe Lightroom or Photoshop, you can really improve the dynamic range of your pictures of waterfalls by bracketing your images.
Exposure bracketing is where you take multiple photos from the exact same position, but use different shutter speeds, ISO or aperture to change how bright or dark each image is.
You then take those images and blend them together in Adobe.
Sign up for Adobe Lightroom and Photoshop here if you don’t have a subscription already.
The reason you would want to do this is so that you can create an image where the dynamic range is closer to what the human eye sees.
To do this take one photo where you expose correctly for the shadows and one where you expose correctly for the highlights.
Later on bring them into Adobe Lightroom and blend them together so that the end result keeps all the details in the dark part of the image without having the bright parts (water, sky, etc) looking too white.
Here’s a video tutorial I made to show you exactly how to do this.
Choose Your Focus Point
So you almost know everything you need to know on how to take a picture of a waterfall that you’re proud of.
But there’s one final piece of the puzzle – where to focus!
Your focus point is extremely important when it comes to photographing waterfalls, because the last thing you want is to have the most interesting parts of the shot be blurry.
Rather than letting your camera choose the focus point, I recommend switching over to manual focus and dialling in the exact position you want by hand, or selecting the exact focus point mode if your camera has that feature and placing it where you want.
But where do you want to focus?
The most obvious answer would be on the waterfall, but that might not always be the case.
If you’re using a shallow depth of field and a wide angle lens, you might want to focus on that cool log protruding from the river and have the waterfall be completely out of focus in the background.
Rather than let the camera decide, when you photograph waterfalls (or anything for that matter) make a conscious effort to select the focus point.
READ MORE: Here’s our latest photography tutorial, all about the best settings for astrophotography with bonus tips!
Bonus – Focus Stacking Waterfall Photography
But what if you want to get everything in focus? Luckily there’s a great technique you can use to achieve that.
This technique is called focus stacking, and what you do is you take multiple shots from the exact same position (remember to use a tripod!), and change the focus point for each one.
For example, on the first shot focus on the rocks in the foreground. For the second shot focus on the waterfall itself. On the third photo focus on the trees in distance. So on and so forth.
Later you bring all those photos together in Adobe Photoshop and blend them together.
The end result is that you have a fantastic image where every aspect of it is in focus.
This technique for photographing waterfalls obviously requires more time post processing in the editing studio and more time in the field, but if you’re ready to take your landscape photography style to the next level, this is a great thing to learn.
Quick Waterfall Photography Settings Cheat Sheet
Obviously shooting waterfalls takes a lot of time and practice to get perfect, and if you’ve made it this far and are still feeling a little overwhelmed on waterfall camera settings, don’t worry – we’re going to make things super easy for your first shoot!
Here are some recommended camera settings for waterfalls.
- Shoot in manual mode (or shutter priority if the rest confuses you)
- Aperture – f/11
- Shutter speed – 1sec
- ISO – 100
- Auto white balance
- Focus on the waterfall
- Shoot in RAW
- Buy ND filters if you can
The above settings really depends on a few different things such as the location, light, the type of camera you use, the style of photography you want to capture, post processing later, etc.
But if you want to know how to take photos of waterfalls that look dreamy, the above settings will help you start your photography off in the right place.
As mentioned above there is no perfect waterfall shutter speed for long exposures, and you may need to have a neutral density filter to achieve the shutter speeds you want.
Now that you know how to photograph waterfalls like a pro, you’re ready to head out there and start practicing.
DISCLAIMER: Some of the links in this article are affiliate links, which means if you book accommodation, tours or buy a product, we will receive a small commission at no extra cost to you. These commissions help us keep creating more free travel content to help people plan their holidays and adventures. We only recommend the best accommodations, tours and products that ourselves or our fantastic editorial team have personally experienced, and regularly review these. Thanks for your support, kind friend!


5 thoughts on “15 Waterfall Photography Tips – How To Shoot Epic Cascade Shots”
These tips are incredibly helpful! I can’t wait to try out the long exposure techniques you suggested to capture those silky water effects. Thanks for sharing your expertise!
Can circular polar and ND filters be used together
Yes. It just all depends what type of filters you get. This will depend if they both can fit at once.
Really great tips can’t wait to actually see a waterfall so I can shoot some pics!
So glad you found it helpful. Let us know how you go. Happy waterfall shooting 🙂