The complete guide to how we use a NAS backup workflow to protect our photos and videos, and what system we use.
FULL DISCLOSURE: Synology and Seagate provided us the NAS system and hard drives in order to improve our workflow and talk about our results with our audience. They did not pay us to promote them, and they have had no control or input over the content in this article. All thoughts, opinions and our new workflow are entirely our own.
Back in 2014 we bought ourselves a little point-and-shoot camera to document our most ambitious adventure to date: Travelling from Thailand to South Africa without flying.
We knew nothing about photography, but over the years it started to turn into a bit of a hobby of ours. From a hobby it turned into a passion, and soon enough from a passion into a job.
Fast forward to 2019 and we now work as professional travel photographers, and have over 50 terabytes of photos and videos from more than 70 countries in our digital media collection.
Over the years the need to keep this digital media safe has become an ever-growing concern for us, especially as we take on more and more clients who contract us for creating photos and videos.
Beyond the work aspect, these pictures and videos are also our memories of travel, holding moments in time where we’ve met incredible people, explored remarkable areas and achieved unbelievable feats.
To lose this would be tragic not just for our business, but for personal reasons as well.
But even though we realise just how valuable our digital media is, it isn’t until very recently that we actually established a proper workflow to back these up using a NAS backup system.
Today we want to share with you what we used to do, and what we do now, to professionally back up our photos and videos.
READ MORE – Check out our detailed guide for the best travel photography tips.
Table of Contents
How We Backup Photos – From No Method to Pro Workflow
When we took our first trip to Antarctica in 2017, we captured over 2TB of photos and videos in 11 days. That’s a lot of footage.
There’s two reasons we took shot and filmed so much. The first was that it was Antarctica, a place so beautiful that words don’t do it justice.
The second is that it was a work trip, and we were trying to get the best content possible for our client. And as such this digital media was extremely important for all parties involved.
Losing it wasn’t an option.
Unfortunately we’re also full-time travellers, and after we disembarked from the ship in Ushuaia, we spent the next 4 months wandering around Patagonia and the rest of Chile, with two hard drives filled with our most valuable content ever.
Uploading it to the cloud wasn’t an option. Internet was barely good enough to post a photo to Instagram half the time, so trying to put 4K video footage and thousands of RAW files into a cloud storage system would never have worked.
If we had have lost those hard drives, had them stolen, or if they just became corrupted, we’d have had a lot of explaining to do to our client…
Luckily nothing happened, and when we finally settled into an AirBnB for a couple of weeks with a solid internet connection we managed to get the most important media into the cloud.
Ever since then though we’ve realised that our workflow of backing up photos and videos was just horrendous, and it’s been a slow journey trying to find the perfect method.
Finally, after years of trial and error, we have it figured out, and with our NAS storage for home and a redundant backup solution we’re feeling confident with our media.
We’ll be the first to admit that our old workflow of backing up photos was pretty bad to say the least.
Here’s what we used to do:

First, Take a Million Photos and Videos
We aren’t very conservative when it comes to the number of photos and videos we capture.
With two of us walking around with full-frame cameras around our necks shooting in RAW, a GoPro each videoing 4K footage and our phones taking quick pics and videos for social media, it’s not unheard of for us to end up with over 100gb of footage in one single day.
Especially if we’re on an assignment somewhere beautiful like South Georgia, our cameras are constantly firing, and we’re always filling up SD cards.
When we filled one up, we’d put it into our camera bag and replace it with an empty one, then repeat the process.
Back Up to a USB Hard Drive
Once we filled up all of our SD cards (which could take anywhere from a day to a week, depending on where we are), we’d finally empty them onto a portable USB hard drive.
NOTE – We used to use WD MyPassport 4TB hard drives, but we have now switched to LaCie Rugged 4TB hard drives
Often we’d be tired or in a rush to go out for dinner or do some more shooting, so this would be a quick-and-dirty method.
Our organisation wasn’t too bad (we’d have two hard drives, one for photo and one for video, and we’d sort the folders out like this: Country > City > Day), but it would quite literally just be a copy and paste affair. This meant we’d end up with hundreds of thousands of files called DSC*******, where the stars are just a number series.
When we had the content backed up, we’d then format the SD card in-camera, ready for the next full day of shooting.
Edit
If we had some time we’d edit a couple of photos for social media, export them at 2048 pixels wide to the laptop, then share them online.
We wouldn’t go through every photo though. It would just be a quick edit of the one or two photos that we thought were the best from that day, then we’d move on with our life.
Every now and then we’d sit down to write a blog post, or put together a collection for a client, and only then would we go back and find the photos that we’d need for that particular task.
We’d edit and export them at low-res, uploading to them to this site, or high-res and try to get them to the cloud.
Automated Dropbox Sync for Edited Photos
This is quite literally the only time we uploaded anything to the cloud, due to always having crappy internet wherever we travelled.
Our folder of edited photos on the laptop had an auto-sync to Dropbox connected. Whenever we ended up somewhere with a decent internet connection, we’d sync the folder to Dropbox.
All of our other RAW files and video clips though would continue to live on the hard drive forever.
Client Media
If we had a number of images or videos we’d have to deliver to a client, we’d edit those by the deadline then upload them to a shared folder on Dropbox. But that was the extent of our cloud storage solutions.
Pray
After the photos were backed up to an external hard drive, then we would literally repeat the process every day or week, praying that the drives didn’t fail us or get stolen.
We’d travel around the world, taking photos, shooting videos, and just collecting portable hard drives. These would fill up, then we’d buy another one, stashing the full drive into one of our day packs.
We rarely made double copies of any digital media, unless it was a particularly important shoot for a client. But even then we’d just have the same content on two hard drives, or make a folder of ‘best photos’ that lived with us at all times.
This wouldn’t be a huge issue if we only travelled for a week at a time. But that’s not how we travel. For nearly 5 years we were completely nomadic, moving around between different countries with just the gear on our backs, gathering more and more hard drives.
READ MORE – Don’t miss our list of the best travel cameras for any budget.
Going Home – Bulk Backup
Every now and then we’d come back to Australia to see family, and when we did we would go out and buy a couple of larger desktop hard drives, with capacities around 6TB or 8TB.
We’d take our portable hard drives and copy all of the media straight across to these new larger desktop drives. Then we would take that big drive, put it into a drawer at a family member’s house, and go travelling again.
Afterwards we’d do one of two things with our full portable hard drives – we’d either retire them, placing them in a drawer full of whatever media was already on there, or we’d take them with us on the road if we thought we’d need the media from a particular destination at some point soon (if we wanted to write a blog post in the future for example).
This is pretty much how we operated for years, and we know we were gambling with our content the entire time. If a hard drive got corrupted or stolen while we were on the road, all of those pictures and video would be gone forever.
If somebody contacted us and wanted to buy a high-resolution photo from a few years back, we just had to apologise and say we didn’t have access to it. This happened way too many times, costing us business.
We put this horrible workflow down to three factors:
- We were always travelling
- We rarely had good internet
- We didn’t know any better
Luckily this workflow is a thing of the past, and we’ve now improved our systems with a NAS backup to ensure we’re no longer gambling with our media.

Improving Our Workflow – Introduction of a NAS Backup System
This has all changed in 2019 as we finally step up our horrible method of backing up and introduce a professional workflow, doing everything we can to ensure we can’t lose our media, and so we can have access to it at all times from anywhere in the world.
The very first thing we did was introduce a NAS (Network Access Storage) backup system into our workflow. If you don’t know what this is, don’t worry – we didn’t have a clue either until we started heavily researching how to best back up our photos.
Without getting too technical, basically a NAS is a series of hard drives placed in one unit, working together and connected to a network. These are known as RAIDs, or Redundant Array of Inexpensive Disks.
This entire system of drives can then be accessed on your home or office network, or if you have it connected to an internet router, accessed online as well.
Sounds fancy, and perhaps it is compared to how we used to work, but in terms of data storage it’s actually pretty standard, and many huge offices use similar setups on a larger scale.
Imagine having all of your photos and videos you’ve ever taken sitting on a few massive hard drives at home, and then being able to access those hard drives while you’re overseas as if they were plugged directly into your laptop.
That’s basically how we look at our NAS unit.
We have our NAS installed at our grandparent’s house in Sydney, Australia. This is where we temporarily call home whenever we’re back in the country, and as of this year it finally has a stable internet connection (internet in Australia has always been in the dark ages).
A NAS is made up of two parts – the unit itself, and the hard drives that install inside it. You can’t have one without the other.
These are the brands and models that we use in our NAS photo backup system.
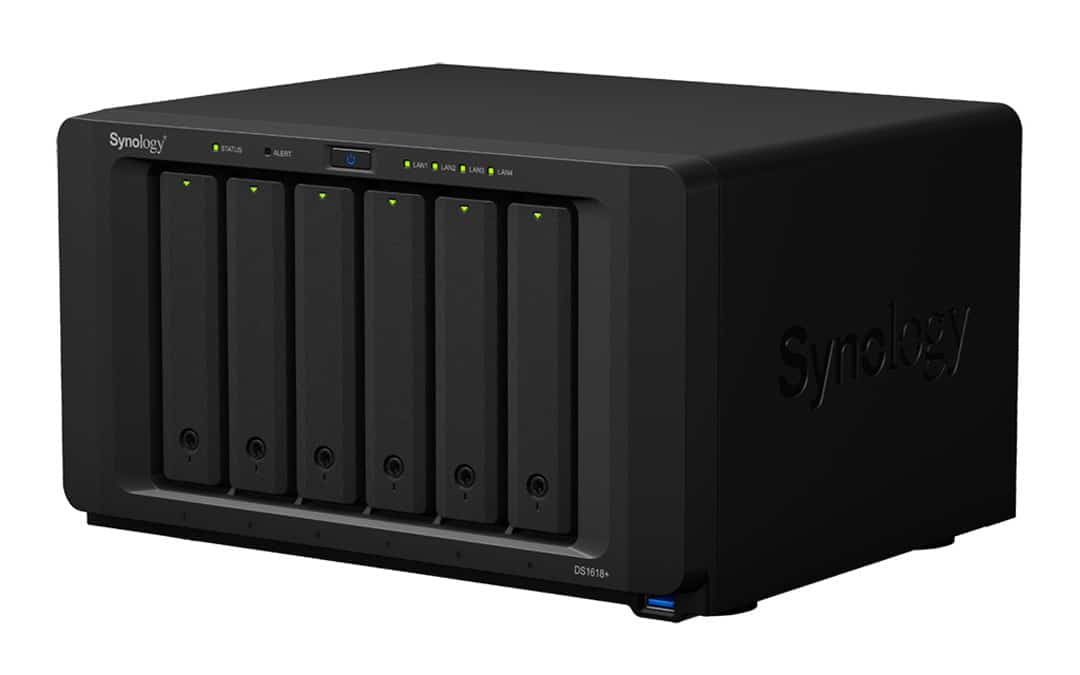
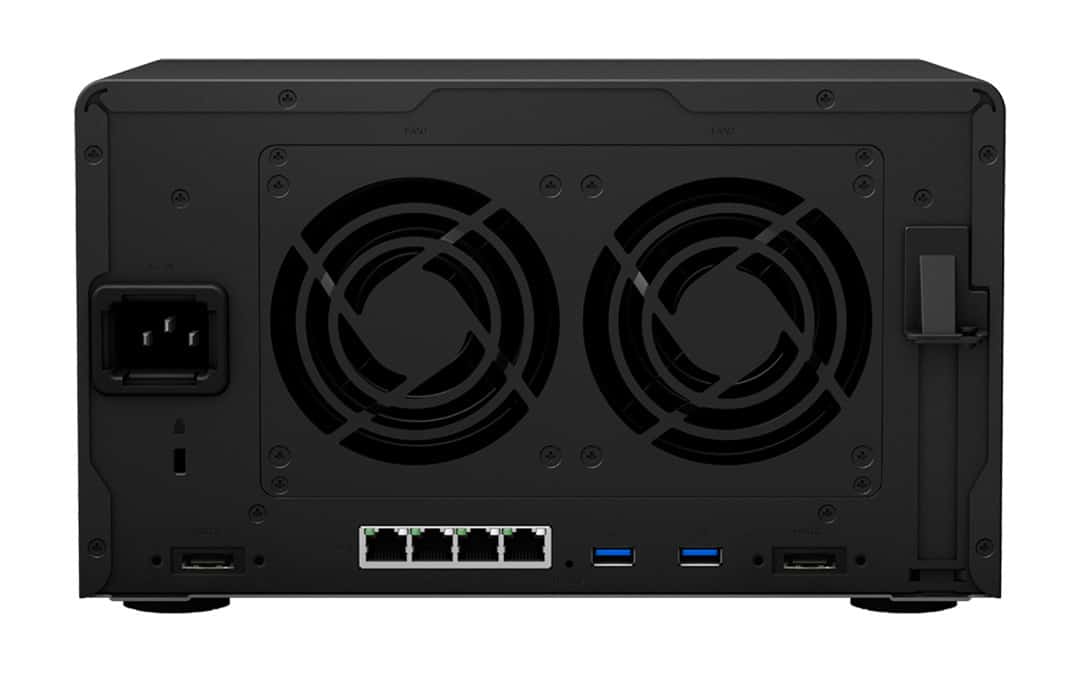
Synology DS1618+ NAS
The brand and model of NAS we use is a Synology DS1618+. Synology are one of the best makers of NAS systems in the world, with high quality products and a fantastic support team in place, so if we ever have any questions, we can get an answer almost immediately.
They also have years of research and development behind them, and have constantly been innovating the industry at a consumer level, so we know that their products are up to scratch.
The DS1618+ is a 6-bay NAS, meaning we can install 6 hard drives into it. It can also connect directly to the internet using an ethernet cable.
Once it’s all set up and connected, which does take a few hours intially, we can access the actual NAS by using Synology’s user interface, which can be done through the network function on our computers, or remotely using a dedicated and password-secured IP address and login.
Where this Synology system really stands out for us though is the use of their great software and applications, allowing us to interact, monitor and control the NAS without needing to know any technical skills.
These do things like automatically sync the media on our NAS to our cloud storage of choice, lets us rearrange all of our files, monitor its health, share folders with clients and even access files from our phones.
It also has a bunch of technical features, such as quad-core CPUs, 4GB of RAM (expandable up to 32GB), optional SSD cache, the possibility to install a 10gbE network card, etc.
But we’ll be honest, most of this goes straight over our heads. All we care about is if it works well and improves our professional photography workflow. And it definitely does.
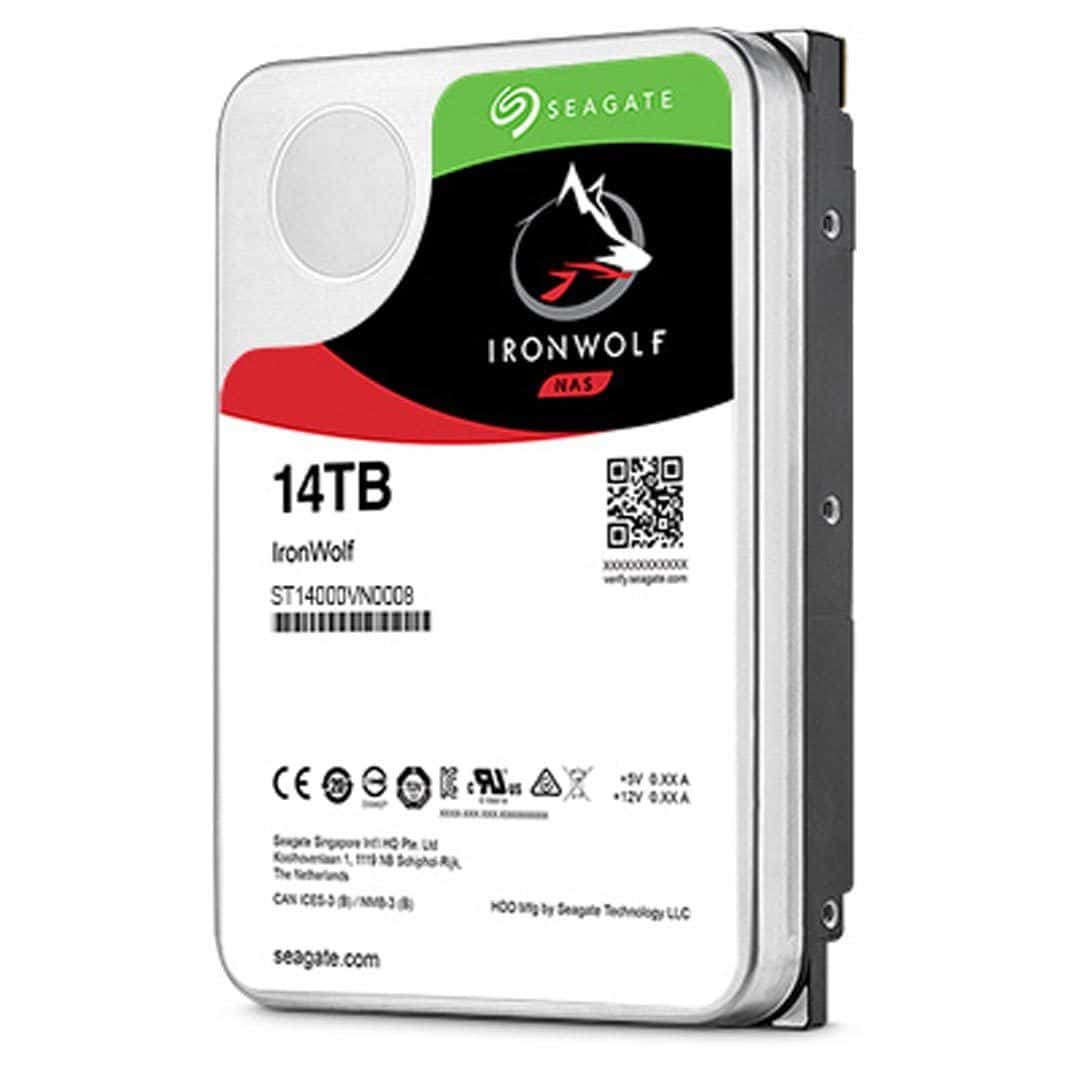
Seagate IronWolf 6TB NAS Hard Drives
The Synology DS1618+ is the unit that we install the hard drives into, but it doesn’t come with the hard drives themselves. We had to get these separately.
After chatting directly to the team at Synology they recommended Seagate IronWolf hard drives. We checked out the reviews and they definitely seemed like the best option.
We ended up getting 6x Seagate IronWolf 6TB NAS hard drives to install into our system. This would give us a total of 36TB of storage in a basic RAID setup.
However we didn’t use a basic setup. After some more research and recommendations from the two teams at Synology and Seagate, we ended up using a double-drive-redundancy setup.
Basically what this means is 4 hard drives are in normal use, while the other two are used as spare backup drives.
Because the Synology DS1618+ is constantly monitoring the health of both the system and the hard drives, it can instantly pick up if something seems to be going wrong, such as a hard drive malfunctioning.
If it picks up that a drive is starting to play up, it automatically starts copying over all of the contents of that drive to one of the spare ones. When it’s done, it deactivates the faulty drive so we can take it out and replace it, keeping everything safe on the spare drive.
The double-drive-redundancy adds an extra spare drive in case something goes wrong before we get a chance to replace the faulty drive, or if another drive fails while one is backing up to the other.
It might seem like overkill, but the thing is it’s not a matter of if a hard drive fails, but when. Plus with our work schedule seeing us always overseas, the chances of one drive failing while we’re somewhere remote like Central Asia is pretty high.
After years or running the gauntlet, we don’t want to take any more chances.
How We Backup Photos Now – A Professional Photographer’s Workflow
Now that we have a NAS system set up in our home office, we have made it a point to make our workflow as professional, seamless and awesome as possible. It took a bit of practice and discipline, but we’ve finally managed to achieve this.
Copying and Importing Using Adobe Lightroom
We still take a million photos and videos, but now we’ve made it a point to properly back these up at every chance we get with updated organisational tools.
The first change we’ve made is we now back up our SD cards to two separate hard drives the second we get back to our laptops, even if it’s between shoots.
No more waiting until we’ve run out of SD cards to finally back them up!
For our photos we now organise and import them to external hard drives through Adobe Lightroom. Here’s how.
Purchase the Creative Cloud Suite of Adobe products, including Lightroom and Photoshop, here.
First we open up the import tool on Lightroom, choose ‘Copy’, and check all the photos. We’ll then go through each photo super quickly and uncheck any shots that are obviously useless (out of focus, bad composition, etc).
On a full 64gb card shooting that’s about 1500 compressed RAW photos from our Sony A7Riii, but going through them all takes less than 10 minutes. That’s how fast we move.
Remember, this is the import and backup stage, not the editing stage.
Then we change the directory that it’s getting copied to in the same way we always have done. That is directly onto a hard drive, using the folder structure: Country > City > Activity or Day.
Of course that folder structure will be different for everybody. We are full-time travel photographers, so having everything sorted by countries and cities works for us, but do whatever feels best to you.
Next we choose the option to rename our files to something obvious from that particular shoot. We do this with ‘Custom Name – Sequence’. That way we aren’t left with thousands of DSC files followed by random numbers.
For example we might change the file name to: “Right Whale Bay A7Riii – 1”, with the 1 being the sequence number. We also add in the camera that it was shot on, as we currently use a Sony A7iii and a Sony A7Riii.
In addition we add it them to a collection (usually the main destination we’re in, such as South Georgia) and add keywords to make searching for images quicker and easier in the Lightroom Catalogue.
There’s also an option to add images to a subfolder using dates in the ‘Destination’ tab of Lightroom’s import feature, but we don’t always use this unless we feel it’s important.
Hit import, and all the images will copy over to the new hard drive.
Once it’s all backed up, we then plug in another hard drive and copy those picture folders directly across from the first hard drive to the second. This way we have an exact duplicate of everything we’ve just captured.
Finally we double check that both hard drives have the same content as the SD card, and we do this by comparing folder size and making sure the numbers match exactly. Then it’s time to format the cards and get ready to shoot again.
Videos
You can use the same way of copying and importing videos from your SD card to your hard drive using Lightroom, but we currently don’t use this as we don’t like having videos in our Lightroom catalogue.
Instead we copy these from the SD cards into folders using the same structure, but with the parent directory being ‘Video’.
Backing Up to the NAS
This stage completely depends on whether or not we are somewhere with decent internet. If we’re somewhere like Patagonia or Central Asia, this isn’t likely. But if we’re in a big city staying in an AirBnB with great internet, we then follow this step.
At night before we go to bed we connect to our Synology NAS system using their remote connection method. Then we open up the File Station application.
We plug in our main portable hard drive, then literally drag and drop the most recent backup folders across to the File Station app.
We have our NAS folder structure the exact same as we back up on our portable hard drives, so it’s easy for us to navigate.
Now it’s a matter of waiting, and this is where having a good internet connection is important. If we are somewhere with fast internet, the folders that have been dragged across to the File Station will now begin uploading to the NAS remotely.
This is our third form of file backup, and this way if anything happens to one (or both) of our hard drives while we are travelling, the files are now on our Synology NAS DS1618+ back in Sydney, which can be accessed remotely.
It’s important to note here that this really does depend on internet connection, so before we begin this we always do an internet speed test to see if it’s something we can even manage.
READ MORE: We are speeding up our process now by adding a portable external monitor to our workflow. Check out our review of the Espresso Display to see what we think.
Coming Home – The Final Backup
Once we’re back from a trip we head back to our temporary base in Sydney and connect our laptops to our home network, where the Synology NAS system resides.
We can easily access the NAS using Finder on our Macbooks. From here we plugin our external hard drives into our laptop, then copy and paste (drag and drop) the folders of new media from our last trip onto the NAS.
The NAS also has a few other apps like USB Copy which allows you to plug the hard drive directly into the NAS and set up an import, but we’ve had issues with this so don’t bother doing it that way.
Our internet connection at home is quite fast for Australian standards (95mbps download, 35mbps upload), so uploading the files to the NAS happens surprisingly quick.
One important note – we don’t copy the entire parent folder over in one go. We’ll do it bit by bit, only uploading one folder at a time, just in case something happens like we have a power outage or the network drops out.

Syncing to the Cloud
Now for the cream on top! The Synology NAS DS1618+ has a great application called Cloud Sync. You install it onto the NAS, then once it’s all set up you can automatically sync whichever folders you’d like to your favourite cloud storage solution.
For us personally we have unlimited cloud storage with Google Drive and G Suite, so we have our NAS synced with that.
Once you start the sync it automatically uploads your files and folders to the cloud as long as it’s connected to the internet, which for us is 24/7 at home.
Now everything on the NAS is duplicated on Google Drive, which we can also access from anywhere in the world.
This step is also very important to us, because at the end of the day, something could happen to the NAS (house gets flooded, someone breaks in and steals it, etc), and in that case all of our media would still be gone despite our best efforts to backup.
By having them in the cloud on Google Drive, using the same folder structure we know and love, there’s even less chance of that happening.
Now that we have all of our media backed up on the NAS, and also synced to Google Drive, we take our two hard drives that we travel with and format them, ready to go on the next photography adventure.
And that’s how we now professionally backup all of our photos and videos!
Pros of This Workflow
We’re so glad that we finally have this workflow for backing up our photos and videos in our lives now. It’s taken away the stress we used to have of keeping our digital media safe.
We realise it’s not perfect, and there’s still some elements we can fine tune to make it rock solid, but for now we’re very happy.
Here’s what we consider some of the benefits of using the Synology DS1618+ NAS system and Seagate hard drives:
- Organisation: Now that we have a dedicated workflow it keeps all of our media clean and organised, making it easier to find in case a client needs access to some of our files (like if we sell an image).
- Redundancy: The Synology NAS system uses a redundancy drive so that if one of the other hard drives fail, it will automatically recover and backup the images onto the spare drive. This is golden!
- Cloud Sync: The NAS automatically syncs all of our files to the cloud 24/7. Never forget to do it!
- Useful Applications: The Synology DS1618+ has a great collection of applications installed on the system, making access to our media painless.
Cons of this Workflow
Now of course it isn’t all roses, and there are few negative aspects of this workflow.
- Lots of Steps: This really depends on what you consider ‘lots of steps’, but in order to backup our digital media properly we do have a list that we need to follow in a certain order. Once it’s been learnt though, it’s easy, but it can take a few times to get in the rhythm of things.
- Old Media Isn’t Organised Properly: We could always go back and reimport/backup our old photos and videos using our new organisation system in Lightroom, but this would take a lot of time that we just don’t have. For now we’re just dealing with our old file and folder structure on the NAS from previous years.
- Need Good Internet to Access Remotely: Not just at your home base where the NAS is connected, but also when you travel if you want to upload files on the road or download some from the NAS. Of course you can still use a NAS without an amazing internet connection just like any hard drive backup solution, and it’s much more secure than desktop hard drives.
- Too Slow to Work Directly From the NAS: This might just be the way we have our network setup, but at the moment we haven’t found a fast way to work directly with files from the NAS. For example if we want to edit a video on Adobe Premier, we need to copy the files over to a portable SSD drive rather than access them from the NAS. Luckily it’s quick and easy to copy them over.

Final Thoughts – Is the NAS Backup System Worth It?
A NAS system is a big investment, and depending on which way you go it can cost anywhere from $1000 up to $3000 or more. It’s not a cheap backup solution.
However if you work as a professional photographer or videographer, or use huge amounts of digital media in your life or business, then the security of having your files safe on this system is invaluable.
Even if you’re a hobbyist who loves photography or videography, a NAS system is a great tool to have in your workflow to protect the content you shoot.
That being said, they’re not for everybody.
If you are a beginner photographer or don’t capture a lot of content, your money would be better spent just buying two portable USB hard drives and backing up your media on there.
For us, as people that capture a lot of content and make a living from doing so, a NAS system is now something we couldn’t imagine not having in our photography tools.
When we fill up the current system, we’ll go out and buy another one, that’s how much we love it.


10 thoughts on “The NAS Backup Workflow – How Pros Backup Photos”
I really hope that you ENCRYPT your data when “automatically syncs all of our files to the cloud 24/7”.
And if you sync it to the cloud anyway (giving away your precious data to some 3rd-party provider), why you keep them on your NAS at all?
For all others: If you buy your own NAS and use it without 3rd-party cloud provider, please don’t forget to backup your data to a second location. No NAS can be 100% secured from thiefs, fire, earthquakes and so on. So make a copy regularely and store this copy on a secure, safe location like a bank safe deposit box.
All good… except the sync to the cloud you called a “backup”. If a virus or ransome corrupts or encrypts your NAS drive and its files… these file will sync to the cloud…and potentially you will loose everything.
You must run full copy “bavkup” (eg Hyper Backup on Synology) as well… and keep this physically separate from your prime data stores.
I already have a Synology DS1019+ (a slightly newer version but 5 bays and only able to pair with one 5-bay expansion unit) and am using both…
> Hyper Backup to back up the NAS to Synology C2 Cloud storage, and
> Cloud Sync to sync some of the data with my
Dropbox, Microsoft OneDrive, and Google Drive storage.
Even before reading your excellent description, my workflow (to use your term) for everything — not just photography/videography — had already evolved to match what you’ve shifted to.
I’ve had an unfortunate hiatus from photography and my return to it has me troubled that you’ve found it necessary to make local copies of the files you’re working on and then to copy those back to the NAS. I presume you found this to be necessary even when working on a computer on the same LAN as the NAS? If so, do you think it is (or know that it was, if you’ve solved the problem) a limitation of your LAN? Or is the NAS’s I/O just too slow for smooth use of data-intense programs such as Photoshop or Lightroom?
Feel free to reply to me individually by email if you don’t think this is of general interest.
I just bought my first Synology NAS and found that you really need to spend about $300 for a NAS that will work well for lightroom/photography backups. I just wrote a post about it and a tutorial on my site. I got the Synology 720 used for $330 on Amazon, and it’s perfect. I Keep my lightroom catalog on my laptop and keep the image files on the NAS. It’s a great way to save space on your computer but probably won’t work if you’re traveling all the time.
Hi David. thank you for your explanation. I am new to NAS things and still figuring out how to organize my photos. Is it an option to keep the Lightroom catalog on the NAS itself? I imagine that it might allow to access it from multiple computers (for example if I want to access from a PC laptop or from a Mac). Is that true?
Also, in your experience, can you edit photos directly on the NAS or do you have to import them on the computer? This seems like a time-consuming process. Thank you
David, where can I read your article?
Hi Guys. awesome images and great explanation. Yous said whilst away you remotely backup to the NAS (3rd backup) but then when back home you backup again to the NAS, isn’t that just overwriting the 3rd backup and a pointless exercise? I’ve just brought a NAS and no one told me about double drive redundancy, love that idea. I’ll have a chat with my IT guy since i’m only running 4 bays at 8tb each
I am wondering why you could not just use Google Drive for your backup? I imagine that their infrastructure is much more secure and robust than your NAS at home (and they have backup process of their own) and as you have unlimited storage…
Great info, thanks guys! My backups are so messy been dreading for years to change it but have to do it sometime! Had one question though, you cab easily upload big raw en 4k files on the G suite from google? I remember looking for cloud storage last year and there wasn’t any that allowed me to upload those big files.
Sounds like an awesome setup. I need to get better at backing up my Lightroom photos as well.