
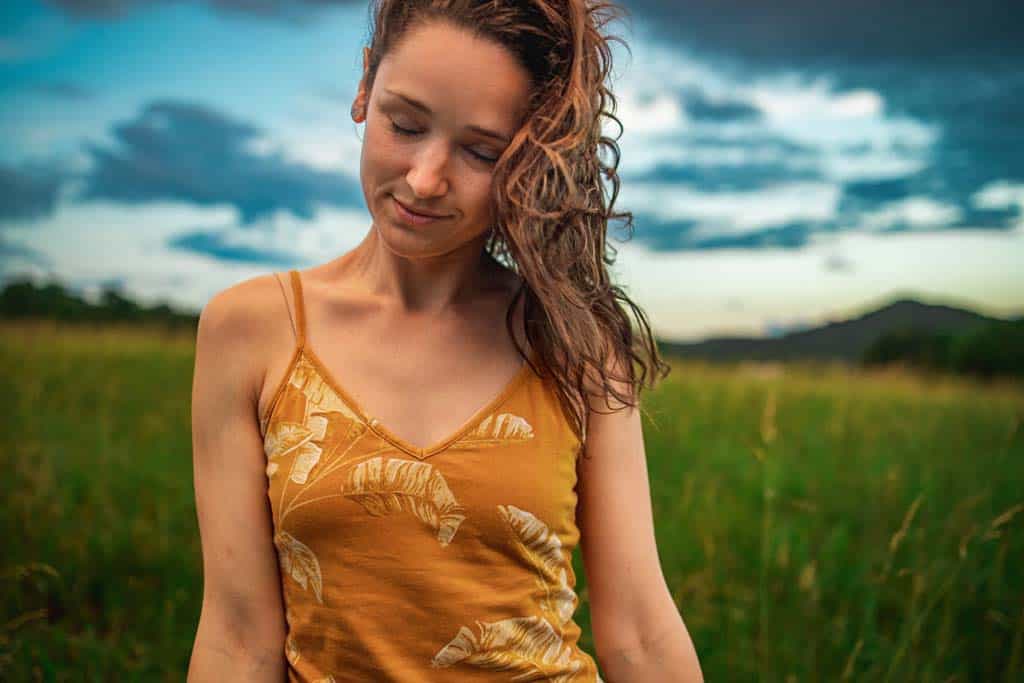
Got all the right camera gear but still struggling to capture mind-blowing images of people and need some portrait photography tips? You’ve come to the right place!
It may seem simple in theory, but portrait photography is more than simply pointing your DSLR at someone and hoping for the best.
Great portrait photography is art. Like all art, taking portraits that stop viewers dead in their tracks is a skill that can be learned.
This article is part of our expert photography series – check out our other articles here:
Portrait photography should capture the essence of the person. You should feel as though the subject’s eyes and position are telling you something about them.
It should be like looking into their soul and discovering their darkest secrets.
Without this, a portrait will appear flat. These tips aim to help you avoid run-of-the-mill portrait photography for good.
Table of Contents
- Our Expert Portrait Photography Tips
- 1) Connect With Your Subject
- 2) Use a Wide Aperture for Portrait Photography
- 3) Opt for a Faster Shutter Speed
- 4) Increase the ISO
- 5) Consider Exposure Compensation
- 6) Choose the Right Lens
- 7) Change Up Your Camera Angle
- 8) Learn Where to Aim Your Focus
- 9) Take Advantage of Burst Mode
- 10) Get Light Levels Right
- 11) Adjust the White Balance
- 12) Shoot in RAW format
- 13) Use a Tripod
- 14) Play Around with Composition
- 15) Pay Attention to the Little Details
- The Secrets to Getting Fantastic People Images – Practice
Our Expert Portrait Photography Tips
In this guide, we’ll reveal the top 15 portrait photography tips we use to take better portrait photos.
We’ll cover all you need to know – from developing a rapid rapport with your subject on your next photo shoot to depth of field and understanding the best camera settings to be used in each scenario.
So without further ado, let’s begin!
1) Connect With Your Subject
Forming a connection with your subject when shooting portraits is possibly the most important thing you can do without touching your camera settings.
Whether you’re in the studio or out in the field, portrait photography requires the subject to be relaxed. Even one person you know well can feel awkward when a camera is pointed in their direction.
If you’ve never done a shoot with a particular model before, spend a few minutes chatting with them before you begin, crack some jokes and be confident, approachable and friendly.
This will help them feel a bit more comfortable, which will make the shoot that much better.
But don’t stop there. Keeping up the conversation while you’re behind the camera will help keep your subject relaxed.
If your subject is clearly uncomfortable with a shot, stop. You’re never going to get any stunning portraits unless they’re feeling good.
On this point, if you’re trying to capture an image of a person you don’t know (such as in street or travel photography), you should always seek the permission of the subject, and never use a telephoto lens to capture them unawares in a candid portrait they had no say over.
Instead, get chatting with them and then ask. Few people ever refuse.
2) Use a Wide Aperture for Portrait Photography
Aperture is often described as one of the three pillars of photography alongside shutter speed and ISO.
Together they form the three sides of the exposure triangle.
Basically, the aperture is the size of the opening in the lens which determines how much light will enter the camera, which in turn affects the depth of field.
A wide aperture (sometimes called a large aperture) lets more light source reach the camera’s sensor, leading to a brighter exposure.
Because of this, wide apertures are used in low light conditions.
You can change the aperture camera settings by altering the f-stop value. A lower f-stop value means you have a wider aperture, and a higher f-stop value equals a smaller aperture.
Any f-stop value lower than f/2.8 is considered wide, but it does depend on lens choice since some lens don’t go down as low as f/2.8.
For portrait photography, it’s usual to use a low f-stop value of between f/2.8 and f/5.6.
Many professional photographers use f/1.4 as their standard, but could push it out to f/8 if they’re shooting environmental portraits.
The other thing using a large aperture affects is creating a shallow depth of field.
This is where your subject is in focus while everything else in the background and foreground blurs out.
With a really wide aperture like f/2.8 this also introduces ‘bokeh‘ into your photo, which is where items and light tend to look more like round shapes, helping the subject stand out against their background.
3) Opt for a Faster Shutter Speed
The shutter speed does two things. Firstly, it helps control how long light is hitting the camera sensor.
Secondly, shutter speed can also be used to add movement to still images by fixing or blurring motion.
When shooting portraits, it’s normal to use a fast shutter speed so that you capture the person without any blur. On occasion, you might want to use a slow shutter speed, to emphasise movement, but this is up to your creative style.
When capturing your portraits in natural light without a flash, having a shutter speed of 1/200th of a second is a good catch-all.
The most important thing is to ensure the person you are photographing is sharp and clear in your images.
4) Increase the ISO
The ISO can be thought of as your camera’s sensitivity to light levels. ISO, therefore, helps to lighten or darken your images, and is the third part of the exposure triangle.
An ISO of 100 is considered low and means that the camera sensor will be less sensitive to the light reaching it through the lens.
A higher ISO number increases the sensitivity to light, meaning you don’t need as much to brighten up the exposure, although this does introduce noise, or grain, into the shot.
In general you always want to use as low an ISO as possible to minimise noise, but because in portrait photography we need to use a fast shutter speed, sometimes it’s necessary to crank the ISO up to compensate for this.
An ISO of 1600 for example is normal to use in portrait photography when the available light is low, such as indoors.
If you’re doing outdoor portrait photography in good natural light though, you can always drop this lower.
As a rule of thumb, set your aperture and shutter speed to your desired amounts first, then set the ISO appropriately.
5) Consider Exposure Compensation
Most modern digital cameras have automated ways of determining the ‘correct’ exposure for an image using a method called light metering.
But they don’t always get it right, particularly when it comes to portrait photography.
Because cameras also take into account the subject’s background, it can result in the subject’s face being overexposed (too light) or underexposed (too dark).
We recommend always using your in-camera histogram to figure out exactly how much light is in the scene, or a handheld light meter if you have access to one.
If you’re shooting in manual mode, you can adjust the exposure triangle to get the correct exposure. But if you’re shooting in auto or one of the priority modes, there’s another way to adjust exposure on the fly.
Cameras will often have something called an Exposure Value (EV) setting that changes the exposure compensation by altering either ISO or shutter speed to brighten or darken an image.
It’s a quick way to adjust the exposure compensation in the middle of a shoot to make sure you’re getting the right amount of light, such as when photographing a portrait in direct sunlight.
6) Choose the Right Lens
Using different lenses can have a huge impact on the look of your images and the overall effect they produce.
The two things you want to look for in a lens for portrait photography is the focal length and widest aperture.
Focal length is how wide or zoomed your lens goes.
A wide angle lens like 16mm shows a lot more of the background (great for an environmental portrait), but also distorts everything in the foreground – not ideal for someone’s face.

A longer lens such as 200mm makes the background very close (called compression), but can make the person’s face appear very thin.
Generally speaking, an 85mm lens (on a full frame camera) is often regarded as the best focal length for portrait photography.
It keeps the person’s face well-proportioned, while compressing the background just enough to get excellent bokeh.
You don’t have to stick to 85mm though. A lot of portrait photographers like to use 35mm, 50mm or 135mm. It all comes down to personal preference and the environment you’re shooting in.
The other thing to consider is your aperture. Shorter focal lengths may have wider apertures around f/1.4 or f/1.8, while a longer lens could be more around f/2.8
The wider (faster) your aperture, the more expensive your lens often is. Just one thing to keep in mind.

7) Change Up Your Camera Angle
One of the difficulties of portrait photography tips is shooting the portrait subject in an unusual way while still capturing the essence of their personality.
One way to achieve this is to change the position and angle of your camera. This can completely alter the resulting image without having to change any camera settings.
For instance, shooting your subject from a lower height will make them appear taller and more imposing than they otherwise would.
Simply taking your camera away from the vertical can also have a huge impact, so why not play around with the different angles possible when shooting handheld?

8) Learn Where to Aim Your Focus
Portraiture fails when your eyes get drawn away from the main subject of the image to another object or feature.
To avoid this happening in your portrait photography, the golden rule is to focus on the subject’s eye.
Doing this helps draw viewers into the image without them even realising.
To achieve the look you’re going for, you’ll want to make sure the subject’s eyes are in sharp focus.
Using a digital camera, you can usually manually adjust the autofocus (AF) point(s) via the viewfinder to ensure the sharp focus is centered on the eyes.
Partially depressing the shutter button will lock the AF at that location (unless you’re using back-button focus), before you then commit to taking the photograph.
Just remember to reset the AF point if you change your position, or you’ll end up with an effect exactly the opposite of what you are after!
Alternatively, Sony cameras have incredible eye auto focus modes to nail that eye contact, or you can stick to good old fashion manual focus.
9) Take Advantage of Burst Mode
Even if you’ve managed to develop a good rapport with your subject, a split second can make all the difference in turning great portraits into mediocre images.
The most obvious example in portrait photography is having a subject blink just as you press the shutter.
But by using a simple in-built camera feature, you’ll be well on your way to better photos when you shoot portraits!
Also known as continuous shooting mode, burst mode takes a succession of images for as long as you hold down the shutter button.
Simply set up the shot, press the shutter and let the camera, and model, do the work without you worrying about missing the best moment.
Created for capturing fast-moving objects, it’s also another trick that you can add to your arsenal to ensure your portrait photography doesn’t sink without trace, while also capturing all kinds of different poses.
10) Get Light Levels Right
It’s always important to think long and hard about your light source when doing a portrait photo shoot!
Shooting in natural light is generally best for photographing models when you don’t have access to a dedicated studio.
But shooting in such lighting conditions can throw up a whole lot of questions and potential problems that might need to be overcome.
Direct sunlight can cast harsh shadows on the facial features of the subject. Days that are slightly overcast actually offer better lighting conditions, since they create a softer light.
If you can’t avoid shooting in direct sun when making portraits, it can be compensated for by the technique called filling.
Filling aims to balance out the harshness of the light by adding more light (or fill) to the shaded areas of your subject’s face.
To do this, you can either force your flash to fire, or use a reflector. A reflector is one of those discs of reflective material you’ll never see a professional portrait photographer without.
They are both relatively cheap to buy and fold down for transportation.
Many photographers use light boxes, flashes and other lighting tools, but these fall more in the advanced side of portraiture, which we’ll dive into on a later article.

11) Adjust the White Balance
One of the other camera settings that you can adjust to have a direct impact on your imagery is white balance, which alters the temperature and tint colouring.
When you’re beginning it’s fine to use auto white balance, and in some instances, this setting is exactly what you’ll need to capture the scene.
However, for portrait photography, it can often leave a subject looking washed out. That’s because it tries to neutralise the tones in the image, while you’re going to want warmth in a portrait.
Instead, you’re better off using one of the camera’s inbuilt custom white balance options. They tend to be linked to environmental conditions, such as cloudy or sunny skies.
Yes, it’s true you can just change this when editing your image, but it’s easier to get the tone you want in camera.
This is one of the simplest photography tips out there, yet missed by so many people!
12) Shoot in RAW format
If you’re new to photography it’s tempting to shoot straight to jpeg so you have smaller file sizes and can preview your images directly on your phone.
But shooting in the RAW file format gives you much more leeway for making even better portraits after the fact with a little post-processing.
Jpegs compress the colour tones and style in an image, while RAW files maintain all those details.
RAW files also contain more colour data which you can edit in post-processing should you desire too.
What’s more, it’s possible to alter the white balance and brightness, helping draw attention to the main focus of the viewer’s attention.
Another benefit of shooting RAW is that you can go back and re-edit your photos in the future as your creative style changes.
13) Use a Tripod
If you’re taking static portrait photography where the subject is staying in one place and not moving, using a tripod is as important as picking the right shutter speed or focal length.
The fact that a tripod will reduce the motion blur that comes with shaky hands is just one advantage of using one in composition portraiture.
Adding a remote trigger to your setup further prevents camera shake while allowing you to get out from behind the camera and talk to your subject eye to eye, generating a greater rapport.
One thing to remember if using a tripod is to turn OFF the image stabilisation or vibration reduction on your camera.
The firm setting of a tripod can actually increase camera shake, ruining all the hard work on focusing correctly.

14) Play Around with Composition
Lens choice will play a major role in how you frame your image. A longer telephoto lens matched with a wide aperture like f 1.4 will produce a shallow depth of field, which can be very effective in portrait photography by getting rid of a distracting background with bokeh, as we’ve already discussed.
But portraits can also be dramatically enhanced by simply altering the composition of the image too.
While it’s always tempting to place your subject in the centre, it’s well worth playing around a little.
If you’re looking to capture more than the subject’s head, you’ll want to watch out for foreground distractions.
At the same time, you should be aware of the gaze of the person sitting for the portrait. Good portraits will avoid poses or gazes which lead the viewer’s eye away from the image.
A brilliant way to create a sense of intimacy between subject and viewer is nothing to do with the focus, aperture, or exposure.
Instead, it’s to do with how the portrait is framed. Close in on your subject, so that the features you want to focus on fill the viewfinder.
Not only does this create instant impact, but it will help stop the viewer’s focus from straying from the main subject of the image.

15) Pay Attention to the Little Details
If portrait photography is all about capturing the spirit of the subject, paying attention to detail can really help.
For example, if your subject is pregnant, it would be strange not to include their baby bump when framing the image.
Likewise, if the subject works with their hands, the magic of their personality can be brought to life by including their hands in the portrait.
Viewers of the very best portrait photography will be able to guess something about the subject without needing to read a long descriptive paragraph.
The Secrets to Getting Fantastic People Images – Practice
Like any skill, taking great portrait photography takes practice. So don’t worry if you don’t see a change in your portraits on day one!
Take your time in adopting these portrait photography tips, and don’t let worrying about a few things like camera settings take away from your natural talent.
You might want to focus on each one of these tips for portrait imagery in turn or dabble with all of them at once. That’s up to you.
At the end of the day it’s better to have taken the image, no matter if you’ve used wide angle lenses or a longer zoom lens, than to walk away without a portrait for your portfolio.
DISCLAIMER: Some of the links in this article are affiliate links, which means if you book accommodation, tours or buy a product, we will receive a small commission at no extra cost to you. These commissions help us keep creating more free travel content to help people plan their holidays and adventures. We only recommend the best accommodations, tours and products that ourselves or our fantastic editorial team have personally experienced, and regularly review these. Thanks for your support, kind friend!


1 thought on “Portrait Photography Tips – 15 Secrets to Stunning Images”
I’ll be publishing a self-help book next year, so I was thinking of getting a portrait photo soon to use for the author’s page at the back of the book. I found it quite interesting when you mentioned that using a longer lens for our portrait photo can help make the face appear very thin since the background will seem close and compressed. I’ll take note of this while I go look for a portrait photographer working in Miami to book for the pictures I need for my book soon.