
Our best landscape photography tips, as well as what camera settings to use and gear to have when out shooting!
Almost all photographers, whether they are long-time pros or absolute beginners, end up developing a passion for landscape photography.
A beautiful landscape image has the power to inspire someone to travwel, excite them about nature or encourage them to pick up a camera themself.
It’s a fascinating art form, and the creative possibilities of what someone can produce are endless.
We’ve been working as professional travel photographers since 2014, and a large part of what we do focuses on landscape photography.
When we bought our first camera, a simple point-and-shoot, we had no idea how to take a good photo, but we were left constantly in awe of the stunning shots we would see hanging in galleries and posted on social media.
Our travels encouraged us to improve our skills, and despite being completely self-taught, we now make a living from photography.
Educating has become one of our biggest passions, and it is now our absolute thrill to be able to teach others how to take better photos, either through this website, on our social channels, or on our adventure photography tours in Central Asia and Antarctica.
Table of Contents
- Our Best Landscape Photography Tips
- Use a Tripod
- Location Scouting is Essential
- Look for Leading Lines
- Walk Around Before You Set Up Your Shot
- Buy a Wide Angle Lens for General Landscape Photography (and Learn How to Use It)
- Use a Telephoto Lens for Compression Effect
- Give a Sense of Scale
- Look for Reflections
- Get a Circular Polarizing Filter
- Shoot in the Blue and Golden Hours
- Use Long Exposures for Water and Clouds
- Take Multiple Exposures (Under- and Over-Exposed)
- Create a Panorama Using Separate Images
- Think About Your Composition
- Choose Your Focus Point
- Landscape Photography Settings and Tricks
Our Best Landscape Photography Tips
Seeing as we’ve become known for our landscape images, we’re excited to finally put together our best photography tips landscapes in this epic guide to help you improve your own shots.
We hope you get something out of it, and if you do, or you have something to add, make sure you leave a comment below!
Ok, let’s get you on the road to becoming a better landscape photographer!
All photos in this article were taken by us, Alesha Bradford and Jarryd Salem, and shot on either a Sony A7ii, Sony A7iii, Sony A7Riii, or a DJI Mavic 2 Pro.
Make sure you follow us on Instagram for more photography from our travels around the world.
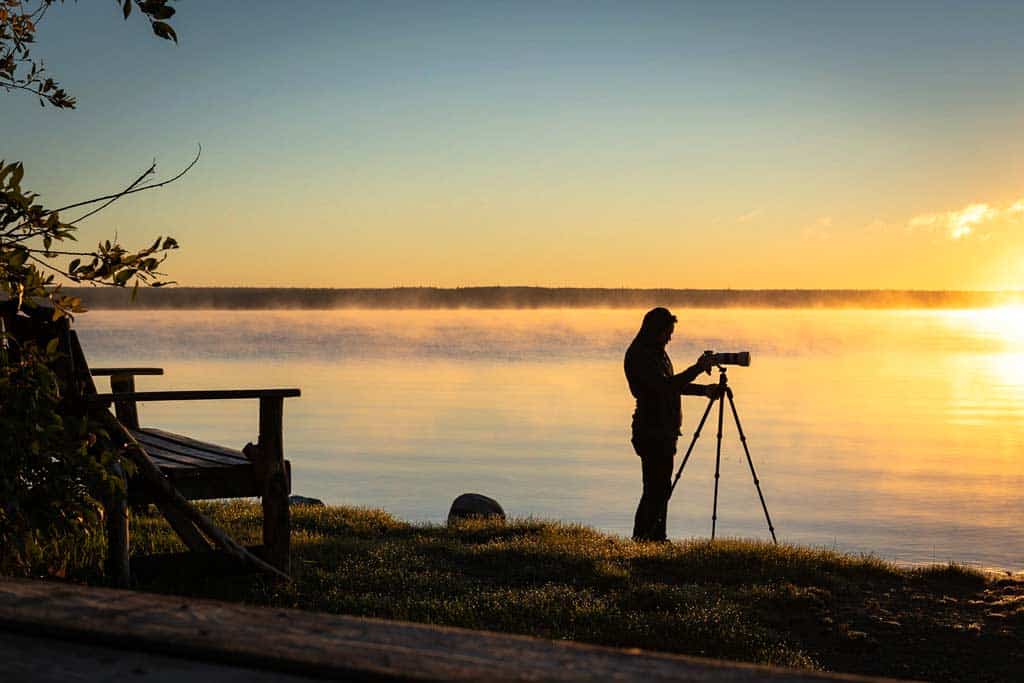
Use a Tripod
The first tip we have on how to take better landscape photos is to almost always use a tripod.
Making sure you have a sharp, clean image is essential when it comes to epic landscapes, and the best way to do this is to take away any chance of having a blurry or high-noise image.
Ideal landscape photography settings* are usually around f/8-f/11 to get long depth of field, and ISO 100, which means to dial this in with perfect exposure (light), you need to adjust the shutter speed accordingly.
*Note – This is not a hard rule, and of course can be broken depending on the creative style you’re trying to achieve and conditions. Read the bottom of our post for more landscape photography settings tips.
In the golden hour, blue hour and low-light conditions, this may mean using very slow shutter speeds that would be impossible to handhold without introducing camera shake.
By placing your camera on a tripod you eliminate the chance of moving the camera accidentally, and can really focus on all the other elements of your shot.
Use a remote shutter release or the 2-second timer feature on your camera to initiate the shot without bumping the camera with your hand.
Check out our guide to the best travel tripods by clicking here.
Location Scouting is Essential
Some places seem as though they were created just for landscape photographers.
Iceland, Patagonia, Faroe Islands – no doubt you’ve seen thousands of shots from these mind-blowing destinations, all making you want to pack up your camera gear, buy a plane ticket, and capture your own photos.
The thing is photographing these popular spots is almost too easy. When you arrive, you probably already know what shots you want to get and where.
There are viewpoints and well-worn paths to get to the most iconic angles, and as long as the weather cooperates and you have the skills, you’re likely to come away with some fantastic images.
But what about the lesser-known places that are equally as beautiful, if not more so, but don’t have the beaten track leading you there?
Or what if you’re on a family holiday and you have to make do with wherever you end up?
That’s where location scouting becomes extra important, both before you travel somewhere, and once you arrive.
Professional landscape photographers spend hours scouting out where they want to shoot.
Before they leave home, they’re using Google Earth, 500px, Flickr and other tools to find the best angles and positions to photography from.
They use PhotoPills (our personal favourite) and the Photographer’s Ephemeris to learn when the golden and blue hours are on a particular day, and where the sun will rise and set.
Then once they are in the field, photographers often go and see these places well before they want to shoot to make sure it is as good as they envisioned. If it’s not, they will have a back-up location to check out.
In other words, they have a plan.
The truth is the chances of simply showing up somewhere by accident and finding the best composition and lighting immediately is extremely low.
So if you want to get the absolute best landscape photographs, get used to scouting out when and where to shoot from before you arrive, and formulate a plan.
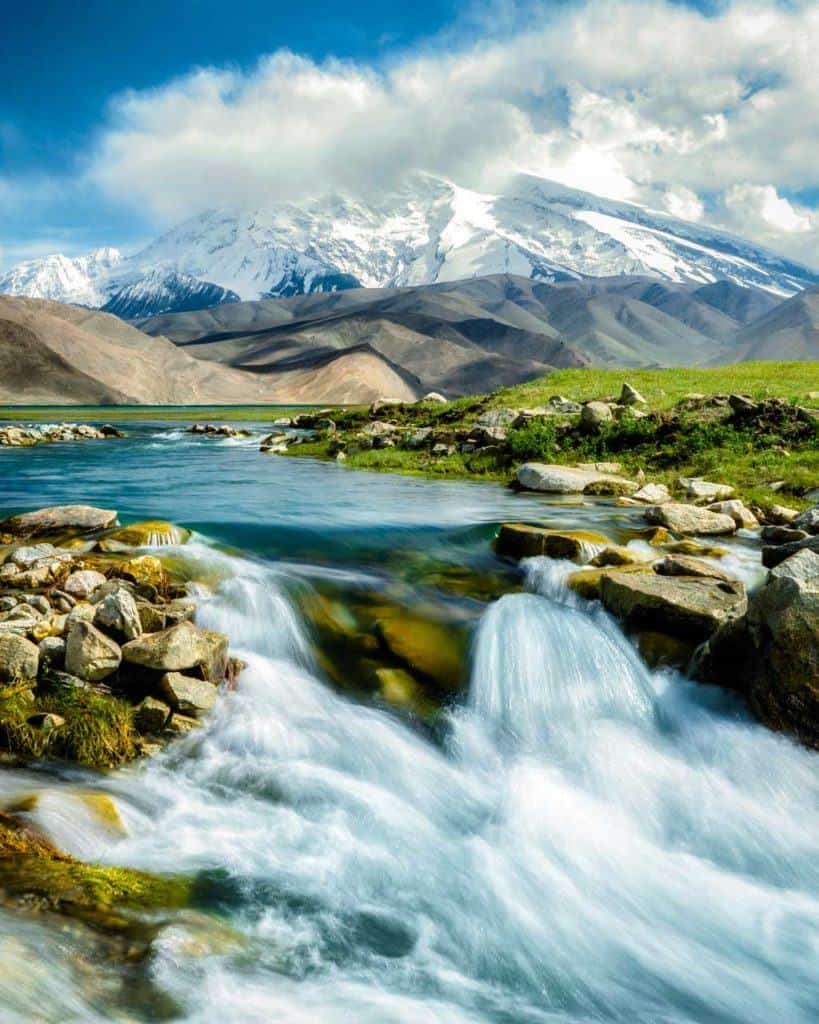
Look for Leading Lines
Landscape photography isn’t just about stunning scenery and using the Rule of Thirds.
Without good composition, light and framing, even the most beautiful landscapes can look mediocre in a photo.
One of our favourite tips for landscape photography is to use leading lines in your shot to add power.
The concept behind this is that when you look at a beautiful landscape image, contours should allow your eye to naturally flow around the scene, drawing attention to the main subject.
Perhaps your focal point is a waterfall tumbling off of a cliff. But rather than just taking a picture of the cascades, you can shoot wide to get the creek that flows away from the waterfall as well, which then helps the viewer guide their way around the image.
A leading line can be anything – a meandering river, the ridge of a mountain, contrasting shadows, a row of rocks – so use the natural environment and your imagination to your advantage here.
Walk Around Before You Set Up Your Shot
This is one of our top travel photography tips in general, not just for landscape photography – Use your feet as much as you use your eyes.
Once you arrive at a location, don’t be in such a hurry to set up your tripod and camera gear that you don’t take a few minutes to walk around and see what other angles you can find.
You may think you have the perfect composition already, but in reality, if you walked 2m to your left, you’d be able to get a hanging tree branch to frame the mountain in the distance.
Or maybe you’re thinking about composing your shot at eye level, but if you stepped forward and squatted down, everything would come together in a much tighter angle.
Take your camera with you while you’re scoping the best position out, and take some test shots. These don’t have to be perfect technically, but try to find the best composition from every angle.
Remember, what your eye sees and what your camera sees can be two entirely different things, so having these test shots will let you figure out which one looks best.
There’s nothing worse than spending an hour shooting, then when the light is gone and you’re packing up you see a better angle just around the corner.
The point is that rather than getting to a location, screaming “WOW!” and setting up your tripod right then and there, take some time to scope out the entire place properly and find the absolute best composition.
If you only take a handful of our photography tips for landscapes away, make sure this is one of them.
Buy a Wide Angle Lens for General Landscape Photography (and Learn How to Use It)
If you had to buy just one lens to make the most of our landscape photography secrets, make sure it’s a wide-angle.
In general, most landscape shots are of large, dynamic scenes. Think mountains, forests, oceans, rivers, etc.
Because of that, it’s important to be able to capture as much as you can see as possible.
READ MORE: Check out our list of the best travel cameras!
Wide angles are generally considered to be 24mm or less, but the most common focal length is 16mm.
One caveat with wide-angle lenses though is that they can be notoriously difficult to compose a shot.
The two main reasons for this is that they tend to make subjects that are far off in the distance quite small, and subjects on the edge of the frame will be distorted.
It’s very important that you don’t place something with a familiar shape close to the edge of your shot, because the perspective warps it to a point that it almost looks comical (buildings, people, man-made objects, etc).
However, that doesn’t mean you should keep everything in the centre of the frame. Quite the opposite actually.
Instead, to compose a wide-angle shot properly, it’s important to use an anchor point or frame on the edge of the shot to pull the image together.
One way to do this properly might be to find a rock in the foreground and place the lens very close to it.
Another option might be to use the natural curve of a river or canyon edge to bend around the foreground, so you don’t end up with an empty space.
Once you get a wide-angle lens, get out there and practice a lot with it to understand how it works properly. When you figure it out, your shots will start to look fantastic.
Use a Telephoto Lens for Compression Effect
On the opposite end of the spectrum, telephoto lenses (200mm and longer) can also be a secret to have up your sleeve on this list of nature photography tups for a few different tricks.
The first, and most obvious, reason is that it allows you to zoom in on a distant subject. Something like a mountain peak or tree bending over a river.
The other reason telephoto lenses are useful in landscape images is being able to use an effect known as ‘lens compression’.
READ MORE: Learn about lens compression and other techniques in our new expert guide to portrait photography tips!
Essentially what lens compression does is make the background of a shot appear closer to the foreground the more you zoom in.
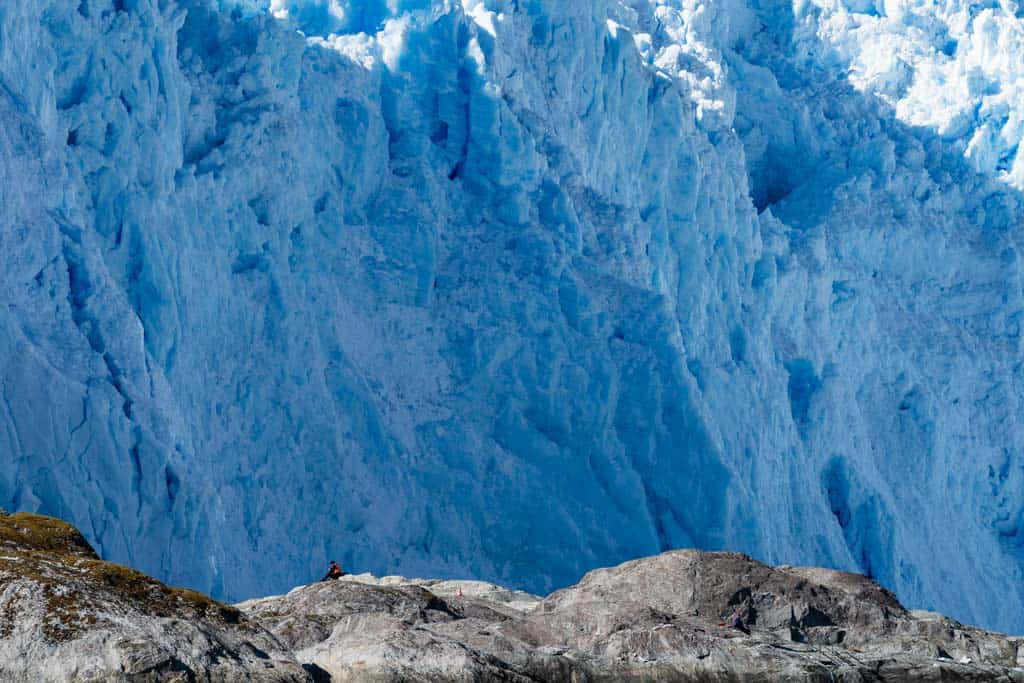
Look at the shot below, which was taken at the El Brujo Glacier in the Chilean Fjords.
By using a telephoto lens, we could really compress the front of the glacier behind the man sitting on the rock to really emphasise just how big that glacier is.
Lens compression also made it appear as though the glacier was only a few metres away, when in reality he was at least 100m from the edge of the glacier.
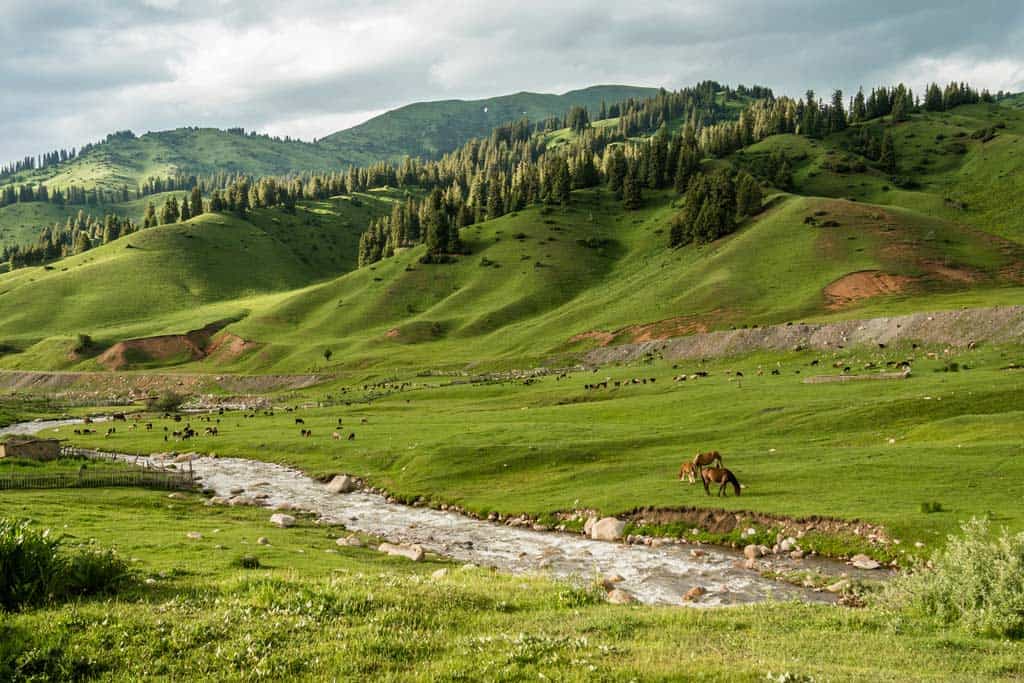
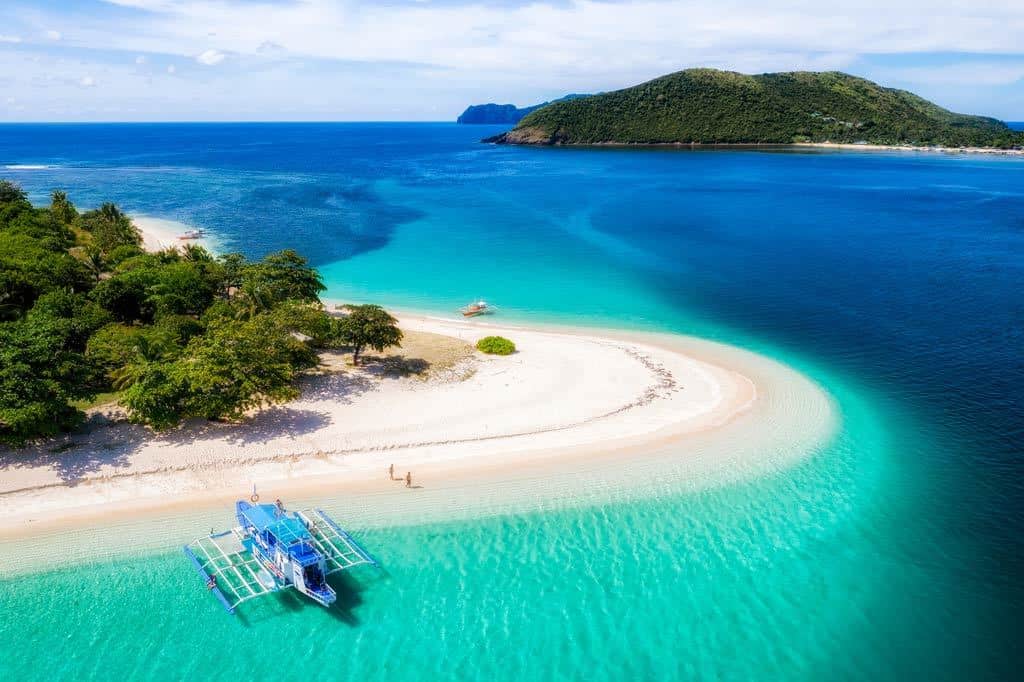
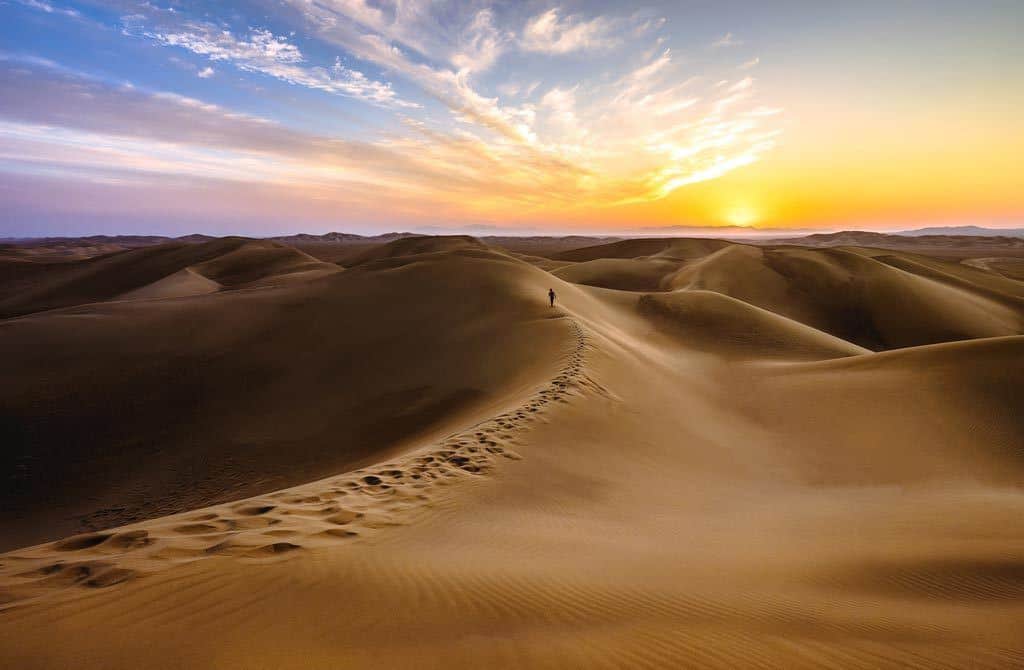
Give a Sense of Scale
Landscape photographers often deal with epic scenes. Mountains, waterfalls, glaciers, beaches. Those kinds of things.
But how can you ensure the viewer really gets an understanding of just how big and epic the scene really was?
You do this by placing something that everybody can relate to the size of, a human, animal or car for example, somewhere in the scene.
This simple landscape photography tip will help give your shots an easily recognised dimension that is easily understood, and will help convey just how big something is when shooting it.
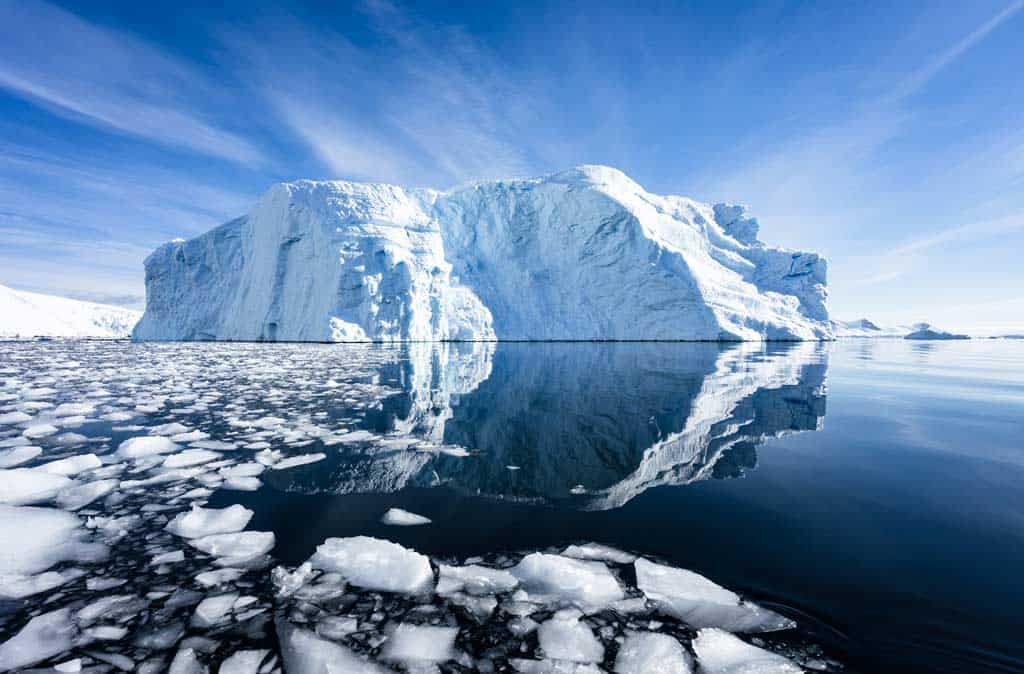
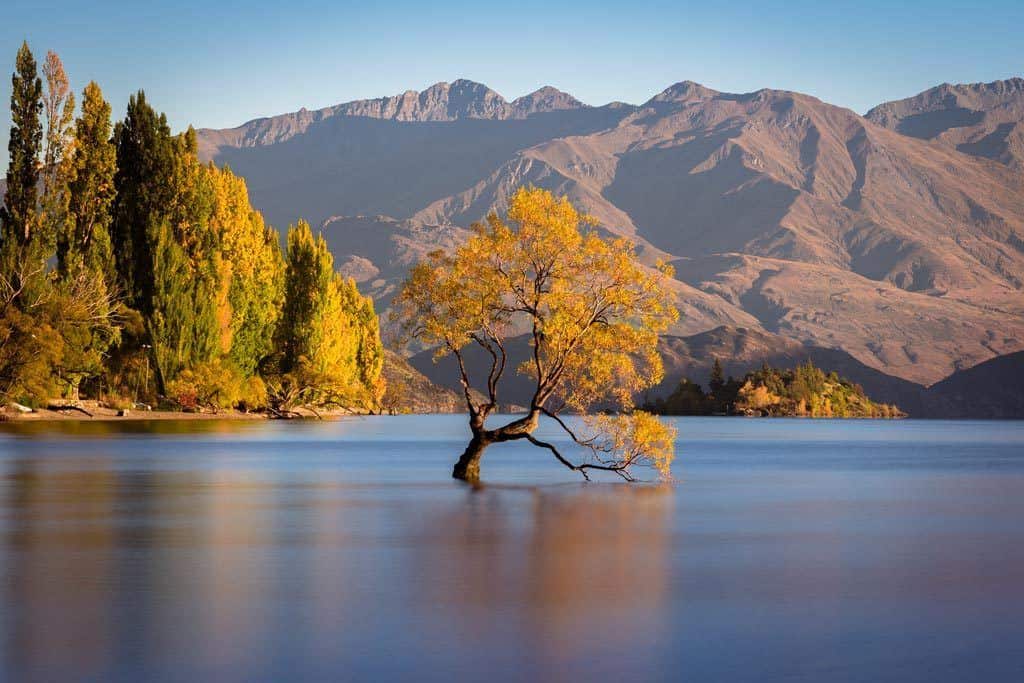
Look for Reflections
Reflections have the ability to turn an average photo into something that will make our jaws drop.
When you’re out taking landscape photos, look for reflections in things like lakes, calm ocean or rivers, or perhaps even in puddles.
Some reflections will be obvious to see, but sometimes you may need to squat down and place your camera as close to the water surface as possible to see them.
Try experimenting with the composition to see what you can make work.
Remember, in this list of nature photography tips, you can take things into your own hands.
Placing the horizon of a reflection right in the middle of your shot is a great example where the ‘rule of thirds’ is meant to be broken.
Get a Circular Polarizing Filter
If you’ve ever gone out shooting the ocean, snowy landscapes, trees or clear skies in the middle of the day, you probably have had to deal with harsh glare and reflections.
The best way to get rid of this blinding light is to use a circular polarizing filter.
These filters screw onto the front of your lens, and are made up of two pieces of glass (a linear polarizer and quarter wave plate, if you want to get technical) that rotate to cut light glare from a scene.
By rotating the front glass, you will start to notice the light disappearing in different areas of the frame, which then returns contrast, saturation and balance to the shot.
These are incredibly useful tools in not just landscapes, but many other types of photography, as they help keep the scene clean and remove any light distractions.
Circular polarizing filters also cut out about 1-2 stops of light on average, so they can also sometimes be used as neutral density filters.
We recommend buying the best filter you can afford, as cheap ones often create a strange colour cast across your shot.
We currently use Hoya Pro1 Digital Circular Polarizing filters on our lenses. Make sure you get one that matches the thread size for your particular gear.
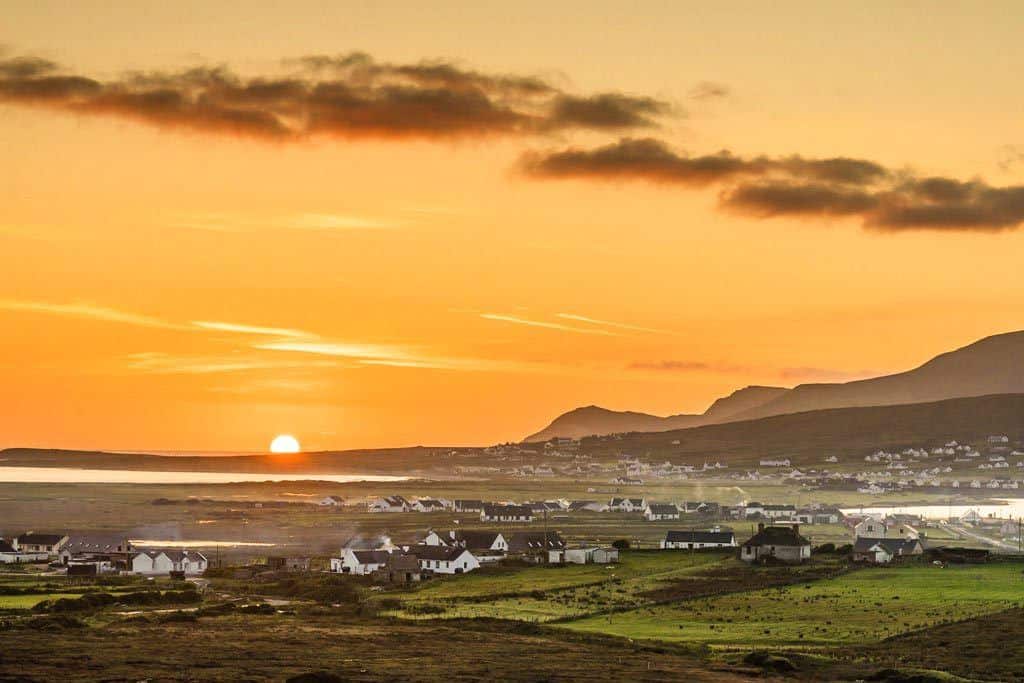
Shoot in the Blue and Golden Hours
No matter how you look at it, photography is about capturing light. So it makes sense that you’ll want to shoot during the part of the day when the light is the most beautiful.
The blue hour is the time when the sky has enough ambient light in it to start to illuminate the scene, before the sun has come close to the horizon, or after it has well and truly set.
This creates a gorgeous, cool hue to a landscape, although it is often still quite dark so you’ll need a tripod to capture a clean image.
The golden hour is the time just before and after the sun rises, or just before and after the sun sets.
This can be considered the optimum time to shoot landscape photos, because when conditions are right, you’ll end up with a spectacular, warm glow.
For this addition to our landscape photography workflow, keep in mind that shooting during the golden and blue hours really makes your images pop, and can be the difference between an ok photo and a portfolio photo.
A good practice, running over from the location scouting landscape photo tip above, is to arrive at the spot you want to shoot well before the golden and blue hours start to give yourself time to set up (and not miss the good light).
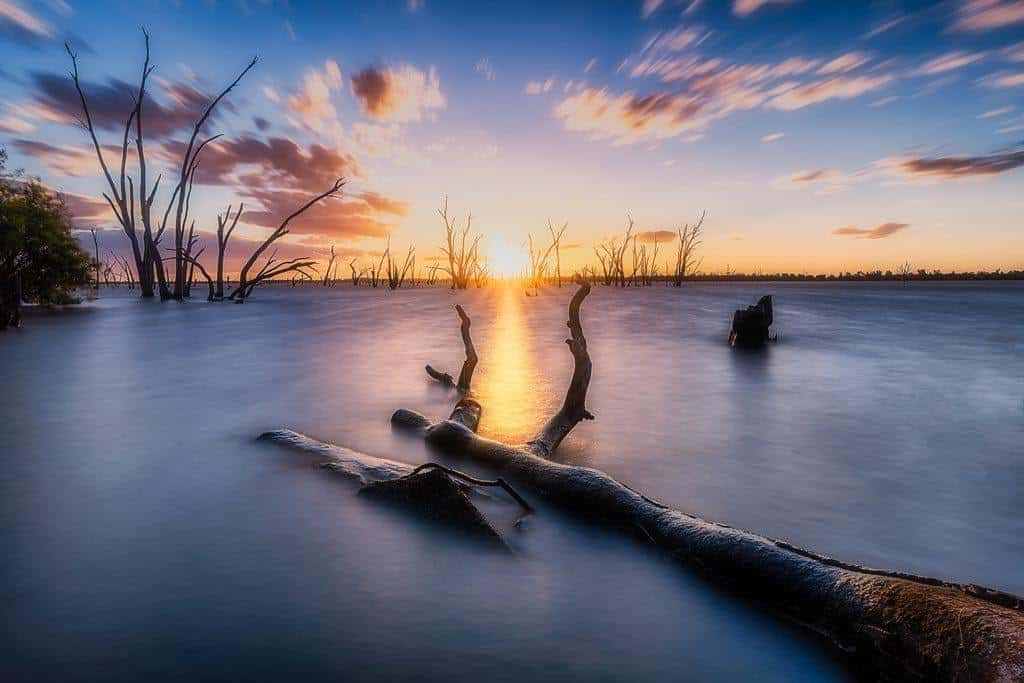
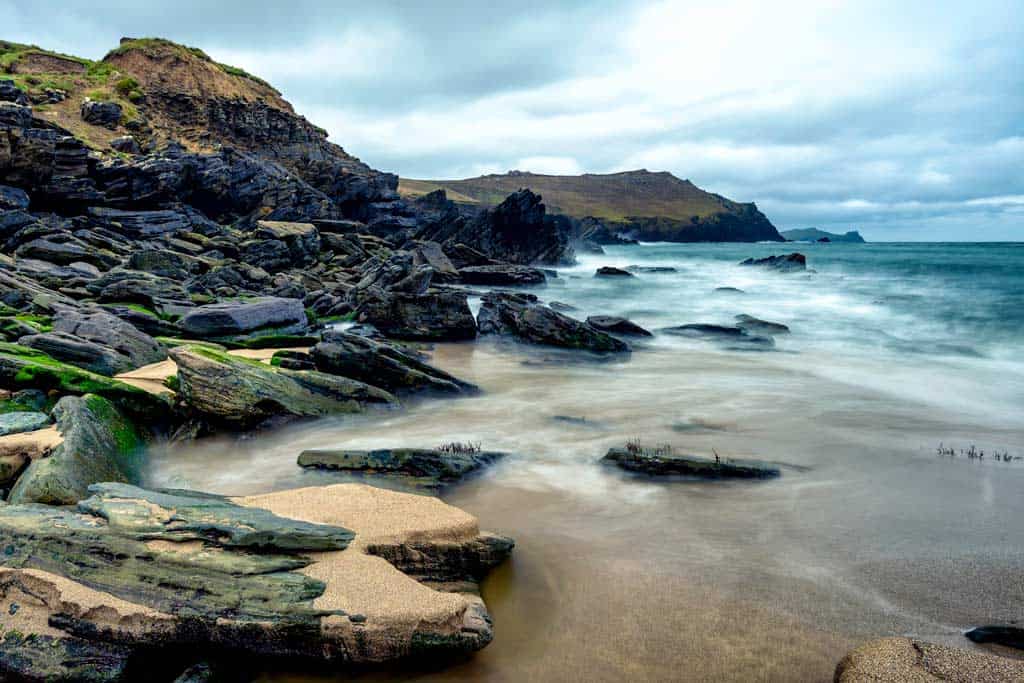
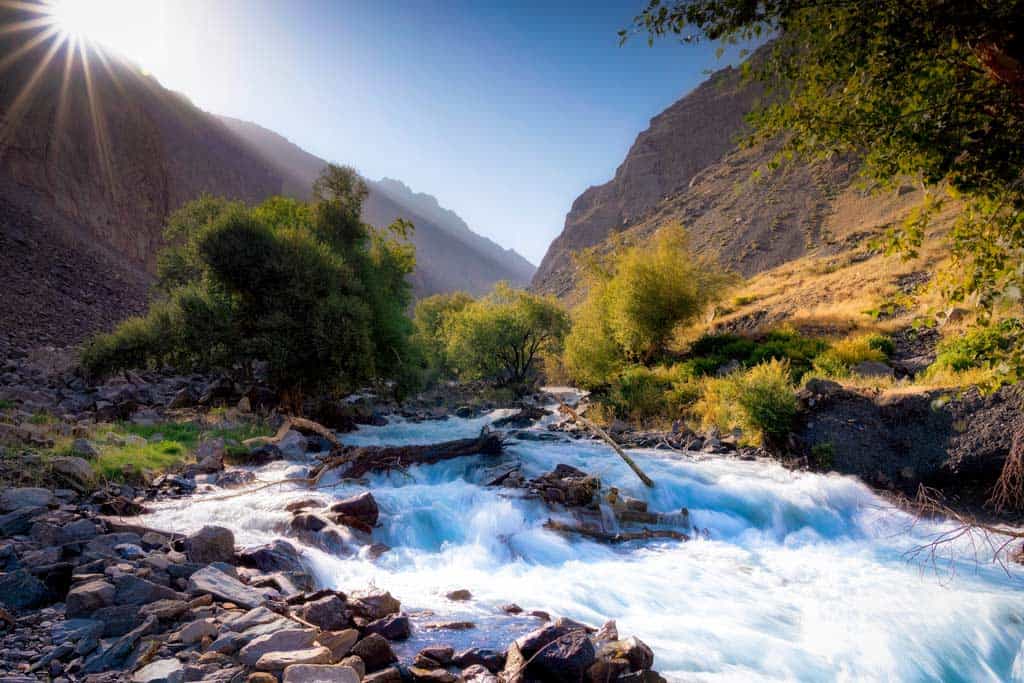
Use Long Exposures for Water and Clouds
One of the most effective tips for landscape photography is to get into long exposures.
Long exposures is essentially when you use a slow shutter speed to create motion blur in an image.
For landscapes in particular, this technique is often used to get silky water, or to give the illusion of streaky, paint-like clouds.
By placing your camera on a tripod and setting your shutter speed to the appropriate time (how long depends on the creative style you’re looking for), you can really add a powerful effect to your landscape pictures.
If you’re shooting in low light, you can often achieve slow shutters by stopping down to f/11 or f/16 and using ISO100.
READ MORE: Check out our latest guide to another one of our favourite long exposure photography types – astrophotography!
If the scene is too bright at these settings to get a slow shutter, you will need to start looking at investing in neutral density (ND) filters.
These heavily-tinted pieces of glass are placed on the front of your lens, using either a mount or screwing directly onto the lens thread, and are like putting sunglasses on your camera.
This is how photographers achieve long exposures in the middle of the day.
If you’re unsure where to start with ND filters, consider getting a 6-stop ND (blocks out 6 stops of light, good for medium-brightness conditions) or a 10-stop ND (blocks out 10-stops of light, good for bright conditions).
We use and recommend NiSi filters, and they’ll really add a new tool to our landscape photo tips.
Take Multiple Exposures (Under- and Over-Exposed)
Often when we’re shooting landscapes, we’re dealing with very high contrast scenes with extremes in highlights and shadows.
This is where we start to touch on the limitations of standard photography, because while our eyes can see the details quite clearly, a camera can struggle to capture this range of light accurately.
That’s why learning how to bracket your photos is paramount in landscape shooting.
What this means is that you take multiple photos of the same scene, one at perfect exposure, one (or more) at 1-3 stops underexposed, and one (or more) at 1-3 stops overexposed.
Check out our new YouTube tutorial on how to bracket multiple exposures in landscape photography:
There’s a couple of reasons why you would want to do this.
The first is that when you’re in the field looking at a small LCD screen, you can’t really tell whether or not you have captured all the details you want.
This only becomes obvious once you are back at home and looking at your images on your computer.
The last thing you want is to take a few photos of a beautiful beach sunrise, think that you have nailed it, then get home to discover you blew out the sky.
By having multiple exposures you give yourself the option later of choosing which shot you like.
A feature that is built into many cameras these days is called High Dynamic Range (HDR) photography, which aims to retain all the details in the shadows, midtones and highlights and merge them into one shot.
However HDR photography can often turn out to be oversaturated, with harsh contrasts, and look pretty fake.
Instead what we recommend doing is using your bracketed images to then blend them together in a program like Photoshop, so you can achieve a more natural composition.
At this stage it’s important for us to share that if you aren’t already editing your photos, it’s time to start learning.
We recommend the Adobe Creative Cloud subscription service. Use this link to get a 7-day free trial.
Here’s a great tutorial on how to blend photos in Photoshop.
Create a Panorama Using Separate Images
Sometimes the scene you are shooting is just too large to fit into a single frame. That’s where shooting panoramas come into play.
You have probably seen this feature on your camera or smartphone already, and while it achieves a decent result, it isn’t always perfect.
Instead we recommend taking multiple shots manually, and merging them later in a program like Lightroom.
To do this, simply point and shoot at the edge of the point where you want your shot to start, and slowly pan the camera (either horizontal or vertical) 1/3 of the frame at a time, clicking the shutter as you go.
It’s best to do this on a tripod, but you can do it handheld as well.
The reason you only move the camera 1/3 of a frame each shot is to give yourself lots of room to merge later.
The end result will be a much higher-definition DNG image, rather than a standard-definition JPEG.
Also we recommend at the very least to dial in your aperture, ISO and focus point before you start the pano.
That’s so you don’t end up with one shot at f/11, focused on the distant mountains, then the next one at f/5.6 focused on a nearby tree, all trying to blend together.
If you’re using a tripod and there are no fast-moving elements, shutter speed won’t matter as much in this instance.
Here’s a tutorial on how to merge panoramas together in Lightroom.
Think About Your Composition
The three things that are absolutely paramount to getting an incredible landscape image is lighting, focus and composition.
You can make a mistake on the technical side of things, such as using the wrong aperture or a high ISO, and still end up with a beautiful image.
But if you mess up the other three elements, your shot is almost destined for the trash.
Having a solid composition is one of the most important, and difficult, parts of landscape photography.
When you’re walking around and setting up your shot, look for how everything works together.
Look for leading lines. Scan your eyes around the edge of the frame to make sure you’re not cutting off anything important.
Make sure anything that is pushed to the edges has enough breathing space to not fill cramped in the final image.
Check that the horizon is level. Ensure that subjects of interest (like a human or interesting tree) stands out and isn’t touching against something that draws the eye away from it.
Use the ‘Rule of Thirds’, where you break your image up into 9 squares and place points of interest in a corresponding third or meeting part of the image.
There can be a lot to take into account when creating your composition, but the best part is that you usually have time to think about it in landscape photography.
Unlike street photography where a moment can be gone in an instant, as long as you give yourself enough time so you don’t miss the light, you can really study every part of your landscape shot.
Choose Your Focus Point
The final point on our list of best landscape photography tips is to choose your own focus point.
Modern cameras do a pretty good job with autofocus, but they don’t always get it right.
Especially in low-light situations, the camera might be hunting for a focus point, and end up choosing the wrong element.
Rather than focusing on the waterfall, it picks a boulder in the foreground, for instance.
Don’t take any chances with this and instead narrow down your autofocus point to be as small as possible, then move that point to exactly where you want, or use manual focus.
It takes a bit longer, but you’ll be guaranteed to have perfect focus every time.
Landscape Photography Settings and Tricks
You know all of the ways to improve your skills in the field, now it’s time to learn about the best settings for landscape photography!
As a disclaimer, all of these settings and tricks should be considered guidelines, and every shooting situation will be different.
Experiment with them all and let your own creativity take charge. We also recommend learning about the exposure triangle if you aren’t familiar with it already.
But if you’re relatively new to this and just want to know what landscape photography settings to use, here’s a general guide.
(Note – we shoot in full manual mode, but many great landscape photographers use Aperture Priority mode. Feel free to use whichever you like.)
Set Your Aperture to f/8, f/11 or f/16
In landscape photography, you generally want a decent depth of field so most of your scene is in focus.
If you’re not planning on focus stacking (we’ll touch on that below), then the best thing you can do is use a small aperture.
Setting your camera to f/8, f/11 or f/16 will give you a balanced depth of field that will be pleasing to the eye, especially if your scene is quite 3-dimensional.
Use ISO100
Having the cleanest image possible is very beneficial in landscape images, and you can achieve this by dropping your ISO to 100.
This minimises the amount of noise you’ll see in the shadows, allowing you to really push the image in post-processing.
Most decent dSLRs and mirrorless cameras these days can handle much higher ISOs, so if you’re shooting on a Sony A7Riii or Canon 5Div for example, you can definitely get away with something like ISO1600 or ISO3200, with just a little bit of noise reduction in post.
But if you’re shooting on a cheaper camera, even ISO800 can be too much sometimes.
Dial the ISO to 100 and don’t stress about the noise.
Shutter Speed Doesn’t Matter (Unless You’re Doing a Long Exposure)
When you’re choosing the best settings for landscape photography, the shutter speed doesn’t really matter, unless you are doing a long exposure or taking a photo that has moving parts in high wind (tree branches for example).
Assuming you are shooting something that is static rather than dynamic, and you’re using a tripod, you just need to worry about the aperture and ISO being right and choose whatever shutter speed is adequate for the right exposure.
Bonus Tip – Long Exposure Shutter Speeds
If you are planning on shooting a long exposure but don’t know where to start in terms of shutter speeds, this should give you a good idea to kick things off (remember to experiment to see what you personally like).
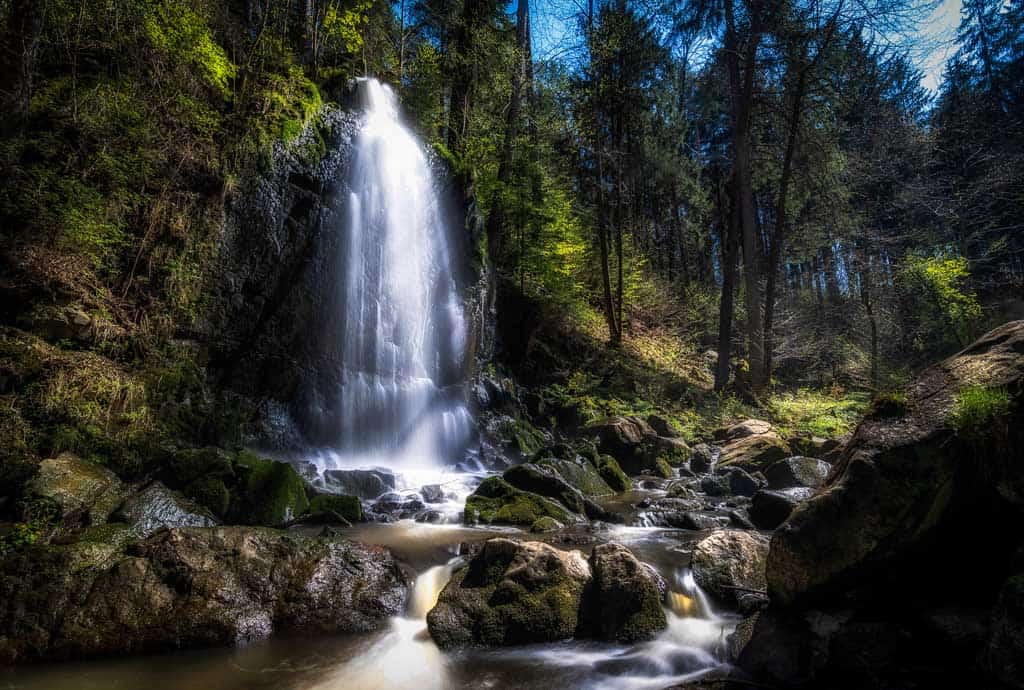
Waterfalls
Aim for between 1/15 and 1 second, depending on how strong the water is flowing. This will keep tendrils and texture in the waterfall, rather than washing it out completely.
Learn more about our top waterfall photography tips in this post.
Waves
Somewhere between 1/30 and 1 second should work fine, again depending on the creative style you’re aiming for.
Clouds
30+ seconds. The longer the shutter remains open, the more movement you’ll get in the clouds.
Set your camera to 30 seconds to start with, and if you need longer, change it to bulb mode and use a remote shutter release to lock it open.

Shoot in RAW
Unless you don’t plan on editing your photos, or you are really struggling for storage space, you should always shoot in RAW mode instead of JPEG.
RAW photos are larger files that maintain all of the colour details from a scene without compression.
This means you can really push the colours, highlights and shadows in post-processing with less destruction and degradation of the shot.
Focus Stacking
Focus stacking is where you take multiple exposures from the exact same spot (using a tripod) and manually focus on different elements throughout the scene.
For example you take a photo focused on the rock in the foreground, another photo focused on the river in the middle of the shot, then take a final picture focused on the mountain in the distance.
Then you use a program like Adobe Photoshop to blend those 3 exposures together, so that every single part of your shot is perfectly in focus.
It can be a very powerful tool to have in your arsenal once you know how to use it, although it does take time and discipline to execute it perfectly.
DISCLAIMER: Some of the links in this article are affiliate links, which means if you book accommodation, tours or buy a product, we will receive a small commission at no extra cost to you. These commissions help us keep creating more free travel content to help people plan their holidays and adventures. We only recommend the best accommodations, tours and products that ourselves or our fantastic editorial team have personally experienced, and regularly review these. Thanks for your support, kind friend!


11 thoughts on “15 Epic Landscape Photography Tips from a Pro (Plus Settings to Use)”
It will be helpful in my new journey of photography and this article also sparked some new thoughts of photography for entrepreneurship in my head. Thanks.
You are so right about paying attention to composition. It worked great when we tried.
Couldn’t agree more 🙂
Thank you for your detailing teach of such a topic I always dreaming of.
So happy you found the article helpful Vincent. Happy photographing.
Thank you for sharing your secrets. They are very helpful.
Glad they were helpful. Thanks for your comment Shelly and happy photographing
Thanks – Great article guys & well written.
Thank you so much. 🙂
It’s really best lanscape photography tips. I need this, i want learn more about lanscape photography, And finally I fount at here.
Thanks forsharing all this tips, and sharing that the result! 🙂
Glad you found the article helpful. Happy photographing.