
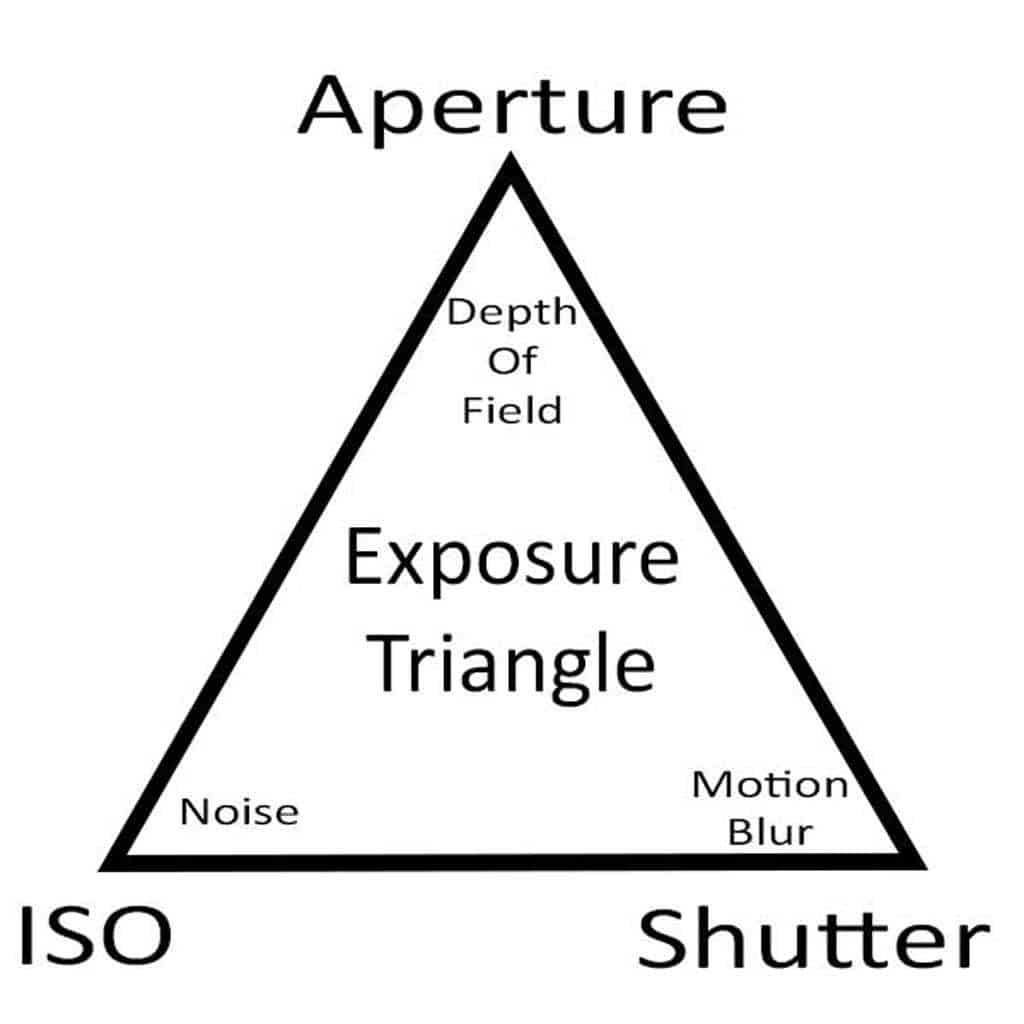
The Exposure Triangle is a term used in photography to describe the three elements that control how much light reaches your camera sensor.
Your camera uses three different elements to change the amount of exposure, or light, that appears in an image.
These camera settings are aperture, shutter speed and ISO – and it’s important for photographers to understand what each element does so they know what adjustments need to be made when shooting in different lighting conditions to achieve a particular look.
If you think it sounds advanced or complicated, don’t worry. We were the same when we first started taking photos.
When we first picked up a camera we had absolutely no idea what any of this meant. But after a bit of study, and lots of practice, we now make a full-time living from our travel photography and are determined to help you figure out this puzzle as well.
In this article we’ll go over how to understand the exposure triangle, with examples, to help you take control of your photography.
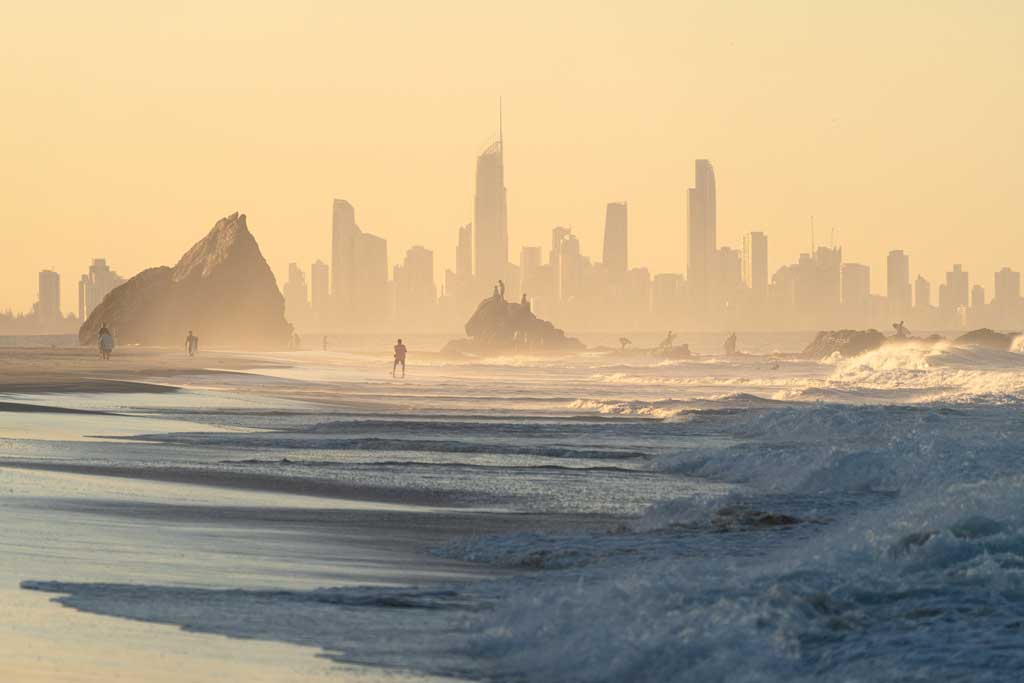
Table of Contents
What is the Exposure Triangle in Photography?
Let’s dive right into it.
As mentioned above, the exposure triangle in photography is a three-part relationship between shutter speed, aperture, and ISO.
Each of these elements affects the amount of light that reaches your camera’s sensor, otherwise known as ‘exposure’.
Too much light, and your photo will be too bright. Not enough, and it will be too dark.
While in pure technical terms there is an exact exposure value that is considered perfect (you may need to use a light meter to get this right), stylistically there really is no right or wrong amount of light all images should have.
The goal as a photographer is to have the camera exposure be as close to what you want as possible.
You know what exposure is now, so let’s talk about triangles.
The triangle illustrates how changing one part of your camera settings, that being ISO, shutter speed and aperture, affects light values from the other two parts.
Understanding exposure triangle photography sounds technical, but by reading the rest of this article and grabbing your camera to practice, you’ll be one step closer to mastering digital photography.
But First, Measuring Exposure (And What the Hell is a Stop of Light?)
Before we get too far into this blog post, we need to learn about how we measure exposure.
The idea of a ‘perfectly exposed image’ in photography is one that is not too dark (underexposed), but also not bight (overexposed).
Exposure can be measured in terms of stops – which are basically the way we measure how much light or photons there are.
A stop is when we double or halve the amount of light in a shot. We can ‘stop up’, which means double the amount of light, and ‘stop down’, which halves the amount of light.
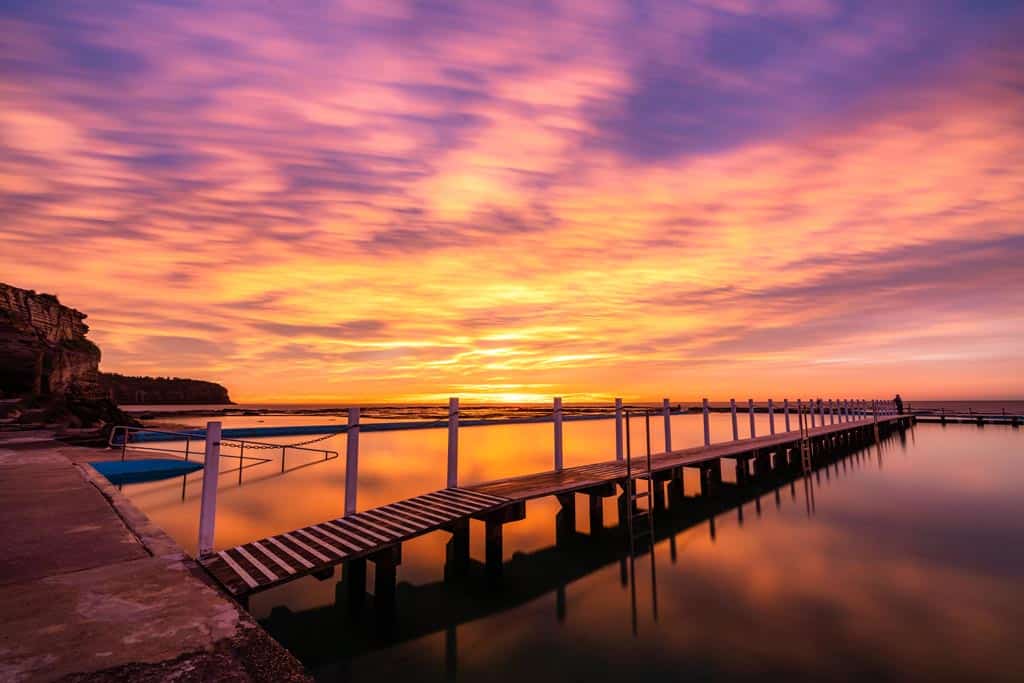
To put doubling or halving into practical terms, let’s say we have taken a photo of a landscape (and while you’re at it, check out our expert guide to landscape photography tips!), and when we preview it we notice that it is underexposed, or darker than what may be considered perfect.
We could then ‘stop up’ to increase the amount of light in the shot, and we do this by adjusting one of the three elements in the exposure triangle – aperture, shutter speed or ISO – to compensate how many photons are hitting the sensor.
The same is said when we notice the photo is overexposed, or brighter than what we want – we would ‘stop down’ by adjusting one of those same three elements.
If you’re not sure about what we mean by aperture, shutter speed and ISO and how it affects the exposure triangle, don’t worry. We’ll cover them in more detail below:
What is Aperture?
Aperture refers to the physical opening in a lens. More specifically, it is the hole that light travels through when it reaches the sensor on your camera.
A wide-aperture means more light gets into your photo and allows you to use a faster shutter speed or lower ISO settings to get a correctly exposed image.
Conversely, a narrow aperture lets less light get in and will require the use of a higher ISO or slower shutter speed to make up for that restriction.
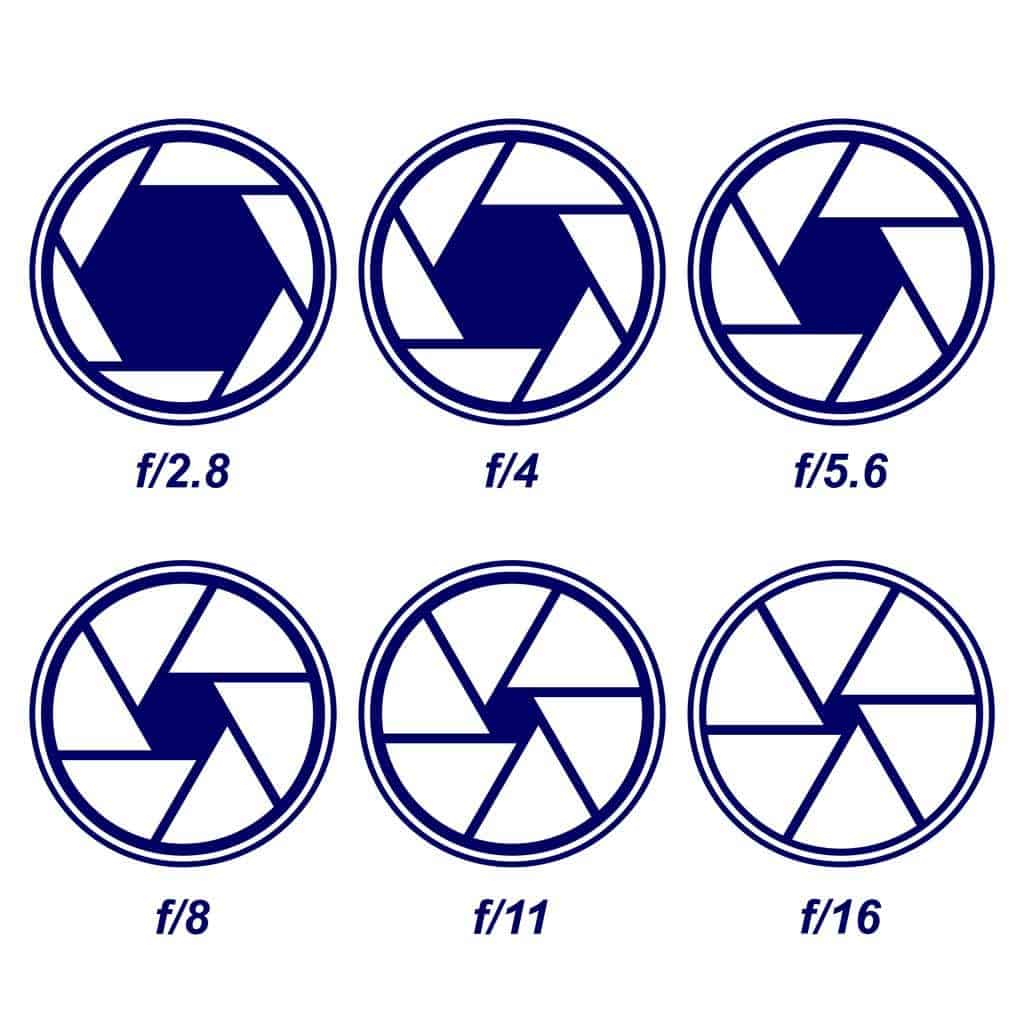
Aperture is measured in f-stops or f stop values, and is identified using numbers such as f/2.8, f/5.6, f/11, etc.
A small f-stop (f/2.8) actually means a large hole, and a big f-stop (f/22) is a small hole.
If it seems backwards, don’t stress – everybody gets confused by this in the beginning, and it’ll become second nature soon enough.
One thing to be aware of is that wide apertures also make certain parts of your pictures that aren’t in focus more blurry (known as ‘bokeh‘) because the large hole results in a shallower depth of field. That’s great for portrait photography.
On the other hand, a narrow aperture has a long depth of field, which means that more objects in your picture will be sharp.
Aperture affects the overall style, depth and creativity of your photo, so it’s worth learning more about.
What is Shutter Speed?
Shutter speed refers to the length time that your camera’s shutter remains open while capturing an image.
Shutter is measured in whole seconds or fractions of a second. For example, 1/100th, 1/2, 5 seconds, etc.
(This isn’t to be confused with frame rate in video work, which is something different.)
The longer the exposure time, the more time light has to burn itself onto your camera’s sensor.
A faster shutter speed will therefore have the opposite effect – not giving much time for light to hit the sensor. Less time equals less light.
Just like aperture, changing your shutter speed will affect the way your image appears other than how exposed it is.
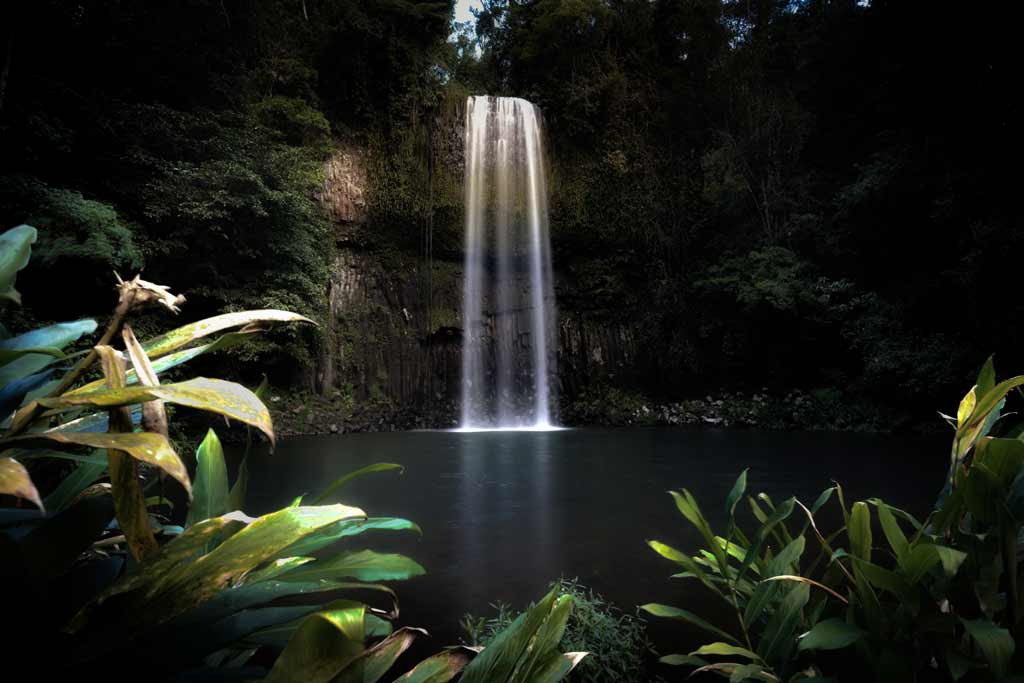
A slow shutter speed brings in motion blur, which is where objects in your picture move during the exposure time, thus becoming blurry.
(An example of this is often seen in waterfall photography)
A fast shutter speeds freezes motion, just like you might want to achieve in sports photography.
What is ISO?
Back in the days of film cameras, ISO was a measure of the film’s sensitivity to light.
A roll of film would come with a fixed ISO value, and photographers would need to select the right film based on shooting conditions.
Today however, we have digital cameras that can change the ISO values directly on the camera’s sensor on-the-fly to suit the photographer’s needs.
ISO usually starts at 100 (but some cameras go down to 50 or lower) and goes up in increments, with higher numbers being more sensitive than lower ones.
What this means is if you select a lower ISO, your sensor won’t have a lot of sensitivity to light.
On the other hand if we select a higher ISO, the digital sensor is very sensitive to light, meaning you don’t need a lot of it in the conditions to appear in the image.
ISO also has its effects on photography, especially when it comes to noise.
A low ISO generally results in a cleaner image with less grain, but needs either a wide-enough aperture or slower shutter speed to compensate for the low sensitivity.
A high ISO, on the other hand, needs less light to produce a similar effect but will result in what’s called digital noise, which appears as grain in the darker parts of the photo.
You need to keep this in mind when determining your correct exposure value.
How to Combine all Three for the Optimum Exposure Value
Now that you know what aperture, shutter speed and ISO are, it’s time to find out how all three work together to get perfectly exposed images.
Understanding the exposure triangle will result in correctly balancing the amount of light that hits the sensor.
Because all three parts of the triangle have an effect on the elements of the exposure, we need to know how and when to change them.
Adjusting Aperture
Let’s start with some general camera settings.
f/8, 1/100sec, ISO400
If you remember the details above, the f number is aperture, 1/100 is the shutter speed, and ISO400 is, well, the ISO.
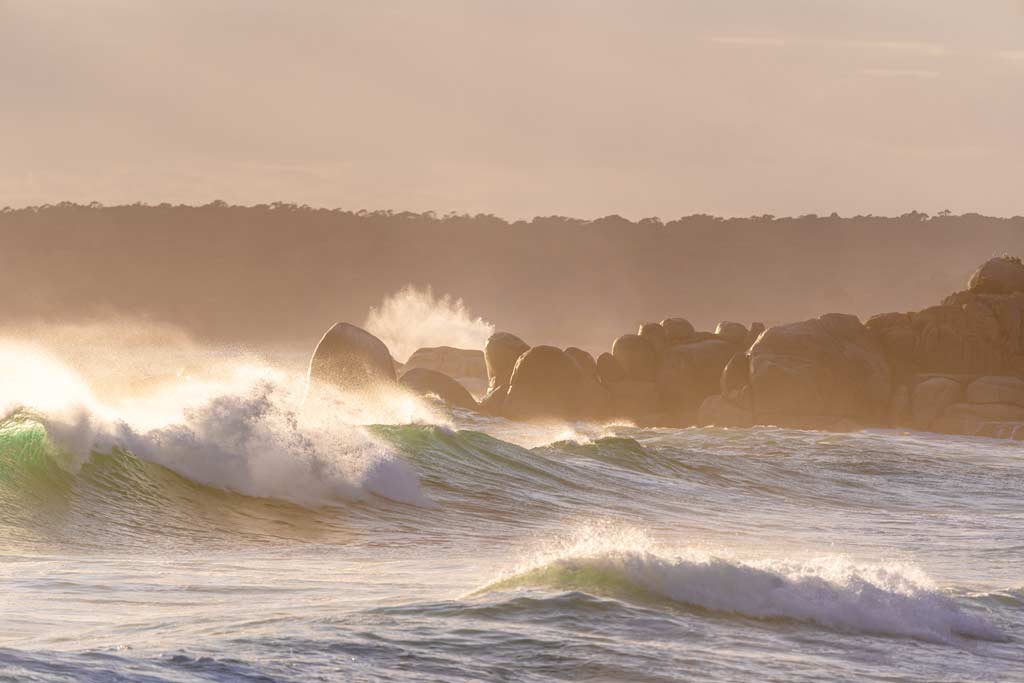
Let’s pretend that we’re taking a photo of a beach at sunset and that the settings above will result in a perfectly exposed photo where there are lots of details in the highlights (bright parts of the image) and shadows (dark parts of the image).
If we leave shutter speed and ISO variables where they are and make the aperture smaller (f/16), the image will become darker because less light is coming in.
If we make the aperture wider (f/4), the image will become brighter, overexposing the photo.
READ MORE: Want to try something different with your creativity? Check out our astrophotography settings guide to help you take pictures of the Milky Way and stars!
Adjusting Shutter Speed
Now let’s take the camera back to f/8 and instead adjust shutter speed.
By lengthening how long the shutter is open there is more time for light to come through the camera lens and hit the sensor, meaning the image will be brighter (and we’ll start to see motion blur in the moving water).
By speeding up the shutter speed the image will become darker because there is less time for light to hit the sensor.
Adjusting ISO
Taking it back to 1/100sec, let’s now play around with the ISO.
Dropping it down to ISO 100 will make the sensor less sensitive, meaning the amount of light coming through the aperture and the length of time dictated by the shutter speed won’t be enough to properly expose the photo.
Turn it up to ISO1600 and it has the opposite effect. The sensor is much more sensitive, so the shutter speed and aperture is now letting in way more light than needed, therefore making the exposure value high (and introducing noise).
So as you can see, by changing one element in the exposure triangle (shutter speed, aperture or ISO), it changes another and so on – thereby impacting how your photos look.
The best way to get comfortable with how these settings work together is through experimentation.
The Secret to Perfect Exposure Triangle Photography
You’ve almost made it to the end of our blog post, and know how different variables like f stop numbers, shutter speeds and high ISO affect each other.
It’s starting to make sense that adjusting your lens opening (aperture) doesn’t just change depth of field, it also changes the impact of low light in the scene.
You are already a more knowledgable photographer than 95% of people! But why stop there?
Now we’re going to let you in on the secret to truly understanding the exposure triangle in digital photography and getting perfect images every single time you push the shutter button.
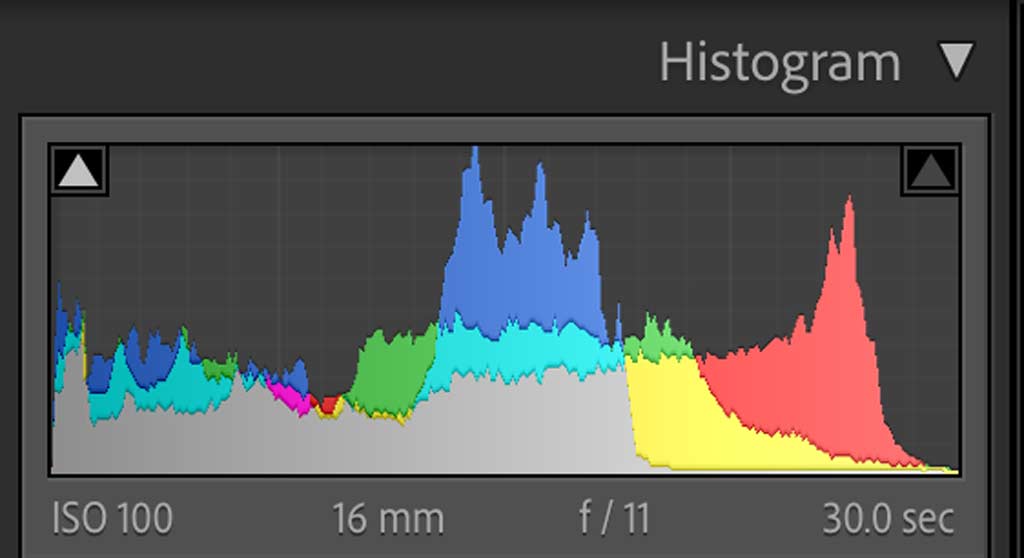
Meet the Histogram!
Say hello to the in-built camera tool that will help you dial in your exposure triangle settings every single time – the histogram!
The histogram is a digital graph that shows the distribution of light tones in an image, with highlights (whites) on the right hand side and shadows (blacks) on the left hand other.
You might be wondering why this is useful. That’s because when you’re taking a photo, it’s difficult to see whether your image is correctly exposed or not. The histogram will help with this
It’s an invaluable tool because it will show you a more accurate representation of the image closer to what the human eye sees, rather than relying on the low-resolution screen on the back of the camera.
When you take an overexposed image, there will be a lot of whites in the scene and the histogram graph will move across to the right hand side.
When you take an underexposed image, the histogram will move across to the left.
It sounds more complicated than it is, but as they say, a picture is worth a thousand words. Here’s a histogram so you can see what we’re talking about:
Most modern digital cameras can be set so that the histogram displays either when you’re looking through the viewfinder or on the back of the LCD screen in real-time, or afterwards when you preview the image you just snapped.
Learn to read the histogram, and make sure you refer to it all the time, and your success rate at getting the right exposure triangle settings will increase exponentially.
One More Bonus Secret – Aperture Priority Mode
Because we’re feeling generous, we’re going to give you one more secret to help you understand the exposure triangle in real time.
Your camera has a number of different photo modes, such as automatic, program, manual, etc. What they all do is the subject of another blog post, but let’s continue anyway.
If you switch your camera over to ‘Aperture Priority Mode’, you are now taking complete control over the aperture f stop value, while allowing your camera to automatically select the shutter speed and ISO to ensure you get a correctly exposed image!
As an example, switch over to aperture priority, lock in something like f/5.6 (a mid-range depth of field), then point your camera lens somewhere that is very bright, then somewhere that is very dark.
Your camera will analyse the amount of light hitting the image sensor and will automatically change the ISO and shutter speed to reflect current conditions.
If you’re still not 100% comfortable shooting in full manual mode, using aperture priority will be a great introduction into adding your own creativity and style to your photography, while letting your camera do most of the work in getting the exposure triangle right.
Conclusion
We hope that this article has helped you to better understand the three variables that come into play with exposure.
The exposure triangle is a complex topic, but with practice, you will be well on your way to nailing your creative photography style every single time.

