
Everything you need to know about hiking the Overland Track in Tasmania, one of the top 10 multi-day hikes in all of Australia!
No other multi-day trek in Australia has the fame, reputation and global attraction that the Overland Track holds over intrepid hikers.
Stretching for 65km through the hearts of the fabled Cradle Mountain and Lake St Clair National Park, this phenomenal trekking adventure navigates alpine meadows, jagged peaks, temperate rainforests and sprawling valleys in one unbroken journey.
High in personal reward and limited in visitor numbers makes the Overland Track a bucket list experience that often changes people through self-reflection and determination.
Under the careful control of Parks and Wildlife Service Tasmania, the trail has been upgraded in recent years to include elevated boardwalks over the most environmentally-sensitive areas and modern cabins for warmth and shelter.
While it’s not on the same level as the Three Capes Track in terms of luxury, it certainly isn’t basic.
Most people trek the entire Overland Track in about 6 days, but it’s not uncommon to shorten or lengthen the time on the trail depending on your schedule and how many side trips you want to see.
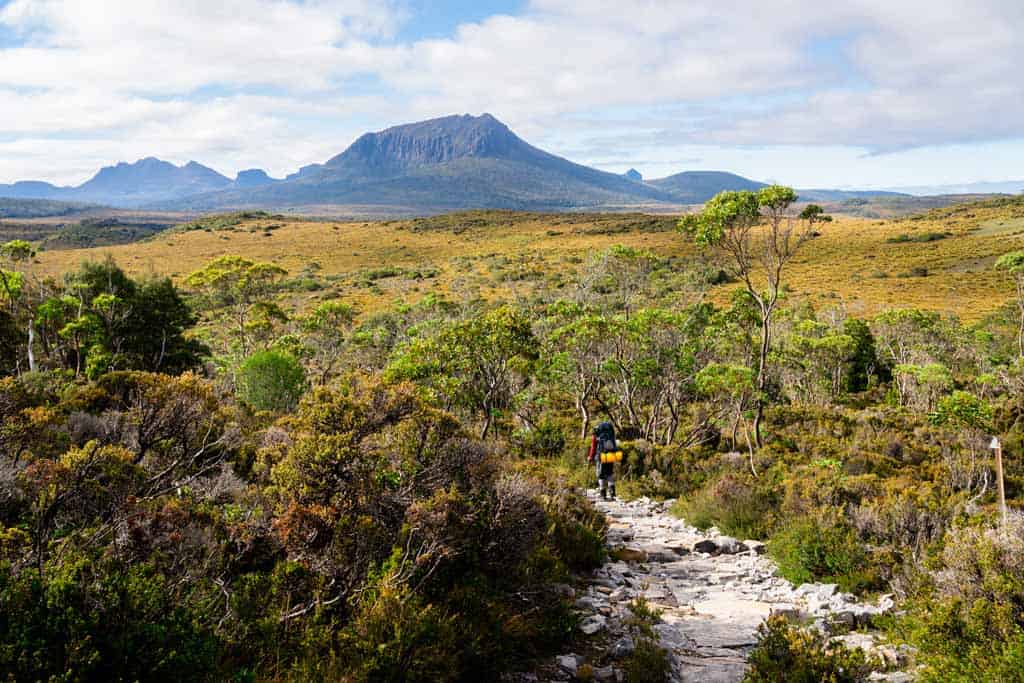
Table of Contents
- The Ultimate Overland Track Hiking Guide
- The Overland Track Itineraries – 4-10 Days on Australia’s Epic Multi-Day Hike
- The Overland Track Experience – Day by Day Sections and Hikes on the Side
- Checking In for the Hike
- Section 1 – Ronny Creek to Waterfall Valley Hut
- Section 2 – Waterfall Valley Hut to Lake Windermere Hut
- Section 3 – Lake Windermere Hut to Pelion Hut
- Section 4 – Pelion Hut to Kia Ora Hut
- Section 5 – Kia Ora Hut to Windy Ridge (Bert Nicholls Hut)
- Section 6 – Windy Ridge (Bert Nicholls Hut) to Narcissus Hut
- Section 7 – Narcissus Hut to Cynthia Bay
- Optional Section – Pine Valley
- Overland Track Side Hikes
- What to Expect on the Overland Track Trip
- Staying Safe on the Overland Track
- Packing List for the Overland Track
- Conclusion
The Ultimate Overland Track Hiking Guide
We spent 8 days on Tasmania’s Overland Track and managed to fit in 113km of beautiful hiking, including many of the side excursions to Cradle Mountain and more.
Cradle Mountain National Park truly is one of the best places to visit in Tasmania, and the most rewarding way to experience it is by spending a few weeks out in the wilderness.
Overland Track General Information
Here’s some basic information about the Overland Track for you to know.
- Location: Cradle Mountain National Park and Lake St Clair National Park
- Length: 65km minimum
- Time Required: 6 days on average
- Type: One-way hiking track – North to south in summer, either direction in winter
- Booking Required: October 1 to May 31
- Overland Track Permit Cost: $285
- Accommodation: Huts or camping
- Guided or Independent: Both options are available at different prices. We did independent, or you can consider the Tasmanian Walking Company.
- Northern Terminus: Ronny Creek
- Southern Terminus: Lake St Clair
- Elevation Gain: 1461m
- Elevation Loss: 1573m
- Highest point: The plateau between Marions Lookout and Kitchen Hut at 1250m
- Lowest point: Forth River crossing at 720m
- Difficulty: Moderate
- Notes: Outside of the booking required dates above, you can hike the track both ways. This is in winter.
Overland Track Booking
If you’re planning on hiking the Overland Track, you need to pre-book it. During the peak season between October 1 and May 31 it often books out months in advance and requires an Overland Track permit to be purchased.
During the off-season, you still need to reserve your spot on the Overland Track, but the permit is free.
When you book your Overland Track, you reserve your start date, and that’s it. You can stay on the track as long as you want, and there’s no time limit to exit the trail. You just can’t go backwards at any point.
Online Reservation
The Overland Track booking is pretty straightforward, and can be done directly online with Tasmania Parks and Wildlife Service using their booking system.
Here is the website to book your Overland Track. Just find an available date and go through the easy-to-follow form.
Once you have booked your Overland Track permit you will receive an email confirming your position. Parks and Wildlife Service Tasmania will also send you an information package about Overland Track and a packing list.
Remember the price is $285 per person. So if you end up on another website and see the price is in the thousands, then you may be looking at a private tour company(for a much, much higher price). If you have the money, booking with a private tour company may be worth it. But if you’re able, we would recommend hiking on your own rather than with a tour company.
If something happens and you can not go on your date you have selected, you can change your Overland Track hike dates to any point in the future if there is availability for no charge.
If you can’t walk the Overland Track and have to cancel all together, there is a cancelation fee.
Whats Included in the Overland Track Booking Fee?
if you’re wondering what’s included in the $285 booking fee, the answer is that it just includes your pass to be on the Overland Track and access the huts.
It does not include transport, food, guides, equipment or anything else.
I Have to Buy a National Parks Pass Too?
Yes.
The Overland Track permit doesn’t include your National Parks pass (which is ridiculous if you ask us, but anyway…), so you have to purchase this separately.
There are a few different options, but if you’re planning on spending a bit of time in Tasmania before or after your hike, the best value is the Holiday Pass for all parks.
The National Parks Pass lasts for 2 months, gives you access to every national park in Tasmania, and costs $40 per person or $80 per car (including up to 8 people).
You can buy the National Parks Pass directly from the Cradle Mountain Visitor Centre or online here.

How Much Does the Overland Track Cost?
The Overland Track cost is actually quite expensive by the time you add up all of the expenses involved.
The permit itself costs $285, but it does not stop there.
You also have to consider transport to and from the National Parks, camping and clothing equipment (either hire or buy, if you don’t already have any), and of course enough nutritious food to last you throughout the entire experience, plus a bit extra as a precaution.
Here’s a rough idea of what it can cost per person to hike along the Overland Track:
- Permit: $285
- National Park Pass: $40
- Bus Transport: $155
- Food: $20 per day
- Camping gear hire: $50 per day
- Personal Location Beacon (optional): $40
As you can see, it’s not a cheap endeavour, especially if you have to hire your own gear.
We would say that if you have all of your camping gear, can organise your own transport, and want to eat as cheap as possible (not recommended), the lowest you could get away with is around $385-450 for the entire trek.
On average, budget around $650 per person for the Overland Track.
Overland Track Transport – Getting There and Around
There are a few ways to get to the Overland Track, and they can be quite expensive.
Because the track starts in the north at Cradle Mountain Visitor Centre, and finishes in the south at Lake St Clair Visitor Centre, you need to figure out how you can start and finish in two separate locations.
Most people book a shuttle bus to and from Launceston or Hobart, unless they have their own vehicles.
Bus
There’s no public transport to Cradle Mountain Visitor Centre or Lake St Clair Visitor Centre, and no regular transport between the two places, so unless you have two cars you can park at each end, you’ll have to book a private bus.
Two companies do the transport to the Overland Track. They are Overland Track Transport and Cradle Mountain Coaches.
All bus routes need to be pre-booked prior to heading out on your track. This means you need to select how many days you plan to be on the Overland Track and choose an exit date.
Here are their prices (current at time of publishing):
- Launceston to Cradle Mountain: $77.50
- Hobart to Cradle Mountain: $87.50
- Lake St Clair to Launceston: $77.50
- Lake St Clair to Hobart: $87.50
- Lake St Clair to Cradle Mountain: $650 (total)
All prices are per person, one way and take about 3 hours. The exception is the bus from Lake St Clair to Cradle Mountain, which is $650 total, split between however many people book it, with a $100 minimum per person (even if there are more than 7 people).
As you can see, the Cradle Mountain bus companies have a monopoly and aren’t afraid to charge huge amounts of money for transport.
If you have friends doing the Overland Track with you and you have access to your own cars, it’s much better to park one at each end and shuttle between the two.
Taxi/Uber
It is possible to book a taxi or Uber to get you from one end of the Overland Track to the other, but it may be just as expensive and obviously not as reliable.
Hitchhiking
If you’re feeling up to it, you can try hitchhiking. Keep in mind though that you may be waiting hours (or days) to get a ride.
Driving Your Own Car
By far the best, and most economical way, to get to the Overland Track is to drive your own car.
There are two options: Park at Cradle Mountain Visitor Centre, then book a bus back from Lake St Clair on the last day of the hike, or park at Lake St Clair and book a bus to Cradle Mountain on the first day of your hike.
Parking is free at both ends, so you only have to worry about the price of the bus.
If we had to recommend one option, we’d say park your car at Lake St Clair and book an early bus to Cradle Mountain on the first day of your hike. That way you can finish the Overland Track whenever you want and aren’t stressed about having to time your last day with whenever you told the bus company.
If you’re planning on going elsewhere in the state, check out our 2 weeks in Tasmania road trip itinerary.
Multiple Vehicles
If you’re lucky enough to have access to two vehicles, park one at each end of the Overland Track and do shuttle runs.
You’ll save a lot of money doing it this way!
Lake St Clair Ferry
While the Overland Track officially ends at the Lake St Clair Visitors Centre, many hikers choose to finish at Narcissus Hut, at the northern end of Lake St Clair.
This cuts out the last 17km (and a day) of hiking along the edge of Lake St Clair, which some people consider to be the least interesting part of the entire Overland Track.
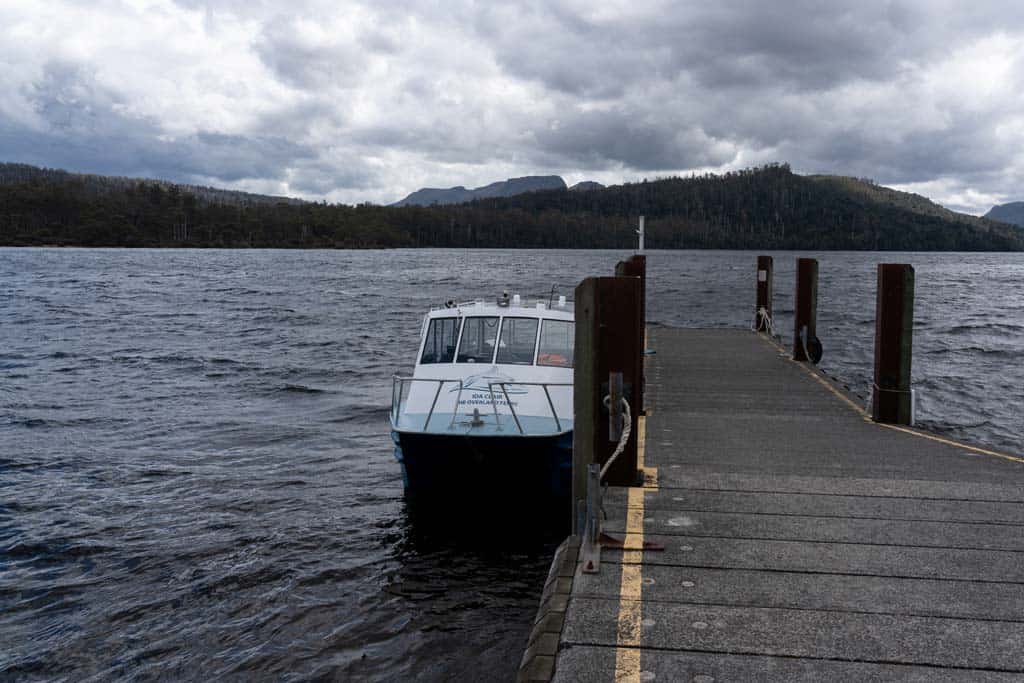
From Narcissus Hut you can jump on the ferry to go back to the Lake St Clair Lodge, for $55 per person.
The ferry picks passengers up from Narcissus Hut at 9:30am, 1pm and 3:30pm, and needs to be pre-booked.
It’s pretty expensive for a 20-minute ferry ride, but on a clear day the views are gorgeous, and your body may be pretty thankful at not having to navigate the last 17km of mud and tree roots.
If you can walk the Overland Track the rest of the way though, we would recommend this.
When you get to Narcisuss there is a phone with a direct line to the Lodge. When you arrive at the hut give them a call to confirm you are there (or perhaps check if there’s space if you haven’t already booked).
If you have pre-booked the ferry but decide you’d rather hike out instead, give them a call to cancel and they will issue you a refund.
The Overland Track Itineraries – 4-10 Days on Australia’s Epic Multi-Day Hike
As one of the top things to do in Tasmania, you can spend as much time as you like out here.
There are a number of different Overland Track walk itineraries you can choose from, based on the length of time you have and how fit you are.
Once you start the Overland Track walk from Cradle Mountain to Lake St Clair you can go as slow or as fast as you want there is no time limit to finish. Make the most of the opportunity to spend as long as possible in this glorious UNESCO World Heritage Area including Cradle Mountain.
How Long to Spend on the Overland Track?
We have suggested a few Overland Track itineraries below to suit all hikers and people who would like to take their time and enjoy the outdoors.
These are:
- 4 days (very fast, no side trips, for fit hikers only)
- 6 days (intermediate, many side trips)
- 8 days (intermediate, all side trips, includes rest day and walk to Lake St Clair)
- 10 days (advanced, all side trips, 2 nights in Pine Valley, walk out to Lake St Clair)
These are typical itineraries and schedules for people based on how much time they have, fitness levels and weather conditions on the Overland Track.
4 days Itinerary for the Overland Track
- Day 1: Ronny Creek next to Cradle Mountain to Lake Windermere – 18.5km
- Day 2: Lake Windermere to Pelion Hut – 16.8km
- Day 3: Pelion Hut to Bert Nicols Hut – 18.2km
- Day 4: Bert Nicols Hut to Lake St Clair – 9km to Narcissus, 26.5km to Cynthia Bay
6-Day Overland Track Itinerary (The Most Popular)
Most people choose to complete the self guided Overland Track in 6 days, as that is what Parks Tasmania recommends.
It offers ample time to see most of the highlights along the track like Cradle Mountain, including a few side excursions if you’re feeling fit, without being too rushed.
- Day 1: Ronny Creek to Waterfall Valley Hut with side trip to Cradle Mountain or Barn Bluff – 10.7km
- Day 2: Waterfall Valley Hut to Lake Windermere Hut with side trip to Lake Will – 7.8km
- Day 3: Lake Windermere Hut to Pelion Hut with side trip to Old Pelion – 16.8km
- Day 4: Pelion Hut to Kia Ora Hut with side trip to Mt Ossa or Pelion East – 8.6km
- Day 5: Kia Ora Hut to Windy Ridge (Bert Nichols Hut) with side hikes to D’Alton and Fergusson Falls and Hartnett Falls – 9.6km
- Day 6: Windy Ridge (Bert Nichols Hut) to Narcissus Hut then ferry – 9km
8 days Itinerary for the Overland Track
Have a bit more time for the self guided Cradle Mountain Lake St Clair adventure? You’ll be able to complete every part of Tasmania’s Overland Track walk.
- Day 1: Ronny Creek to Waterfall Valley Hut via Cradle Mountain summit/Dove Lake – 10.7km
- Day 2: Waterfall Valley Hut to Lake Windermere Hut via Barn Bluff and Lake Will – 7.8km
- Day 3: Lake Windermere Hut to Pelion Hut via Old Pelion Hut – 16.8km
- Day 4: Rest Day at Pelion Hut with side trip to Oakleigh Mountain Summit – 8km
- Day 5: Pelion Hut to Kia Ora Hut via Mount Ossa or Pelion East – 8.6km
- Day 6: Kia Ora Hut to Windy Ridge (Bert Nicholls Hut) via the waterfalls – 9.6km
- Day 7: Windy Ridge (Bert Nicholls Hut) to Narcissus Hut 9km
- Day 8: Narcissus Hut to Cynthia Bay (via Lakeside Track) 17.5km
This amount of days with all the side hikes is perfect. You are not rushing and you can see everything you want on the Overland Track, including hiking to the summit of Cradle Mountain.
You can also kick things up a notch and charge into Pine Valley for a night like we did if you’re feeling up to the challenge.
10-Day Itinerary for the Overland Track – The Ultimate Trip
If you have 10 days up your sleeve you’ll see just about everything there is available as part of the Overland Track, including all the side missions, Cradle Mountain summit, and a few nights in the Pine Valley, which isn’t technically part of the Overland Track but still worth visiting.
- Day 1: Ronny Creek to Waterfall Valley Hut via Cradle Mountain Summit/Dove Lake – 10.7km
- Day 2: Waterfall Valley Hut to Lake Windermere Hut via Barn Bluff Summit and Lake Will – 7.8km
- Day 3: Lake Windermere Hut to Pelion Hut via Old Pelion Hut – 16.8km
- Day 4: Rest Day at Pelion Hut with side trip to Oakleigh Mountain Summit – 8km
- Day 5: Pelion Hut to Kia Ora Hut via Mount Ossa or Pelion East – 8.6km
- Day 6: Kia Ora Hut to Windy Ridge (Bert Nichols Hut) via waterfalls – 9.6km
- Day 7: Windy Ridge (Bert Nichols Hut) to Pine Valley Hut with side trip to Acropolis Summit – 8.9km
- Day 8 : Rest Day in Pine Valley with side trip to Labyrinth – 6km
- Day 9: Pine Valley Hut to Echo Point Hut – 14.6km
- Day 10: Echo Point Hut to Cynthia Bay (via Lakeside Track) – 10.1km
The Overland Track Experience – Day by Day Sections and Hikes on the Side
Now that you know the basic information like how to get there and itineraries to do, let’s dive into the whole Overland Track experience and what it’s like day by day.
We’ll share with you what you can expect on the Cradle Mountain Lake St Clair National Park trek, some tips and highlights of this Wilderness World Heritage Area.
Let’s start from the first moment when you check in for the Overland Track at Cradle Mountain!
Checking In for the Hike
When you arrive at the Cradle Mountain Visitor Centre, the check in desk is inside the front door on the right.
Doors open here at 8am, with the first safety briefing at 8:30am if you’re self guided in the national parks.
You will have to fill out a few forms before you start the Overland Track. One form is to say you have the right equipment with you and another is your registration form.
After you have filled out these, you will go into a room and a presentation will be given. This is to give you some more information about the hike, prepare you for the worst and for your questions to be answered. The mountains are not to be messed with so being prepared is crucial.
After the presentation is finished you will receive your Overland Track pass with your name on it to attached to your backpack. If you would like, you can weigh your bag on the scales there.
Now you are ready to hop on the bus and drive the 20 minutes to the start of the Overland Track.
Section 1 – Ronny Creek to Waterfall Valley Hut
- Distance: 10.7km
- Time: 5 hours
- Side Trips: Cradle Mountain Summit and Barn Bluff
The first day just so happens to have the highest elevation gain, so make sure you’re ready!
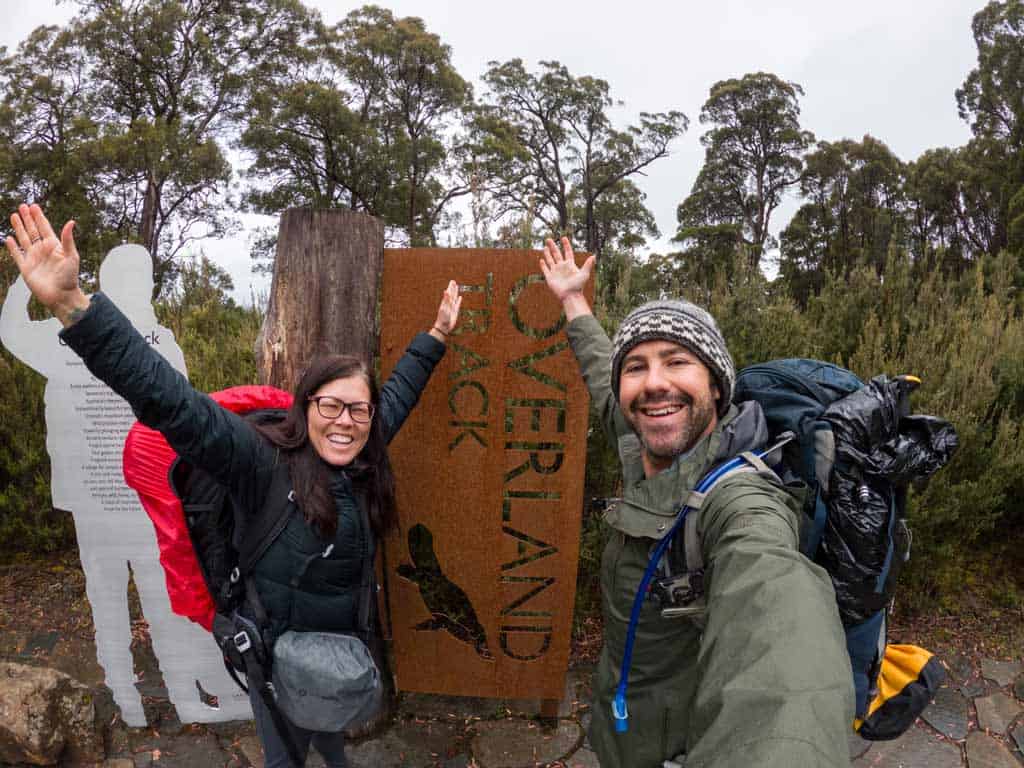
The bus will drop you off at Ronny Creek, the official start of the Overland Track in Cradle Mountain National Park. You can get your photo taken with the famous sign at Ronny Creek Cradle Mountain.
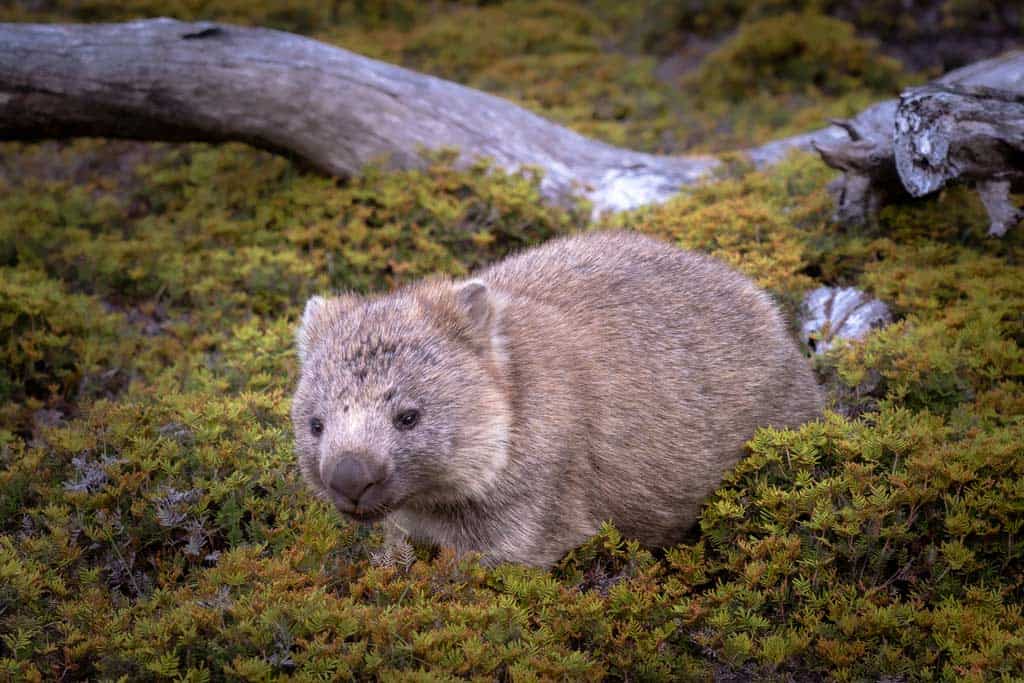
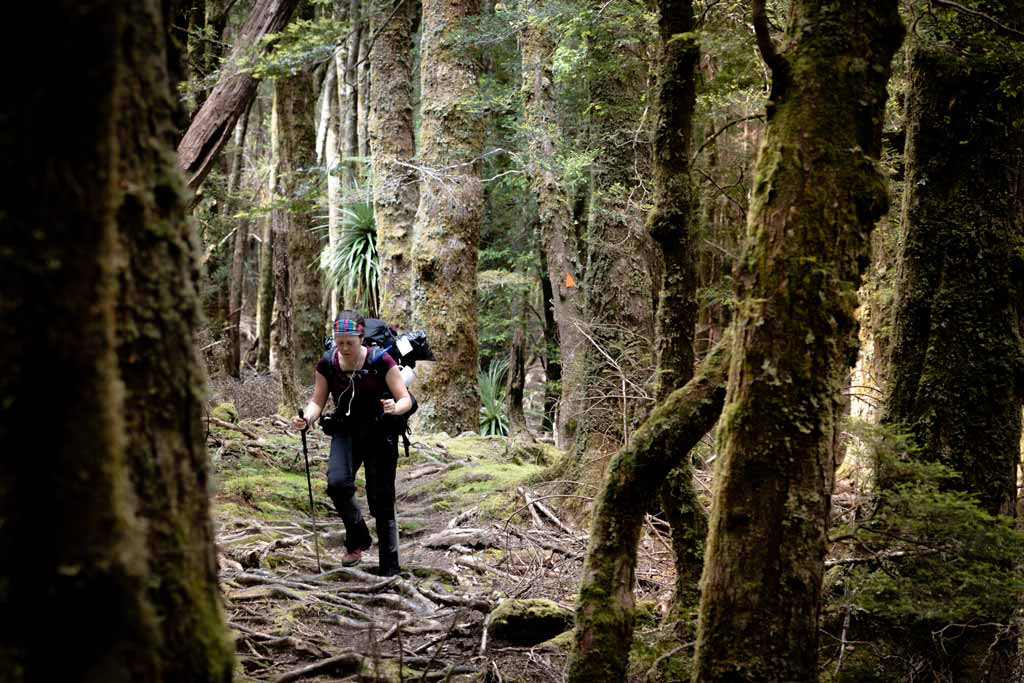
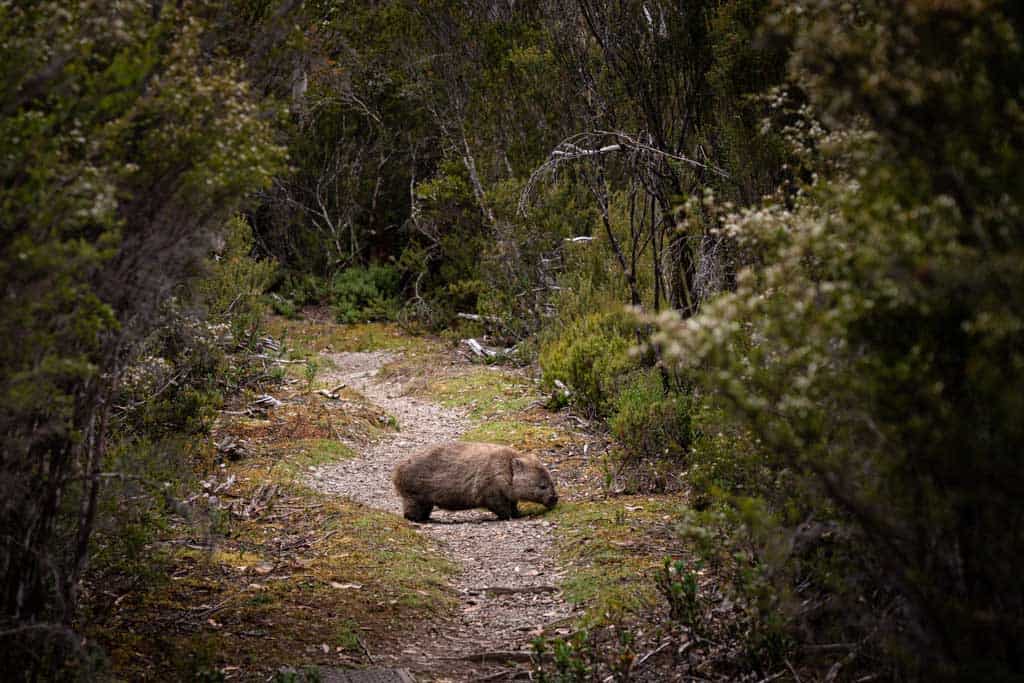
You start off on boardwalks from Ronny Creek, following the public track towards Cradle Mountain, and twisting through buttongrass plains (keep an eye out for wombats).
Soon enough you start to climb towards the Cradle Mountain peaks above, with the trail steadily getting steeper and more difficult. Crater Lake appears on your right with the shelter being a perfect spot to grab a pic.
If the weather is hot enough you can even go for a swim here!
As the valley opens up below, you’ll start to be rewarded with breathtaking scenery of Dove Lake right before a near-scramble challenges you on the stretch towards Marion’s Lookout.
With the aid of chains to hold you to the mountain, crawl your way up and be greeted with views over Dove Lake and the sprawling plains of Cradle Mountain National Park.
Dove Lake is another gorgeous spot in Tasmania, but you won’t want to linger too long as there is lots more to see.
As you leave the vistas over Dove Lake and reach the alpine plateau you’ll pass a poor-weather shelter and then the track towards the summit of Cradle Mountain.
If the weather and forecast is clear and you have ample time, tackle the Cradle Mountain summit before continuing towards Waterfall Valley.
You’ll navigate a mix of single track and boardwalk, and when you see the fork to Barn Bluff continue straight (you’ll backtrack to do this tomorrow, unless you have lots of time and energy today).
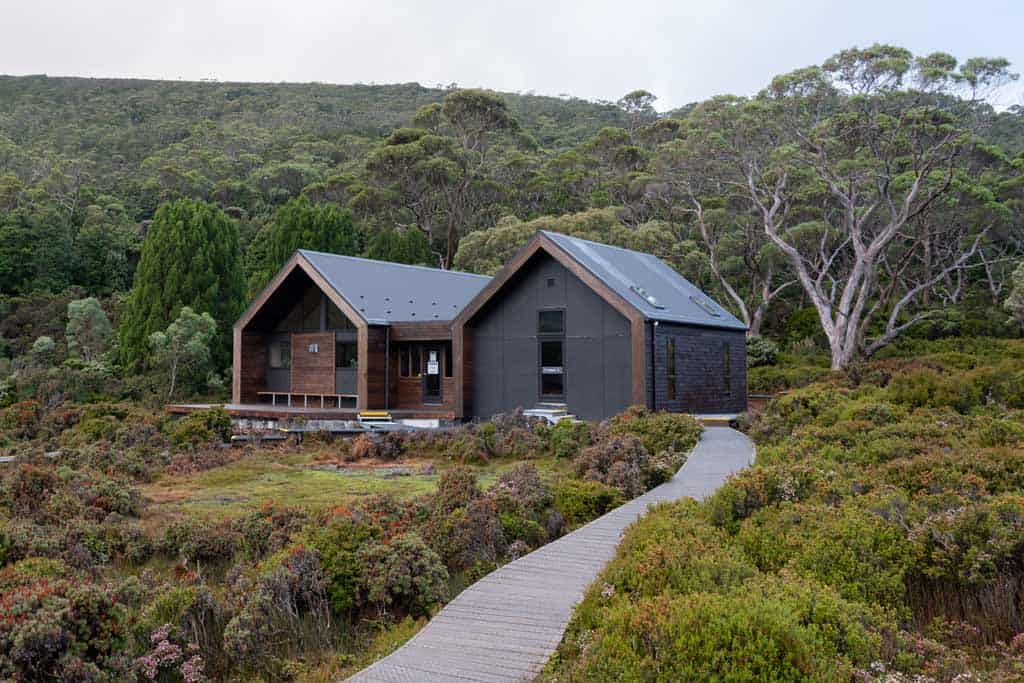
The trail heads downhill quite steeply, so take it easy on your knees before eventually landing at the newest hut on the Overland Track, Waterfall Valley Hut.

Section 2 – Waterfall Valley Hut to Lake Windermere Hut
- Distance: 7.8km
- Time: 3 hours
- Side Hikes: Barn Bluff and Lake Will
Today is quite a short day, so you have a few options. Either take your time on the way to the hut, or backtrack and tackle Barn Bluff (weather permitting).
If the weather is good and you didn’t do it yesterday, leave your heavy pack at the hut and head back up the hill towards Cradle Mountain. After 30 minutes or so you should hit the turn off to Barn Bluff.
Scramble your way to the summit of this spectacular peak (it is quite challenging), snap a selfie, take in the views, then make your back to the hut. Collect your pack and onwards you go towards Windermere.
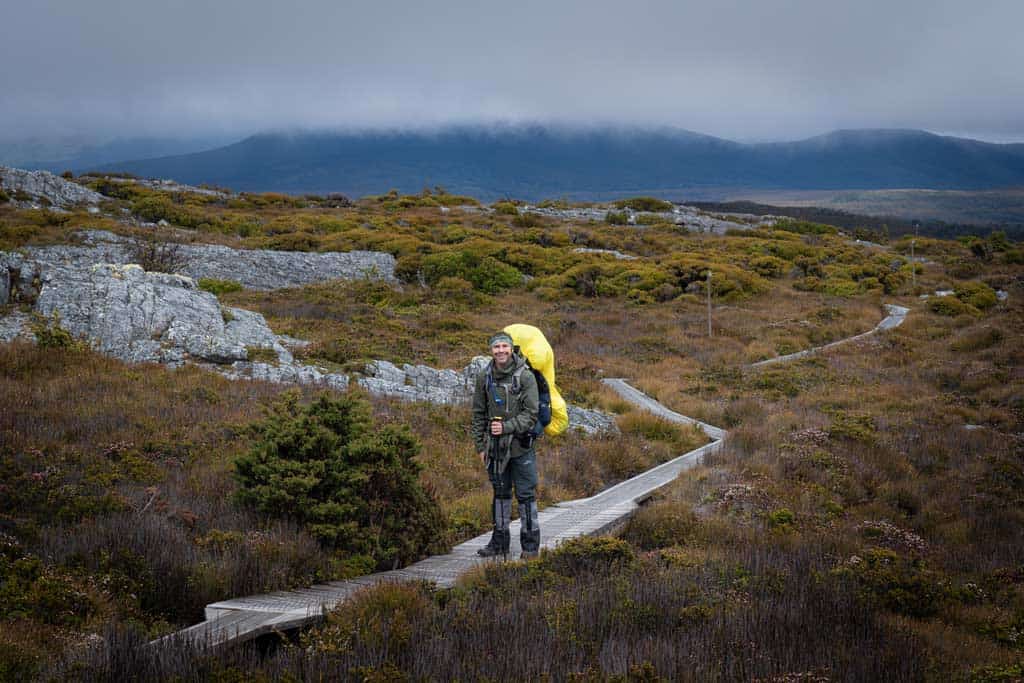
The trail is fairly flat and easy on the way, and the landscape takes you through stunted forests and huge button grass plains.
You’ll reach the turnoff to Lake Will with a large platform where you can leave your heavy pack.
It’s only a short walk out to Lake Will (take lunch with you if it’s a nice day, it’s a lovely spot), then come back to pick your pack up and hike the rest of the way to the hut.
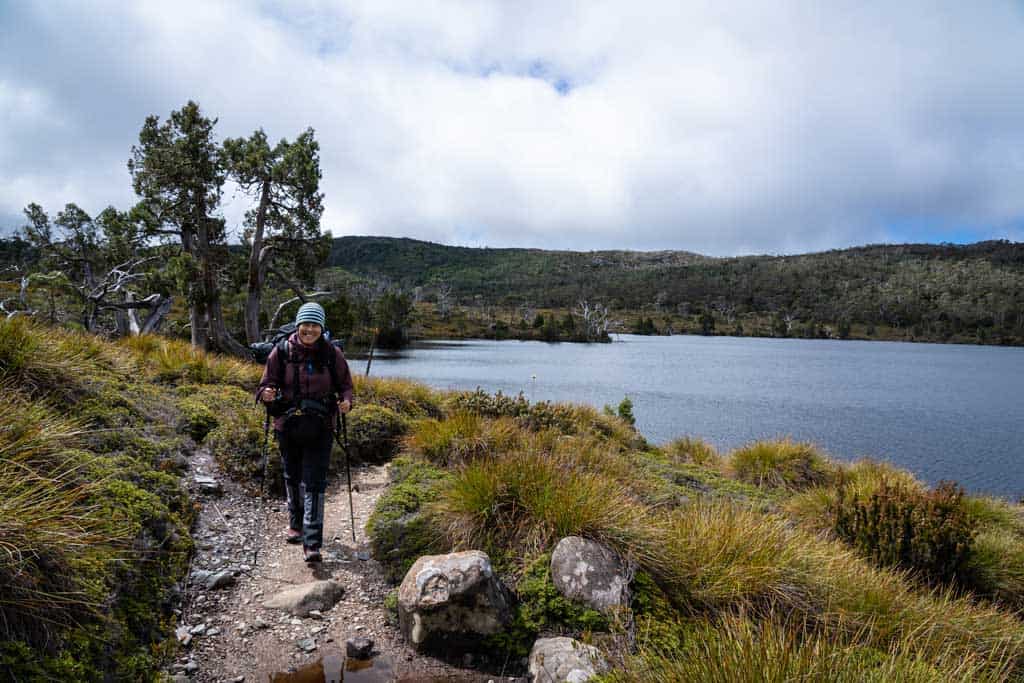
You’ll hit the shore of Lake Windermere with gorgeous views all around, then soon enough you’ll arrive at the hut.
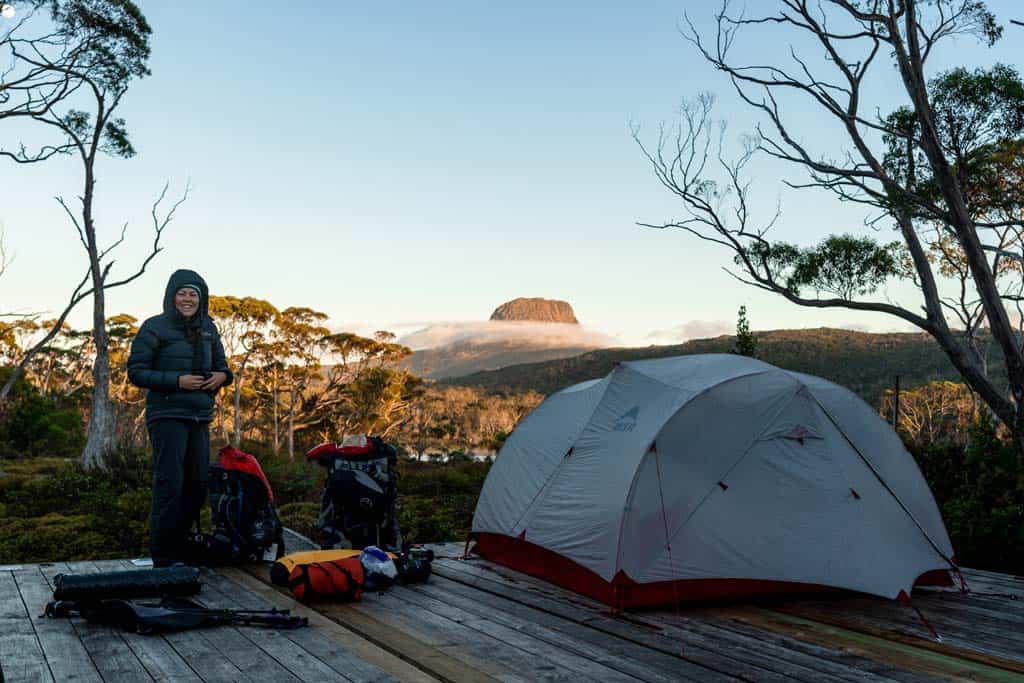
The hut is quite small, so we chose to camp on the platforms. Hot tip – walk past the toilet block and you’ll find some platforms with views all the way to Barn Bluff!
Section 3 – Lake Windermere Hut to Pelion Hut
- Distance: 16.8km
- Time: 8 hours
- Side Hikes: Old Pelion Hut
Today is the longest hiking day on the entire Overland Track, so make sure you’ve had a big breakfast and leave early.
It’s also the most spectacular in terms of views though, so the effort is absolutely worth it.
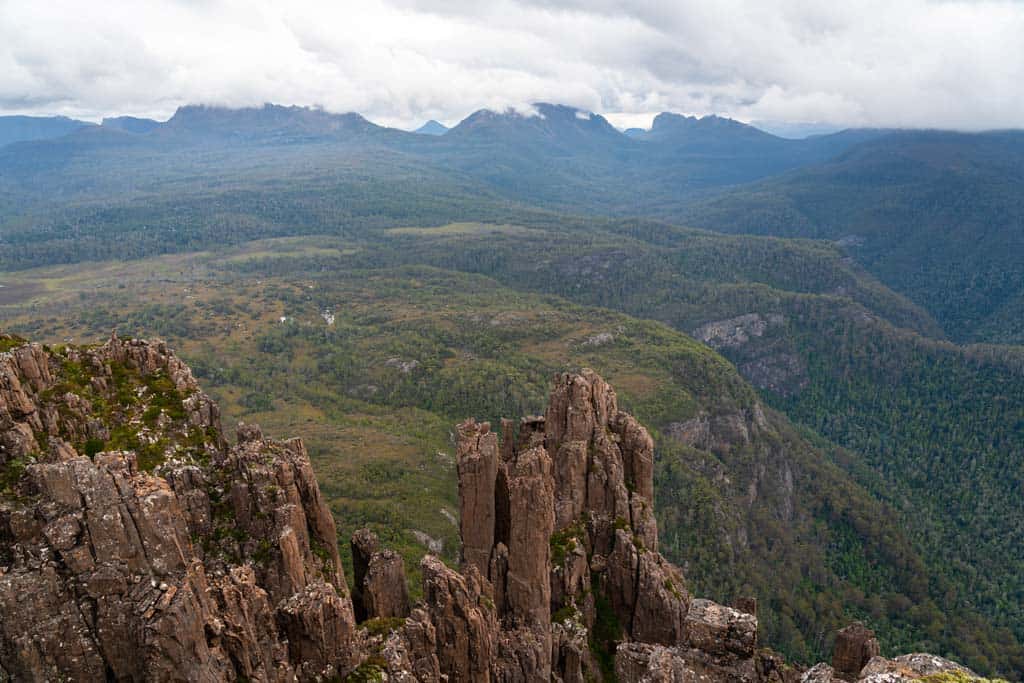
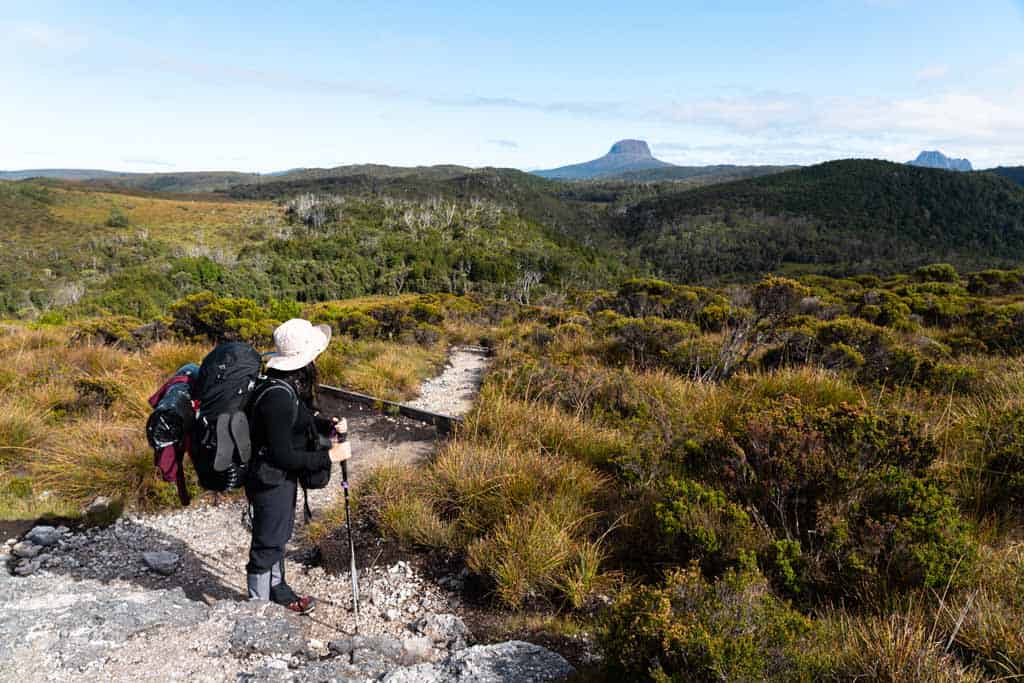
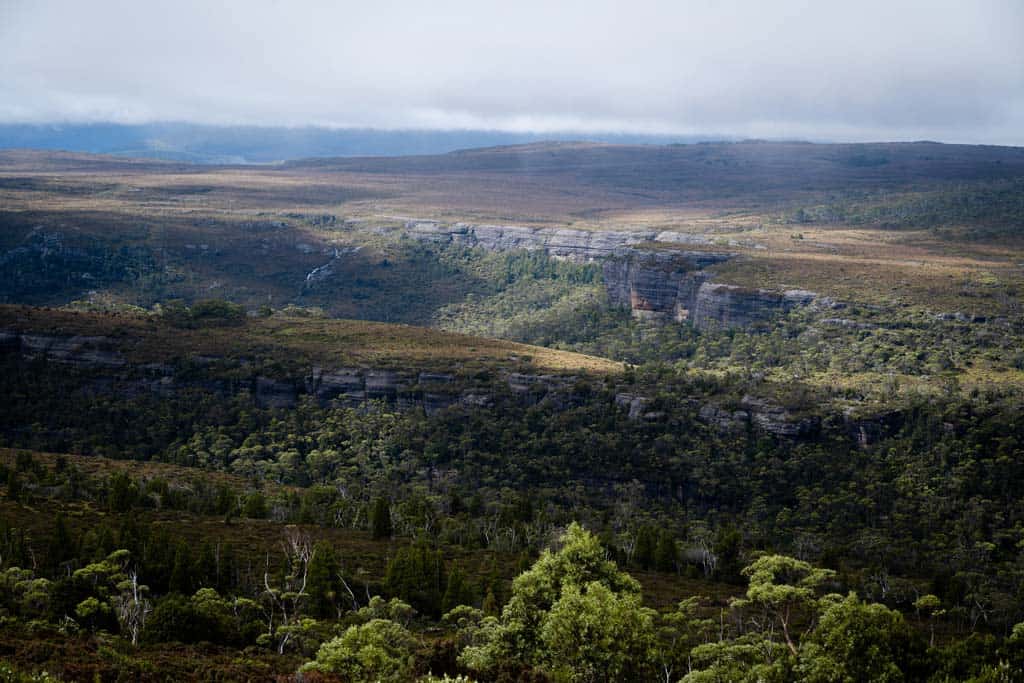
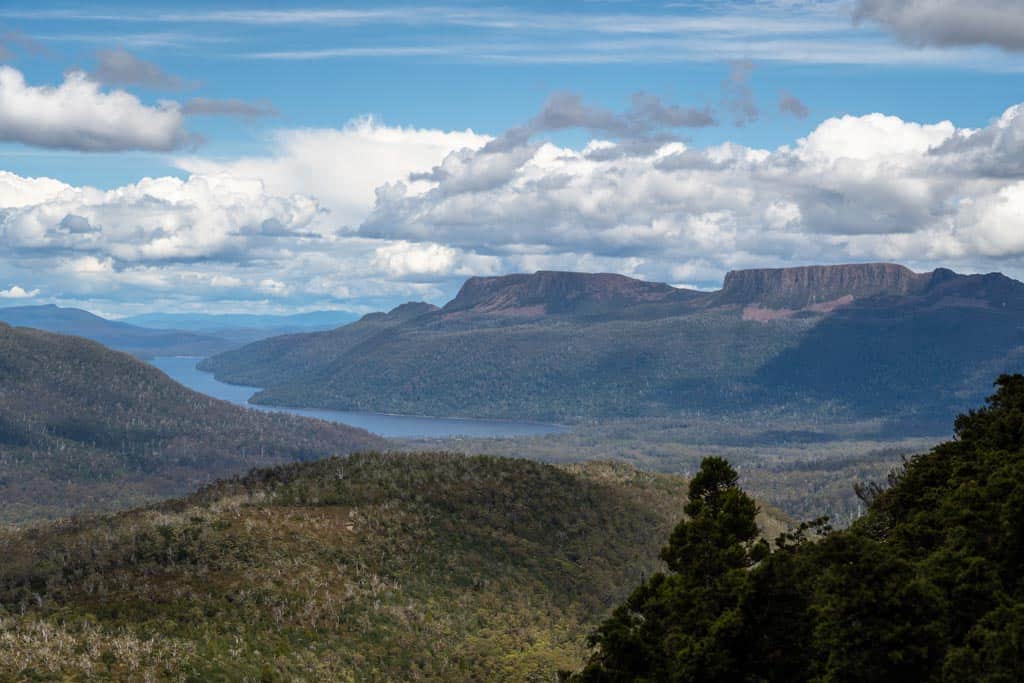
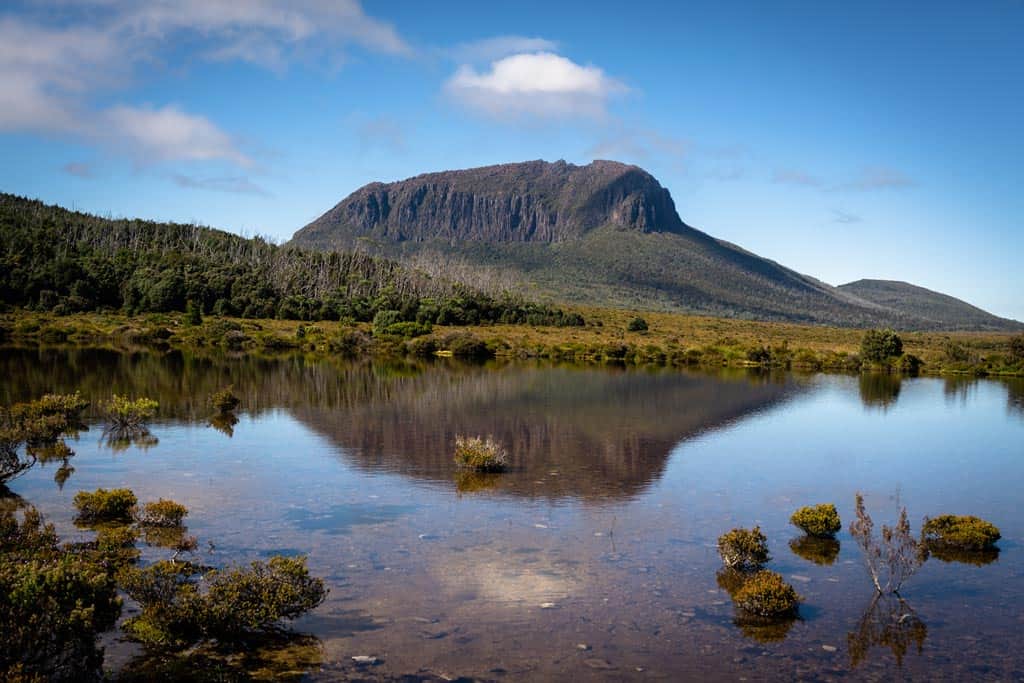
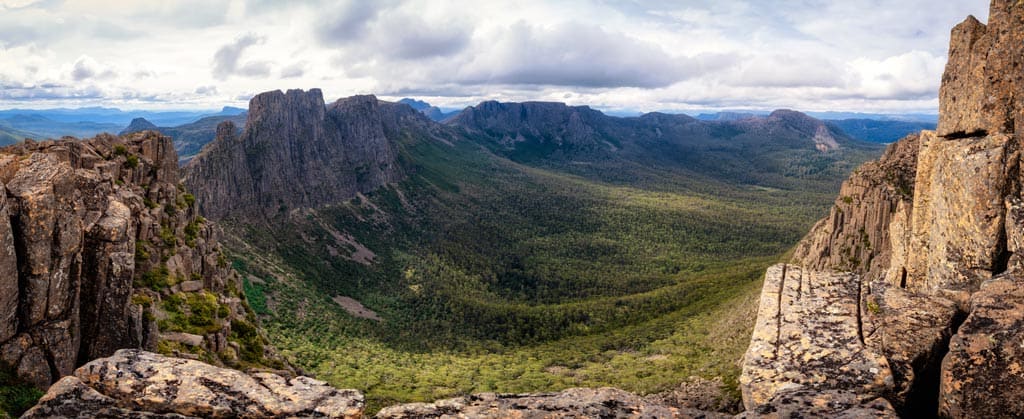
You hike high on the plateau, and on a clear day you’ll be surrounded by the largest peaks and dolerite spires of the Cradle Mountain National Park, including Barn Bluff, Pelion East, Pelion West and Mount Ossa.
Take the little side trails that lead to the edge of the valley for the last open views (great spots for a snack) before you enter into the forest.
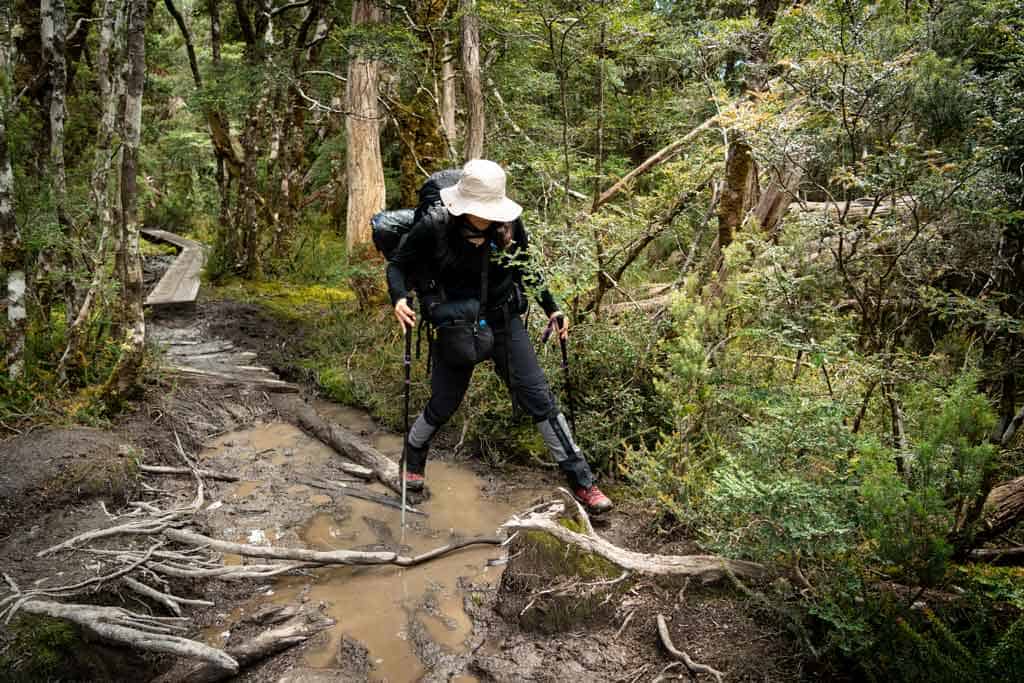
The trail gets quite difficult from here on out, mainly due to the tree roots that you’ll be stepping over, and deep mud if you’ve been unlucky enough to receive heavy rain.
It’s beautiful and quiet through the forest, so make sure you take moments here and there to look around.
There’s a platform next to a freshwater stream where you can top up your water bladders and enjoy lunch (mind the mosquitos), then keep heading down the valley into Frog Flats and over the Forth River crossing.
You’ll start to climb again, and while it’s not necessarily steep, it is a long slog as you regain all the elevation you just lost.
As the trail flattens off you’ll see the turn off for the historic Old Pelion Hut. Either take it now to have a look, or backtrack after setting up camp at Pelion Hut and bring your swimmers to take a dip in the freezing creek just beyond it.
Pelion Hut is quite large with lots of room to sleep inside, but as one of the public huts it’s also open to people who hike in from Arm River, so it can get busy.
Enjoy the sunset over Mt Oakleigh, which towers in front of you across Pelion Plains.
Section 4 – Pelion Hut to Kia Ora Hut
- Distance: 8.6km
- Time: 4 hours
- Side Trips: Mt Ossa and Pelion East
If you’re planning on summiting Mt Ossa (the highest mountain in Tasmania) or Pelion East today, make sure you start early.
The trail starts through lush forest with towering ferns and trees before climbing steeply to the alpine meadow at Pelion Gap above.
It’s a tough way to start the day, so take your time. Once you get to Pelion Gap you’ll find the large platforms where you can drop your bags and tackle one of the mountains on either side.
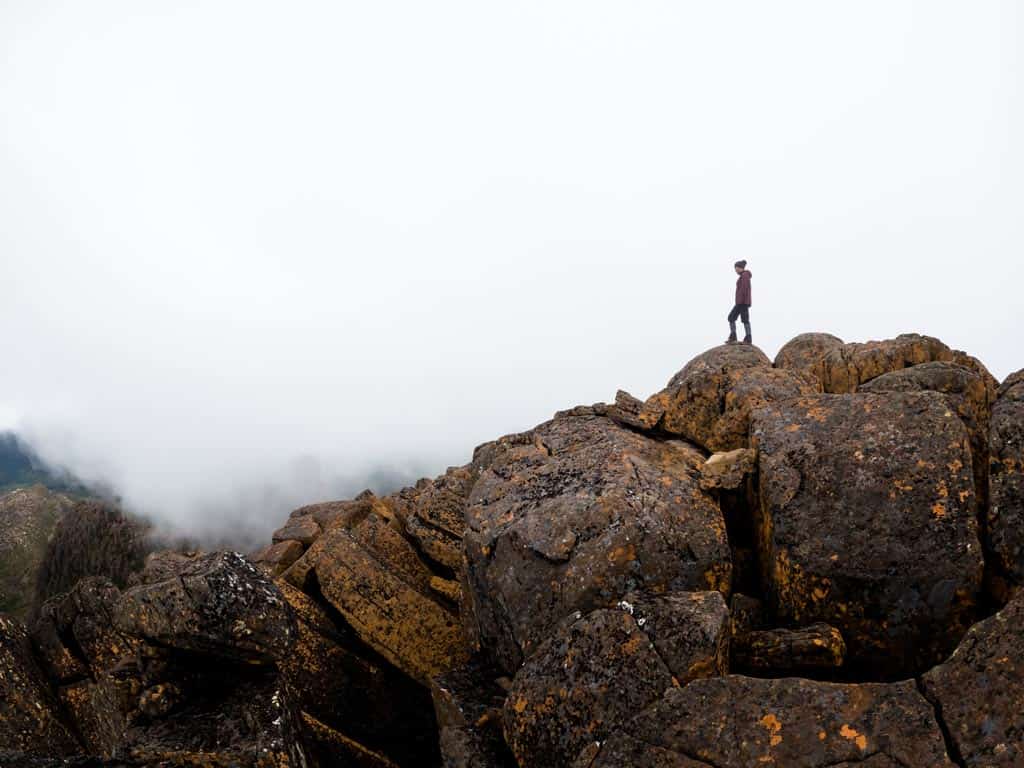
Mount Ossa as Tasmania’s highest peak is by far the most difficult, yet most rewarding, but should only be attempted if the weather is perfect. As a rule of thumb if you can’t see the summit then consider skipping it, unless you’re a peak bagger.
Pelion East is steep yet easy except for the final scramble to the peak.
Continuing on it’s a steady downhill down to Kia Ora Hut. You’ll find a lovely swimming hole to go for a dip and wash yourself down here as well.
For accommodation options, we preferred camping at Kia Ora.
Section 5 – Kia Ora Hut to Windy Ridge (Bert Nicholls Hut)
- Distance: 9.6km
- Time: 5 hours
- Side Trips: D’Alton Falls, Fergusson Falls and Hartnett Falls
Today’s section of the Overland Track walk is focused on two things – rainforests and waterfalls.
As you leave Kia Ora Hut you’ll come across the old Du Cane Hut, which is worth a few minutes of exploration to learn more about the history of old explorers.
The track is pretty level as you wind through moss and dense trees, then you’ll reach the fork for the first side trip to D’Alton and Fergusson Falls.
It will only take less than an hour to see both, and is well worth the detour. You can leave your packs at the fork.
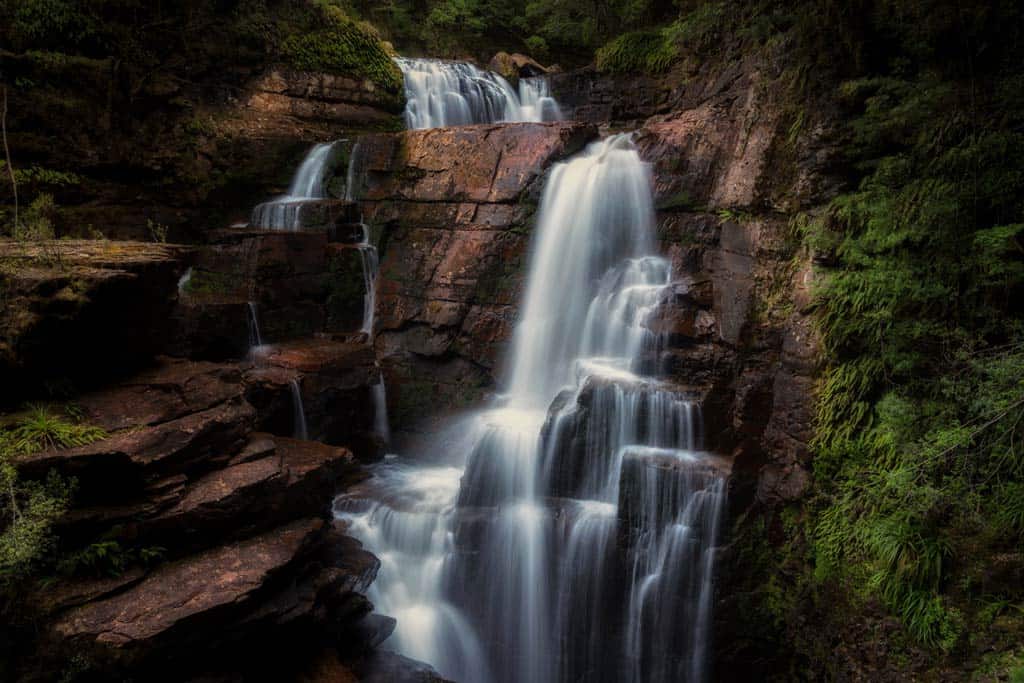
When you come back walk the next kilometre until you reach the other side trip to Hartnett Falls.
While it’s beautiful from the top, we recommend climbing down to see it from the bottom. If you’re feeling really keen you can even swim at the base of the cascades.
The last few hours over Du Cane Gap to Windy Ridge (Bert Nichols) Hut aren’t overly spectacular until you reach the last rainforest section.
Section 6 – Windy Ridge (Bert Nicholls Hut) to Narcissus Hut
- Distance: 9km
- Time: 2 hours
The hike to Narcissus Hut from Windy Ridge is mostly flat the whole way, walking through tall pine trees and shrubs with the odd buttongrass plains.
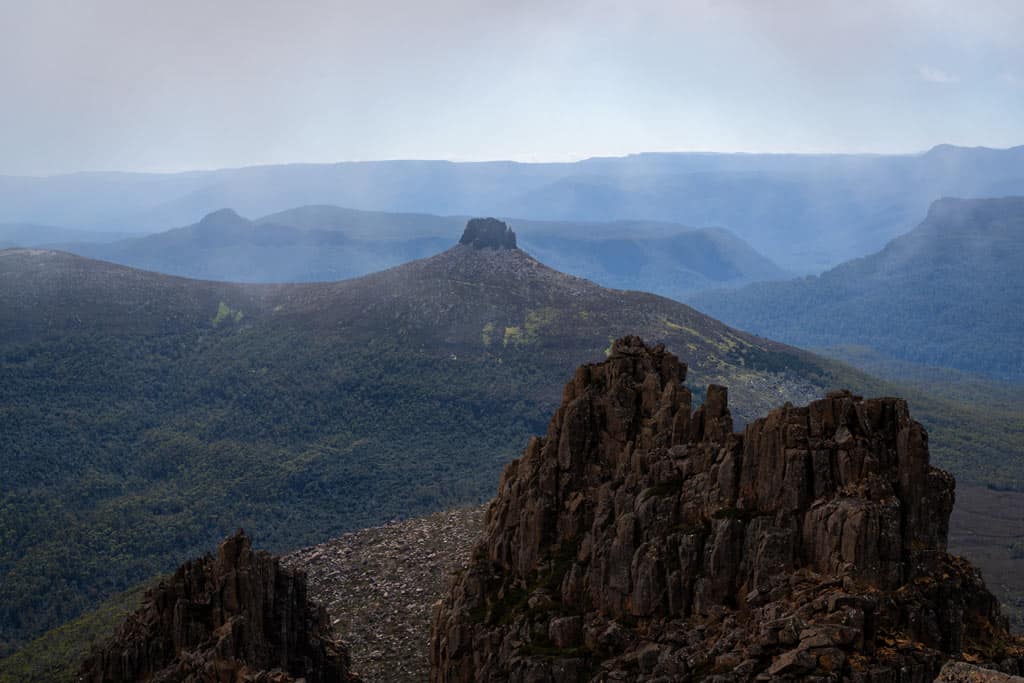
You’ll catch glimpses of the Acropolis off on your right, and about halfway you’ll find the turn off for Pine Valley.
If you leave early enough in the morning you can really take your time, as it’s an easy walk and your bag will be pretty light after consuming most of your food.
Once you hit the river the scenery improves dramatically, and you follow the edge for a short while until you finally arrive at the northern end of Lake St Clair and Narcissus Hut.
It’s from here that the ferry will collect you to take you across Lake St Clair, Australia’s deepest lake to the Lake St Clair Visitor Centre, if you’ve pre-booked it.
Once inside the hut find the phone that connects you directly with Lake St Clair Lodge and call them to confirm you ferry departure.
Most people choose to end here, but if you’re planning on walking the rest of the way to Cynthia Bay, follow the signs around the hut.
Being such a short day you can either choose to rest in the afternoon by the lake, or push on Echo Point or Cynthia Bay (if you’re feeling up for the long hike).
Section 7 – Narcissus Hut to Cynthia Bay
- Distance: 17km
- Time: 6 hours
The final stretch to finish the Overland Track will have you following the lake to Cynthia Bay, where you end at the Lake St Clair National Park Visitors Centre.
Looking on the map is misleading, because despite how close the track looks to Lake St Clair, the water actually remains out of sight for almost the entire walk.
Leaving Narcissus you walk through an open field with towering trees on either side of you.
Soon enough you enter the forest, and this is where you stay for the next 17km.
The trail doesn’t have much elevation change, but it isn’t exactly flat either. Instead it undulates through muddy trails, scattered with tree root obstacles and small sections of boardwalk.

The moss and ferns make it a lush walk, and honestly we aren’t sure why it gets such a bad reputation from hikers, other than it can seem a tad monotonous.
You’ll know you’re getting close to civilisation as you come across wider, manicured paths and hordes of day hikers.
Once you arrive at Cynthia Bay you can officially say that you have completed the entire Overland Track! Congratulations, you are a rockstar.
Make sure you grab a selfie with the Overland Track sign, then head to Lake St Clair Lodge for a well-earned beer and overpriced feed (the meat burgers are fantastic, but the vegetarian options are horrendous).
As a reward for finishing the Overland Track you’ll find a number of free hot showers available to hikers. This is where you’ll be thankful you brought a spare pair of clean clothes to change into.
Optional Section – Pine Valley
- Distance: 4.7km one way
- Time: 2 hours
- Side Trips: The Acropolis and the Labyrinth
Halfway between Windy Ridge and Narcissus Hut you’ll find the trailhead to Pine Valley.
While not technically part of the Overland Track, it’s often added on by hikers who have an extra day or two up their sleeve to explore Cradle Mountain Lake St Clair.
And trust us when we say that the extension is well worth it!
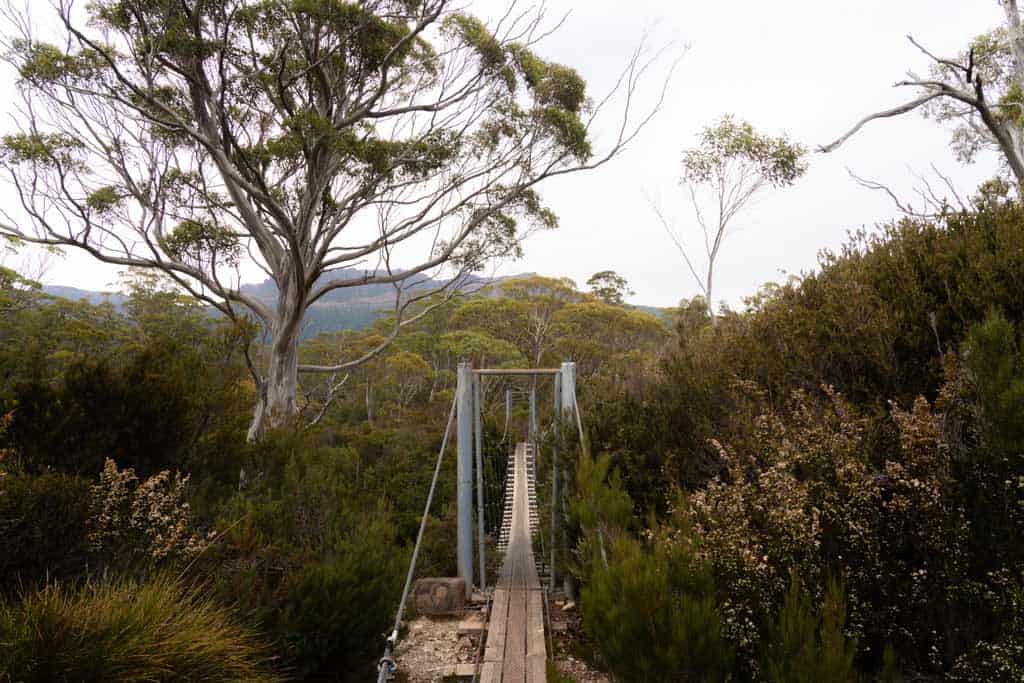
The trail to Pine Valley is simply gorgeous, navigating its way through magnificent pine forests, over swaying suspension bridges and into a vivid rainforest overgrown with moss and funghi.
Once you arrive at Pine Valley you’ll find a few tent platforms scattered in the forest and the aging yet comfortable hut set amongst the trees.
From the hut there are two main side hikes you can do – The first is to the Labyrinth, a diverse and fragile ecosystem unlike anywhere else in Tasmania, and the Acropolis, a towering and jagged peak that requires scrambling to reach the summit.
You need to spend at least one night at Pine Valley to do one of the side hikes.
Overland Track Side Hikes
There are several side hikes you can do on the Overland Track. They are optional, so if you choose do do them make sure you give yourself enough time to complete them safely.
Here is a list of all the main side excursions, with Cradle Mountain being the most popular:
(In order from the start of the trail to the end)
- Cradle Mountain (1545m) – 2km round trip from Overland Track (moderate)
- Barn Bluff Mountain (1559 m) – 7km round trip from Overland Track (difficult)
- Lake Will – 3km round trip from Overland Track (easy)
- Old Pelion Hut – 1km round trip from Overland Track (easy)
- Mt Oakleigh (1286m) – 6.8km round trip from Pelion Hut – (moderate – difficult)
- Mt Ossa (1617 m) – 5.2km round trip from Overland Track, Tasmania’s tallest mountain (difficult)
- Mt Pelion East (1461m) – 2.4km round trip from Overland Track (moderate)
- Mt Pelion West (1560 m) – 8km return from Overland Track (difficult)
- D’Alton and Fergusson Falls – 1km round trip from Overland Track (easy)
- Hartnett Falls – 1.5km round trip from Overland Track, top and bottom view (easy)
- Pine Valley Hut – 4.7km one-way from Overland Track (easy)
- The Acropolis – 6.4km round trip from Pine Valley Hut (difficult)
- The Labyrinth – 6km round trip from Pine Valley Hut (moderate)
To learn more about each of these side excursions, keep an eye out for our upcoming article.
What to Expect on the Overland Track Trip
By now you’re no doubt extremely excited about hiking the Overland Track in Tasmania! The scenery and walking trails around Cradle Mountain Lake St Clair National Park are stunning, but there are still a few things you probably should know before you hit the trail.
These are some of the most common questions we got from people when we did the Overland Track, and we hope they help you too.
Terrain
Since the Overland Track has had significant upgrades to the trail over the last few years, it is no longer the extremely difficult and challenging hike it once was.
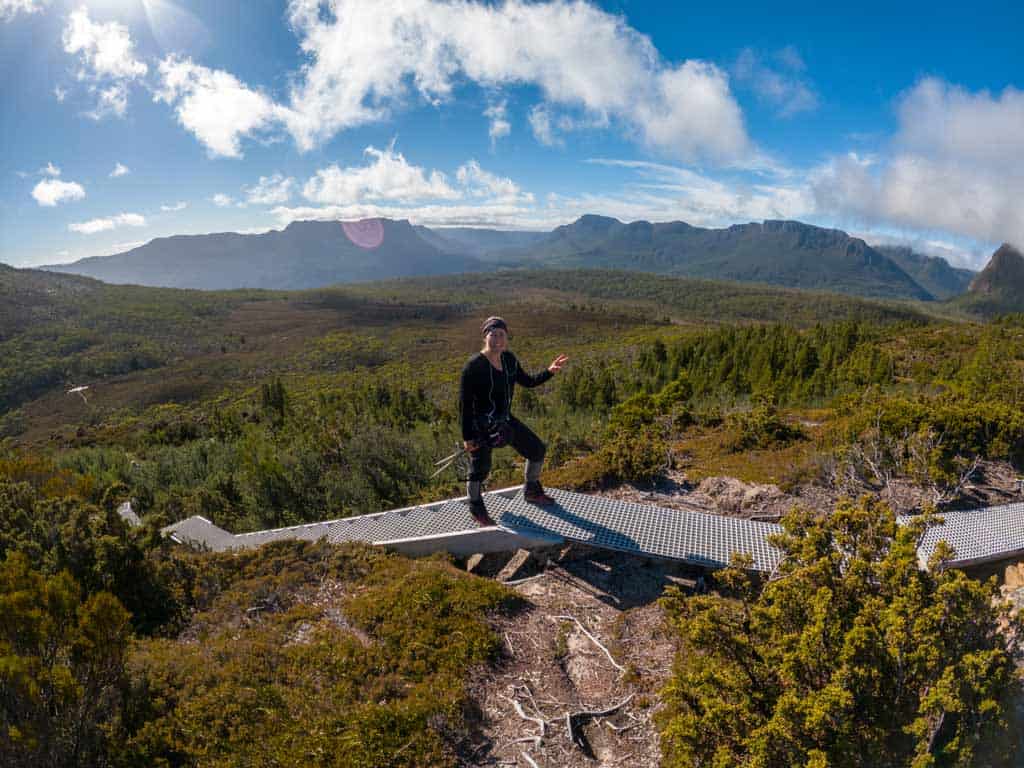
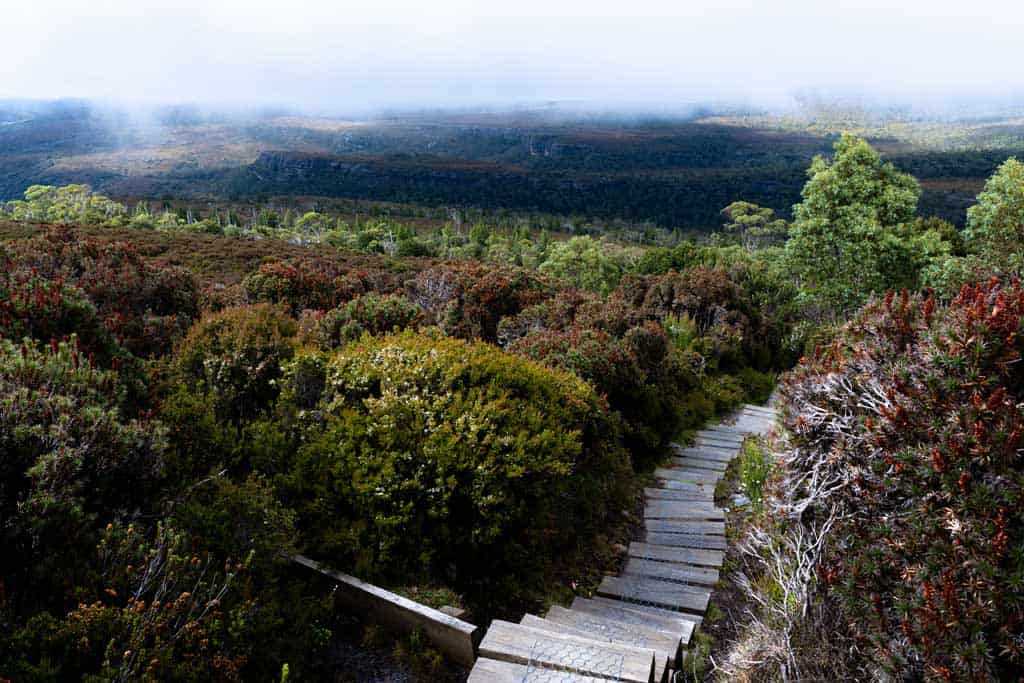
Elevated boardwalks now make up a large portion of the Overland Track, and are often found over some of the muddier sections.
Most of the track has been built, cleared and compacted, and is very easy to follow.
In other sections of the Overland Track, however, you’ll be navigating through boggy parts, over tree roots and tackling uneven and slippery terrain.
Parts are steep enough to warrant using chains to keep your balance, and large boulders and rocks will need to be navigated.
Overall, while the terrain isn’t the most difficult Cradle Mountain Lake St Clair National Park by any stretch, it definitely requires sturdy footwear and attention to get through it safely.
Drinking Water
There is drinking water available at every hut, which is collected from rain and stored in large rainwater tanks. It is recommended to sterilise the water with filter tablets or a SteriPEN.
Fill your 2-litre water bladder or bottles up every morning, and you will be set for the day of hiking.
You will also come across rivers and streams along the way on most days, but some were too low or looked dirty to fill the bladders up.
While you shouldn’t have any issues finding water on the track in the summer, don’t leave the huts in the morning without filling up to be safe.
Phone Service
There is extremely limited phone reception throughout the entire Overland Track. Do not rely on it!
Telstra does pick up a few bars in certain parts of the trail and at the top of Mt Oakleigh, Mt Ossa, Pelion East and the Acropolis.
Optus and Vodafone has no reception anywhere.

What are the Huts Like?
There are seven primary huts and one campground where hikers can stay along the Overland Track.
I have also included Pine Valley Hut as this is a popular side track on the Overland Track and many people do stay here.
Here is the list below from north to south:
- Waterfall Valley Hut – sleeps 34
- Lake Windermere Hut – sleeps 16
- Pelion Hut – sleeps 36
- Kia Ora Hut – sleeps 20
- Bert Nicholls Hut – sleeps 24
- Narcissus Hut – sleeps 18
- Echo Point Hut – sleeps 8
- Fergy’s Campground – Tent Sites
- Pine Valley Hut (side track hut, popular) – Sleeps 24
There are also four emergency shelters located on the Overland Track (overnight stays not permitted except in case of an emergency):
- Kitchen Hut
- Rangers Hut
- Du Cane Hut
- Old Pelion Hut
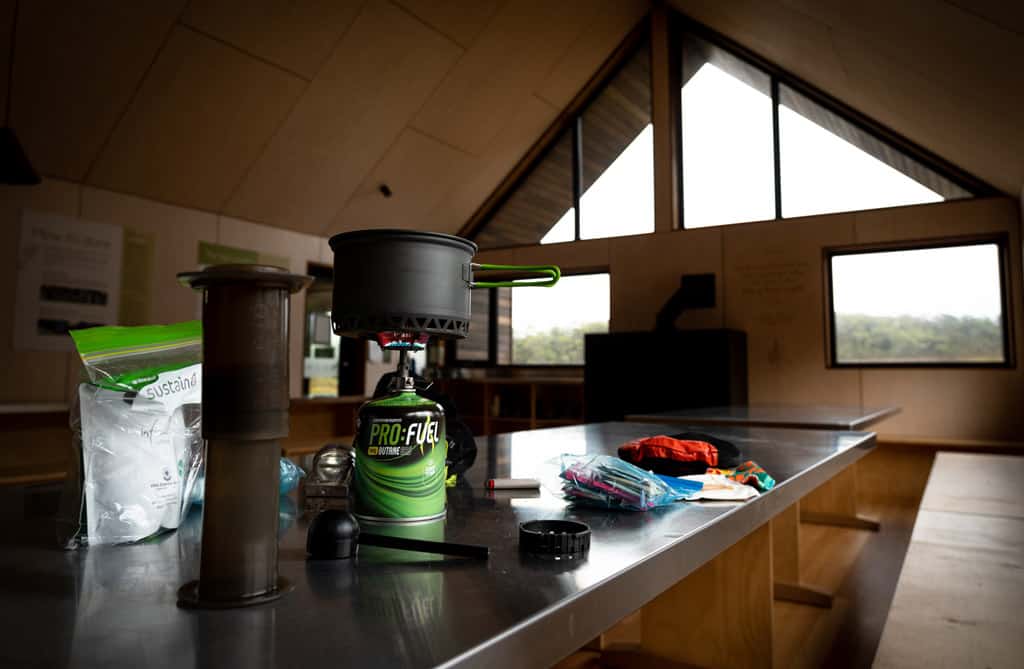
The huts are all made of timber, have separate toilet facilities (mostly composting toilets, clean but no running water) and have areas for people to cook inside them.
The sleeping pads in the huts are just wooden planks and are either in dormitory-style rooms, or in one large room with the cooking area. So yes, you will be sharing the space with other hikers.
Excluding Waterfall Valley Hut, which is the newest one, there are no lights, so you’ll need to use headlamps when inside in the evenings.
None of the huts have electricity, cooking equipment, permanent heaters (wood fire stoves are only used in winter) or sleeping gear.
As you can tell, the huts are quite basic, but they serve their exact purpose – to provide a simple shelter and sleeping quarters out of the elements.
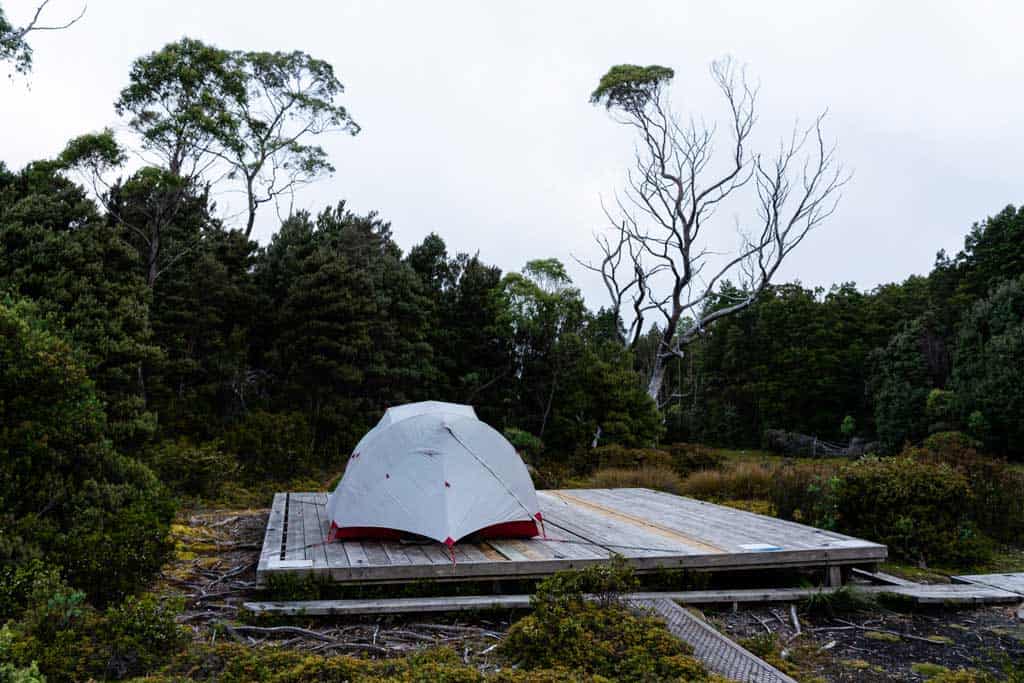
Camping on the Overland Track
As the huts don’t have enough room to house every Overland Track hiker, there are also designated camping areas people can pitch their tents.
In a lot of circumstances and depending on your style, camping on the Overland Track is actually a nicer experience than staying in the huts.
If you’re a light sleeper you may have a tough time staying in the huts with so many other hikers (especially if there is a snorer in the group).
Or if it’s fair weather you may like cooking by your tent and having your own space to spread your gear out.
Depending on the site, you will either pitch your tent on wooden platforms, or directly on the earth.
Check out our comprehensive guide to choosing a tent for backpacking to find one that matches your need.
We use and recommend the MSR Mutha Hubba.
Wooden Platforms
These timber platforms are elevated off the ground to protect the area, or in case the ground is muddy or not flat.
The platforms can have anywhere from one to four tents set up on each one.
The way it works is you pitch your tent as normal on the timber, then take the chains with hooks that go around the perimeter and tie your tent rope directly to these.
We found that sometimes there were not enough chains to tie down the tent properly, or they weren’t in the right position.
As a little trick, we brought along a small pack of threaded hooks bought from Bunnings and screwed these directly into the tent platforms where we needed them.
Just make sure you don’t forget them when you leave in the morning.
Grass Sand Areas
This is like a normal campsite you may have camped at in the past. You will secure your tent into the ground with pegs. Do not forget any pegs when you leave.
Staying Safe on the Overland Track
As organised and structured as hiking the Overland Track can appear to be, do not forget that you are essentially wandering into the wilderness with all of your supplies on your back for days, or weeks, at a time.
This is an adventure, and adventures come with inherent danger that needs to be addressed. Serious injuries and even deaths have tragically occurred on this trail.
This section is not designed to scare you. Quite the opposite in fact. It is to tell you exactly what to expect and how to stay safe while out hiking in the Cradle Mountain Lake St Clair area.
Overland Track Registration and Check In
When you first arrive at Cradle Mountain Visitors Centre you are required to complete a safety briefing and registration before you will be given your pass to walk the Overland Track.
The Cradle Mountain park rangers will check your gear to make sure you have adequate clothing and equipment as well. If you are missing anything you can purchase most things at the shop in the Cradle Mountain Visitors Centre.
Once you are on the Overland Track you are required to fill out a log book once you arrive at each hut, and include your intentions for the next day (which hut you are heading to, any side hikes planned, etc).
It is very important that you complete these log books, so that in case anything happens and you don’t arrive at the next hut the park rangers know where to search.
When you get to the end, fill in the log book outside of the Lake St Clair National Park Visitors Centre to declare that you are now safely off the track.
Besides the Parks Tasmania registrations, make sure you also tell your friends or family your plans.
This includes your Overland Track start date, expected finishing date, the side trips you are planning on doing, who you are hiking with, etc.
Be Prepared for Any Weather
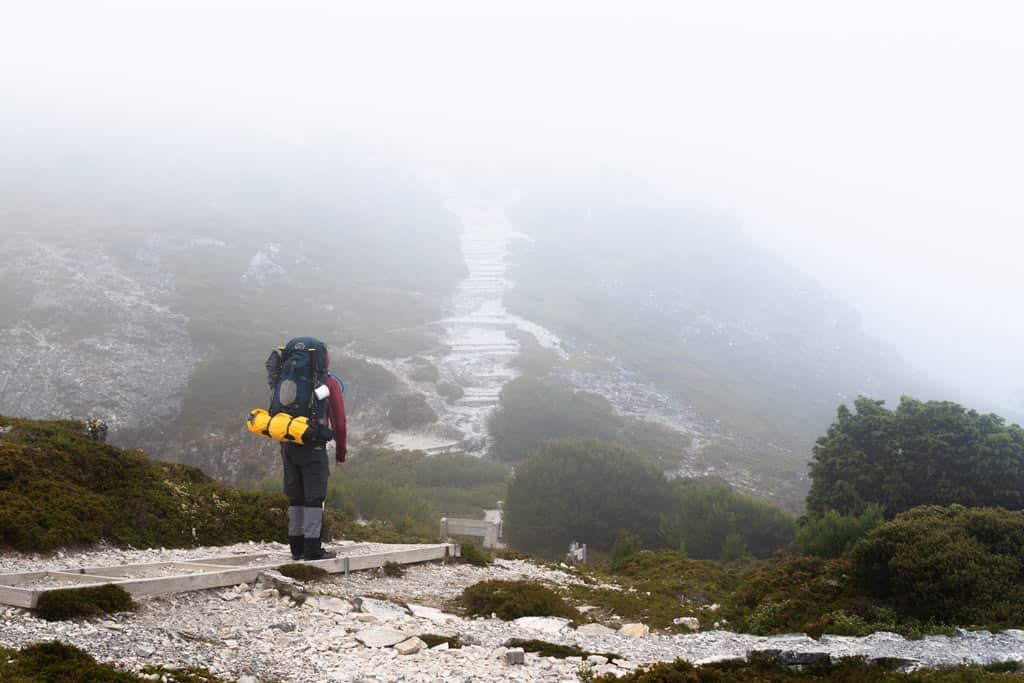
When you walk the Overland Track, you are spending an extended period of time in a remote alpine region in Tasmania. That means you should expect any kind of weather conditions at any time of year (even in summer), including snow, heavy rain, high winds, freezing temperatures and blistering heat.
Pack clothing for all conditions, and learn to layer up for proper temperature regulation. Our Overland Track packing list below should help.
The park rangers will have weather updates for the next 2-3 days at some of the huts, as will the Cradle Mountain and Lake St Clair visitor centres, but these can’t really be relied on. Anything can happen in the mountains.
Be Able to Call for Help if the Situation Requires
As there is no phone service on the Overland Track walk, you will not be able to make a phone call to anyone if you are in trouble.
That’s why it’s important to bring with you either a satellite phone (recommended) or at least a Personal Locator Beacon (PLB) on the Overland Track.
A satellite phone can be used to connect directly with emergency services and relay information as to what has happened.
A PLB doesn’t have the same capabilities for direct communication. Instead when it is activated it sends out your location via GPS to emergency services, and they will organise a search and rescue.
You can hire PLBs from the Cradle Mountain Visitors Centre before you start your hike, and drop it off at the Lake St Clair Visitors Centre when you finish.
Don’t Attempt Any Summits if Weather is Bad
One of the highlights of the Overland Track is taking the side trips up mountain peaks like Cradle Mountain, which can offer tremendous views over the entire national park.
But if the weather conditions are bad, or looks like it could turn, do not attempt to climb any of these peaks.
As tempting as it is to bag Tasmania’s highest peak, Mt Ossa, or the legendary Cradle Mountain, if visibility drops to zero and rain starts falling while you’re up there, you run a serious risk of not being able to get down safely.
Instead be smart about it. If you can’t see the summit, don’t try to climb it. And if clouds are rolling in, stay down on the track. Just plan to return to Cradle Mountain or the other peaks another time.
Packing List for the Overland Track
When you sign up for the Overland Track walk, Parks and Wildlife Service Tasmania will send you an email with all the essentials to bring with you. It was a good list to follow to organise yourself.
When we were working out our Overland Track Packing List, we laid everything out on the ground and went though it all.
This was important to see if we have doubled up on anything or highlight items we do not need.
You want your bag as light as possible. Below is our packing list for the Overland Track.
Our Overland Track Packing List
Clothes
- 1 x hiking boots
- 3 x hiking socks
- Thermal sock liners
- Pair of gaiters
- 1 x hiking pants
- 3 x breathable shirts
- 1 x rain proof jacket
- 1 x rain proof pants
- 1 x camp shoes
- 1 x camp pants (sleep in this)
- 1 x camp top (sleep in this)
- 2 x camp socks
- 1 x beanie
- 1 x Buff, face mask or scarf
- 1 x fleece jumper
- Thermals – pants
- Thermals – top
- 6 x underwear
Equipment
- Trekking backpack with good harness
- 1 x sleeping bag (rated for extreme cold temperatures)
- 2 x waterproof compression bags – one for the sleeping bag and one for clothes
- 1 x sleeping bag liner
- 1 x inflatable camping mattress
- 1 x small inflatable pillow
- 1 x lightweight, 3-season tent (4 season is better) – check out our guide to the best hiking tents
- Tent pegs and hooks – take a few extra tent pegs and hooks for the platforms
- Hiking poles
- 2lt water bladder
- Camping stove with gas (we recommend a Jetboil, which is on our list of the best stoves for camping)
- Pot for cooking
- Lighter
- Leatherman (knife)
- Cutlery
- Bowls or plates
- Cups
- Aeropress Coffee Maker
- Stirring spoon
- Mini chopping board
- Water filtration Tablets
Electronics
- Head torch
- Power bank
- GoPro (we recommend this one)
- Camera + lens (here’s our personal recommendations)
- Iphone
- Cords to charge
- Spare batteries – cameras and torch
Personal
- Ear Plugs
- Baby wipes
- Face wipes
- Face cream
- Suncream
- Bug spray
- Toothpaste
- Toothbrush
- Mouthwash
- Medication
- Biodegradable soap (for the shower at the end of the hike)
- Quick dry towel
- Simple First Aid Kit – bandages, pain killers, joint cream, etc
- Blister kit
- Bandaids
Food
Here is all the food we took for 10 days on the Overland Track.
- Oats – Uncle Tobys instant porridge – 18 large bowl packets (1 each per morning)
- Vita-wheat crackers – 2 packets
- Block of Cheese – 1kg
- Vegemite – squeeze plastic bottle
- Protein Muesli Bars – 36 Sam’s muesli bars (4 a day each)
- Chocolate – 18 Peanut Slab (we had 1 each during the day and 1 after dinner)
- Dehydrated meal packs – 9 double portion for 9 nights (we would share a double serving)
- Coffee – we had an Aeropress with us for the mornings and made coffee
- Tea – Great for after hiking at the camp
We recommend dividing your food up into individual bags for each meal, so you know exactly what you have to eat each day and to stop you from over-eating, meaning you’re low on snacks on another day.
Conclusion
It was time to end our time on the Overland Track!
In the end we hiked 113km and climbed 2 mountain peaks (Jarryd climbed 4) in 8 days! The scenery was just incredible throughout the entire Cradle Mountain Lake St Clair area. Sadly we had to cut our hike short by 2 days due to a bad storm rolling in, but such is life. We’ll just have to come back!
We’ve done a lot of multi-day hikes all around the world, and we are honestly blown away at just how amazing the Overland Track was here in Australia.
We’re so thankful that we could throw the backpacks on again and get out for an adventure!
Hopefully you found our article useful. If you did please leave a comment below and share with your friends and family if they’re planning on doing the Overland Track as well.
Happy hiking.
DISCLAIMER: Some of the links in this article are affiliate links, which means if you book accommodation, tours or buy a product, we will receive a small commission at no extra cost to you. These commissions help us keep creating more free travel content to help people plan their holidays and adventures. We only recommend the best accommodations, tours and products that ourselves or our fantastic editorial team have personally experienced, and regularly review these. Thanks for your support, kind friend!


12 thoughts on “The Ultimate Guide to Hiking the Overland Track in Tasmania (2026)”
Please stop telling people to take hooks! These leave permanent damage on the camping platforms and are completely unnecessary. Take light nylon cord and you can then use this to tie peg loops on your tent to the chains.
thank you so much for sharing
Informative and helpful 🙂
Preparing to walk the track in March 2023.
Found the information in your blog very helpful.
Nice easy read too.
Thanks.
That is amazing Gary. Have a great time. March will be great weather. We went at the beginning of March and got sunny days and some rainy days. Happy hiking. 🙂
How exciting. March is going to be a great time to go. So glad the article was helpful. Have a great hike.
Impressive!! Thanks for sharing this insightful write up.
You are welcome. Thanks for reading. Hope you get down to Tassie to do the Overland Track. It is amazing. 🙂
Thank you so much for reading. 🙂
Thank you so much. 🙂
Read the whole article, is very informative. I was searching what time of year is the best for views and clear weather. Perhaps its the summer however weather is unexpected here. There are slots available only in later half of May 2022. Wondering if I should book and change to earlier dates when someone cancels. Is that possible? I traveled the east coast Tassie and now I am planning for wild west coast Tassie trop this Christmas break. Next year hoping to do 3 Capes track then Overland trek. Tasmania is one of the most beautiful places I traveled and would love to trek in wilderness there.
Enjoyed the YouTube video.
What time of the year did you do the hike?
Looking at your packing list, can you recall the all up weight of your packs?
Thanks so much Howard! Glad you enjoyed the vide. We hiked the Overland Track at the end of January/early February. Jarryd’s pack was about 22kg on day 1, and my pack was 17kg. We did have a fair bit of camera gear with us though. Hope you enjoy the hike whenever you do it.