
A hike that will test all of your limits, in order to help you be as prepared as possible here’s our ultimate guide to hiking the Larapinta Trail in the West MacDonnell Ranges.
The Larapinta Trail is the pinnacle of all hikes in the Northern Territory, and possibly all of Australia.
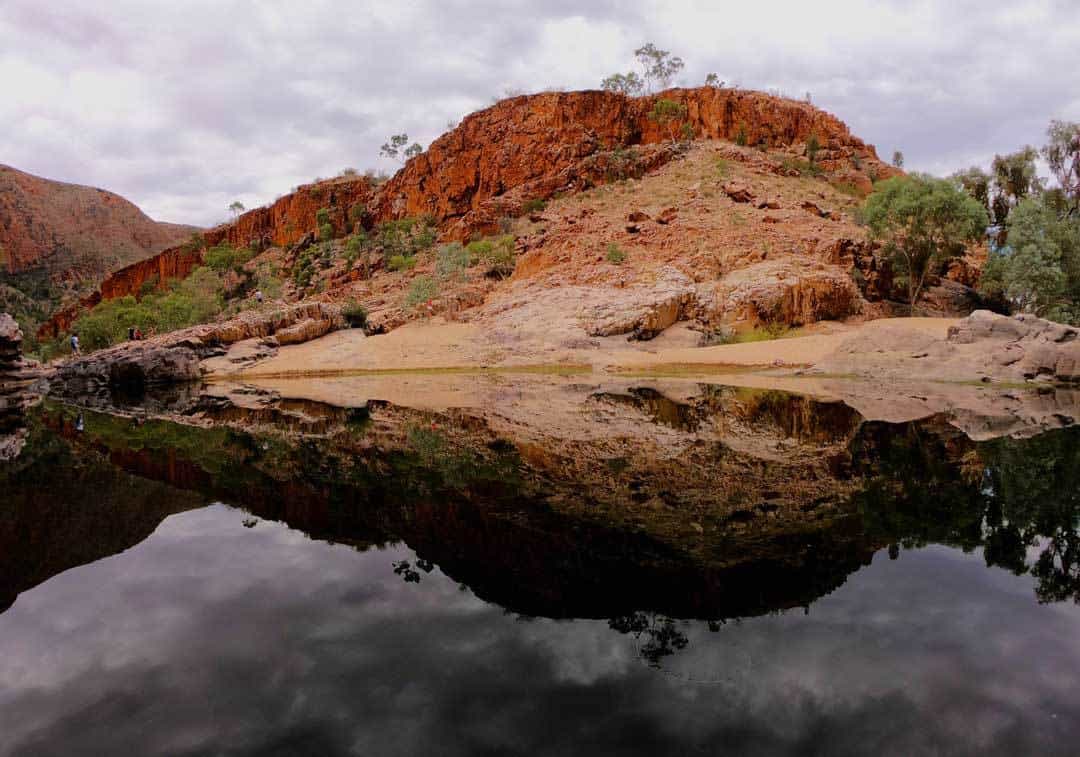
The West MacDonnell Ranges or Tjoritja is located to the west of Alice Springs.
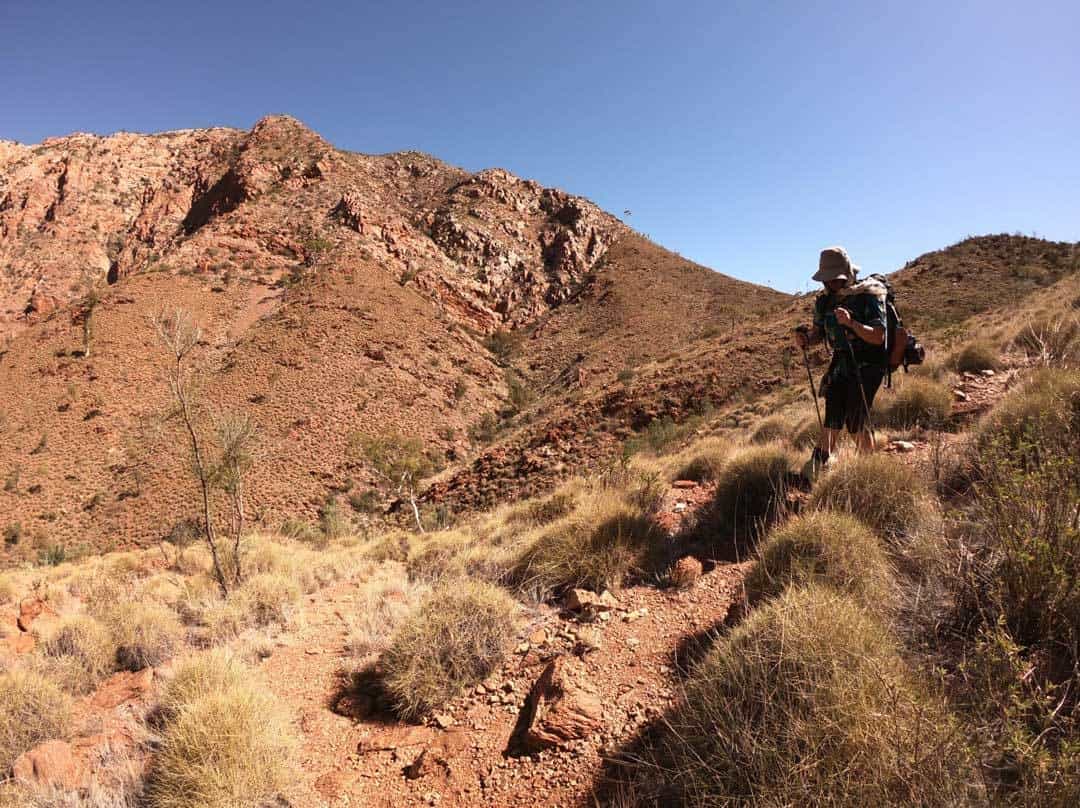
Hiking the Larapinta Trail is no ordinary effort even for the seasoned hiker so expect to be pushed to your limits both physically and mentally.
Hiking to me is all about seeing things at a slow pace and getting to connect to the environment around me.
The Larapinta Trail is a place of deep cultural significance to the Arrente people, so take the time to learn about the history of the area, the significant songlines, and why you can swim in some places and why you can’t swim in others.
It’s also important to acknowledge the traditional owners of the land, and pay your respects to elders past, present and emerging.
I have put together this comprehensive guide to the Larapinta Trail from sections 1 to 12 to help you guide your way through this beautiful part of the Northern Territory.
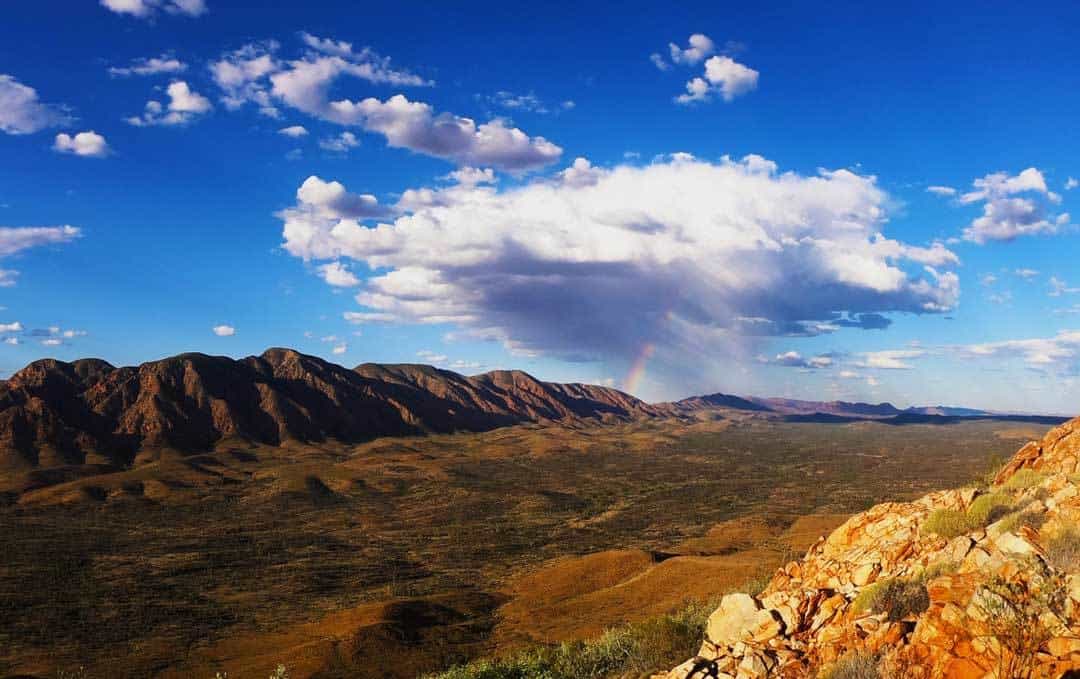
Table of Contents
- What to Expect on the Larapinta Track
- My Experience Hiking the Larapinta Trail
- Hiking the Stages From 1 to 12
- Section 1 – Telegraph Station to Simpsons Gap
- Section 2 – Simpsons Gap to Jay Creek
- Section 3 – Jay Creek to Standley Chasm
- Section 4 – Standley Chasm to Birthday Waterhole
- Section 5 – Birthday Waterhole to Hugh Gorge
- Section 6 – Hugh Gorge to Ellery Creek
- Section 7 – Ellery Creek to Serpentine Gorge
- Section 8 – Serpentine Gorge to Serpentine Chalet
- Section 9 – Serpentine Chalet to Ormiston Gorge
- Section 10 – Ormiston Gorge to Finke River
- Section 11 – Finke River to Redbank Gorge
- Section 12 – Redbank Gorge to Mount Sonder
- Getting Back to Alice Springs
- What to Pack for the Larapinta Trail – Items That Will Get You Through
- Things To Know Before Hiking the Larapinta Trail
What to Expect on the Larapinta Track
You may not think it, but Central Australia, especially those places closer to the ranges, hosts so much flora and fauna, and it’s just a matter of looking in the right place.
3 main environments make up the Larapinta Trail being riverbeds and riverbanks, mulga shrub lands, and rocky ranges and outcrops.
Within these environments depending on what time of year you decide to hike, a large variety of wildflowers will be present from the Sturt’s Desert Rose to the famous Sturt’s Desert Pea.
You are bound to see the perentie all year round, a lizard known as a sand monitor, to the occasional dingo lurking around the ridge lines of Simpson’s Gap or even the odd Thorny Devil lizard.
Life in the desert is precious so please stay on the designated trail, camp in the designated wilderness campsites and take your rubbish with you as there are only a few bins located at Ormiston Gorge, Ellery Creek Big Hole, Standley Chasm and Simpson’s Gap.
My Experience Hiking the Larapinta Trail
Having hiked in Northern Thailand, Nepal, New Zealand and throughout New South Wales in Australia, I didn’t expect the Larapinta Trail to top the list as one of the hardest treks I have done.
It wasn’t my first time in Central Australia so I had a brief idea of what the climate and landscape would be like, but the thing that caught me off guard was just how long the entire trip was.
The Larapinta Trail is something that has to grow on you as you need to truly immerse yourself within the surroundings.
Day 1 on the trail caught me completely off guard, my hiking bag was too heavy and the straps wouldn’t adjust to the point that I considered walking off to Glen Helen homestead and hitching a ride back to Alice Springs.
After a good night’s rest at Finke River, I was good to go! We chose our planning that we would hike from Mount Sonder to Telegraph Station so we could walk straight into the pub and sip on a nice cold brew.
It took me a few days to get into a grove as I hadn’t put myself through a major distant hike since the Mustang in Nepal.
Mountains became my best friend and the flat sections tore me to pieces.
From gorge to gorge we hiked, stopping at those we could swim in, refill on food then hit the trail. There were a few steep ascents as well.
There were nights which we spent gazing into the stars above, the most memorable night out was Waterfall Gorge after hiking a massive 30 or so kilometers to the point we decided to set up camp on a rocky patch besides a river gum.
I was either too tired or delirious to figure out how to set up my tent or if I had lost or misplaced equipment.
In the end, I hopped into the shell of the tent with the mosquito net pressed against my face and I just lay and gazed into the Milky Way.
It was one of the best nights I have spent out in a long time.
Then there was the night of horrors at Simpson’s Gap.
Caitlin and I were the only ones at the shelter and basically had all of Simpsons Gap to ourselves (so we thought).
After doing a bit of exploring and taking photos on our last day on the trail, dinner was eaten and we were soon off to bed, once again I climbed into the shell of my hiking tent to keep the mosquitos out.
From the Simpsons Gap shelter, the views happened to be quite spectacular as the layers of the ranges dotted with spinifex and river gums.
A breeze began to pick up on dark which rustled the inside of the shelter.
The next thing I know, Caitlin wakes me up at midnight to inform me that dingoes were nearby.
I couldn’t hear or see them until a strong gust of wind carried the faint howl through the shelter giving the impression that dingoes where much closer than we had expected.
I was terrified to the point that I began tearing up.
There were still 6 hours to go until first light and with no idea where the dingoes were. Let’s just say I didn’t sleep that night.
Despite having a few rough times on the trail, some moments were truly magical with distant storm clouds producing magnificent rainbows after a heavy downpour of rain upon the desert.
Gorges were lush with cycads creating places to seek shelter out of the ran to moments of hiking through something you would see in The Land Before Time.
There’s no doubt that this hike will test you, I still can’t believe that I was able to walk in this amazing part of the world.
It literally is a must-do if you are ever in the Northern Territory and the good thing is that you do not need to do a E2E (end to end), you can hike whichever stage you like.
Check out one of my other ultimate guides – hiking in New Zealand!
Hiking the Stages From 1 to 12
12 sections make up the Larapinta Trail. It doesn’t really matter which way you choose to hike the trail, but you’ll always start in Alice Springs.
I hiked from west to east but for this article, I have written it from east to west.
Section 1 – Telegraph Station to Simpsons Gap
- Distance – 23.8 kilometres
- Start/ Finish – Telegraph Station to Simpsons Gap
- Time – 5 to 6 hours
- Difficulty – Easy
Section 1 near Alice Aprings is a long one to start with which is sure to get your shoes worn in. It starts with a rather steep ascent onto Euro Ridge which provides the only views of Alice Springs along the entirety of the trail.
There are sections of the walk about 10 kilometres into the trail which are quite boring with a lot of flat ground that sometimes pointlessly winds its way through mulga patches followed by the odd short hill climb.
Coming into Simpsons Gap, things get a bit more interesting with an ascent onto Hat Hill Saddle on Arenge Bluff where the first views of Simpsons Gap can be seen. Simpsons Gap can be seen through the vast patches of Mulga from the campground which makes a hard day on the trail worth it.
Once at the designated wilderness campsites for hikers of the trail, be sure to take the walk down to the waterhole at the beautiful Simpsons Gap.
Swimming is NOT allowed here but being in awe of just how unique this place is, is totally acceptable.
Section 2 – Simpsons Gap to Jay Creek
- Distance – 24.5 kilometres
- Start/ Finish – Simpsons Gap to Jay Creek
- Time – 6 to 7 hours
- Difficulty – Easy
Section 2 is a long one with 24.5 kilometres of easy walking but be aware, this section can be quite confusing as cattle tracks dominate parts of the landscape to which can be mistaken as a walking track.
There is an opportunity to camp at Mulga Camp about halfway along section 2 but from experience, I recommend continuing to Jay Creek where the facilities are much better kept and the scenery is quite beautiful.
READ MORE: We have just published another comprehensive trekking guide for one of Australia’s other great walks – Hiking the Overland Track in Tasmania!
Section 3 – Jay Creek to Standley Chasm
- Distance – 13.6 kilometres
- Start/ Finish – Jay Creek to Standley Chasm
- Time – 6 to 7 hours
- Difficulty – Moderate
Heading through the creek can be a very dusty experience as water in this part is a rarity apart from the odd puddle of water.
A steep ascent out of the creek is the preferred route despite being able to exit through the mount of the dried river bed.
It’s not long until you are back into the more mountainous areas as 2 routes become present, where you can either take the high route which provides stunning views over the great expanse or the lower route which winds its way up a dry, rocky creek bed.
Once the trail meets back up a few tricky sections arise which require the use of your hands.
Arriving into Standley Chasm is quite stunning a requires the traversing of lots of stairs.
You don’t actually enter Standley Chasm directly but can be visited after arriving at the campground.
Standley Chasm is privately owned meaning the price of wilderness campsites skyrockets compared to the rest of the spots along the trail so make sure to bring cash or a credit card to pay the camping fee.
Section 4 – Standley Chasm to Birthday Waterhole
- Distance – 17.7 kilometres
- Start/ Finish – Standley Chasm to Birthday Waterhole
- Time – 7 to 8 hours
- Difficulty – Strenuous
Without a doubt, section 4 takes the cake as the best part and most scenic of the trail but be prepared for a lot of ups and downs.
Brinkley Bluff provides 360 degree views of your surroundings and they certainly don’t let you down!
But to get to Brinkley Bluff, be prepared for a hefty ridge traverse the whole way from once you leave Standley Chasm.
Brinkley Bluff will be the last place where you can get phone reception so use it wisely as it will be at least 2 or 3 days before reception is available.
Descending from Brinkley Bluff is very steep, so expect to descend for upwards of 2 hours until the dry creek bed that leads to Birthday Waterhole appears.
Section 5 – Birthday Waterhole to Hugh Gorge
- Distance – 16 kilometres
- Start/ Finish – Birthday Waterhole to Hugh Gorge
- Time – 7 to 8 hours
- Difficulty – Strenuous
Section 5 is possibly one of the most hair-raising sections of the Larapinta Trail hiking experience.
The trailhead begins by following a dry river bed full of rocks and boulders which requires constant attention and rock hopping.
You will probably ascend for 2 to 2.5 hours and the uphill is a real grind and it doesn’t stop there.
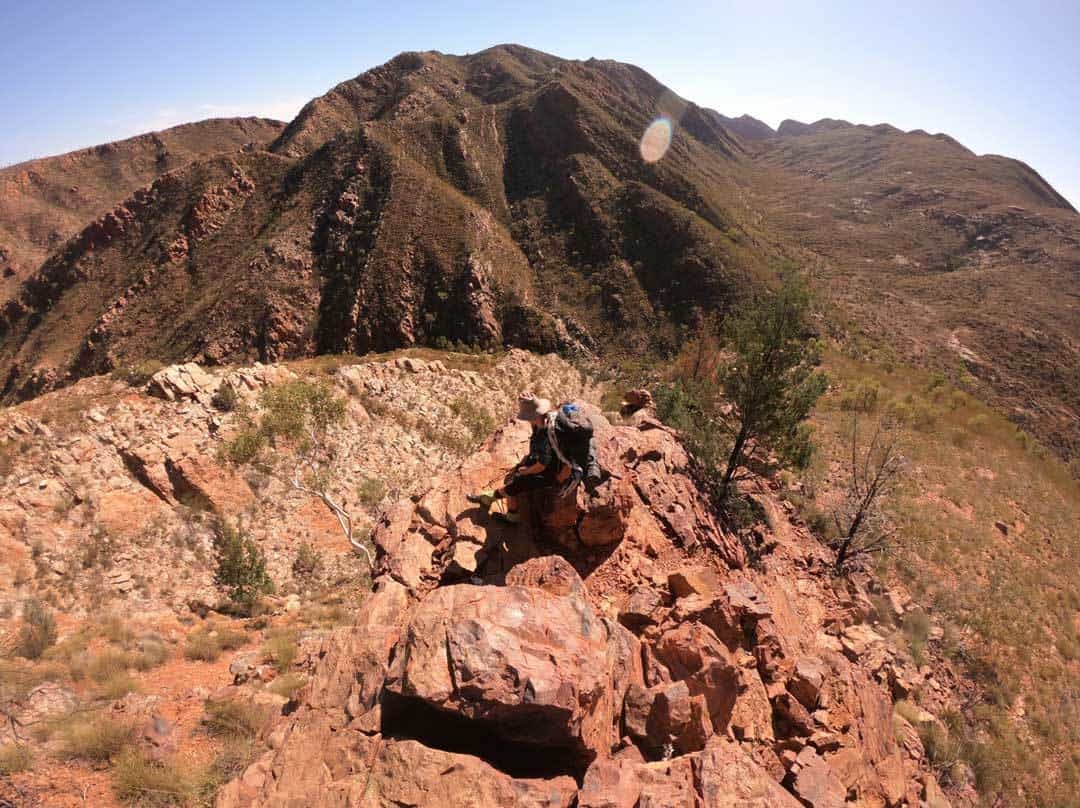
Razorback Ridge is a real challenge especially when you have a 30-kilogram bag on your back as a culmination of narrow chutes, loose rock and shear drops surround you, there’s no room for error, once you become clear of Razorback Ridge, the views are stunning and if not one of the best valleys along the Larapinta.
The climbs aren’t finished just yet as a long ascent to the saddle leading into Hugh Gorge takes around 2 hours with rewarding views at the top.
On the descent to Hugh Gorge, most of the trail is through large patches of eagle spinifex so don’t even think about taking a shortcut down the mountainside.
Hugh Gorge is massive.
Like really, really incredible but can be quite tricky to navigate with old gums, banks of course sand which can be quite annoying if it gets into your hiking boots.
Otherwise from here on in it is all flat until Ellery Creek.
Section 6 – Hugh Gorge to Ellery Creek
- Distance – 31.2 kilometres
- Start/ Finish – Hugh Gorge to Ellery Creek
- Time – 10 to 12 hours (splitting stage into 2 sections highly recommended)
- Difficulty – Strenuous
Section 6 proved to be the greatest challenge for my sister and me on the Larapinta Trail even though it mainly consists of flat terrain.
You will be greatly surprised by just how hard and grueling section 6 is especially if you are coming from Ellery Creek Big Hole.
My best tip for section 6 is to start as early as possible as this particular section is very lightly shaded to no shade at all.
Welcome to the Alice Valley.
As soon as you leave Hugh Gorge, Mulga patches stretch for kilometres in every direction with a few sandy creek crossings that lead you to the base of a series of very rocky hills covered in grasses that like to attach to your socks.
Section 6 tends to get on your nerves as some of the trail winds its way into areas that don’t really need exploring which adds on extra kilometers to your trek.
Given the length of section 6, you might want to consider breaking the hike into two parts.
Rocky Gully campsite is about halfway along the Alice Valley although it’s nothing like one of the shelters at the trailhead; the campsite is secluded with a water tank and toilet.
Rocky Gully to the base of the saddle is quite flat but there are lots of sandy creek crossings which can get quite annoying as you edge closer and closer to the West MacDonnell Ranges, things get a lot easier and less repetitive despite a small amount of climbs involved.
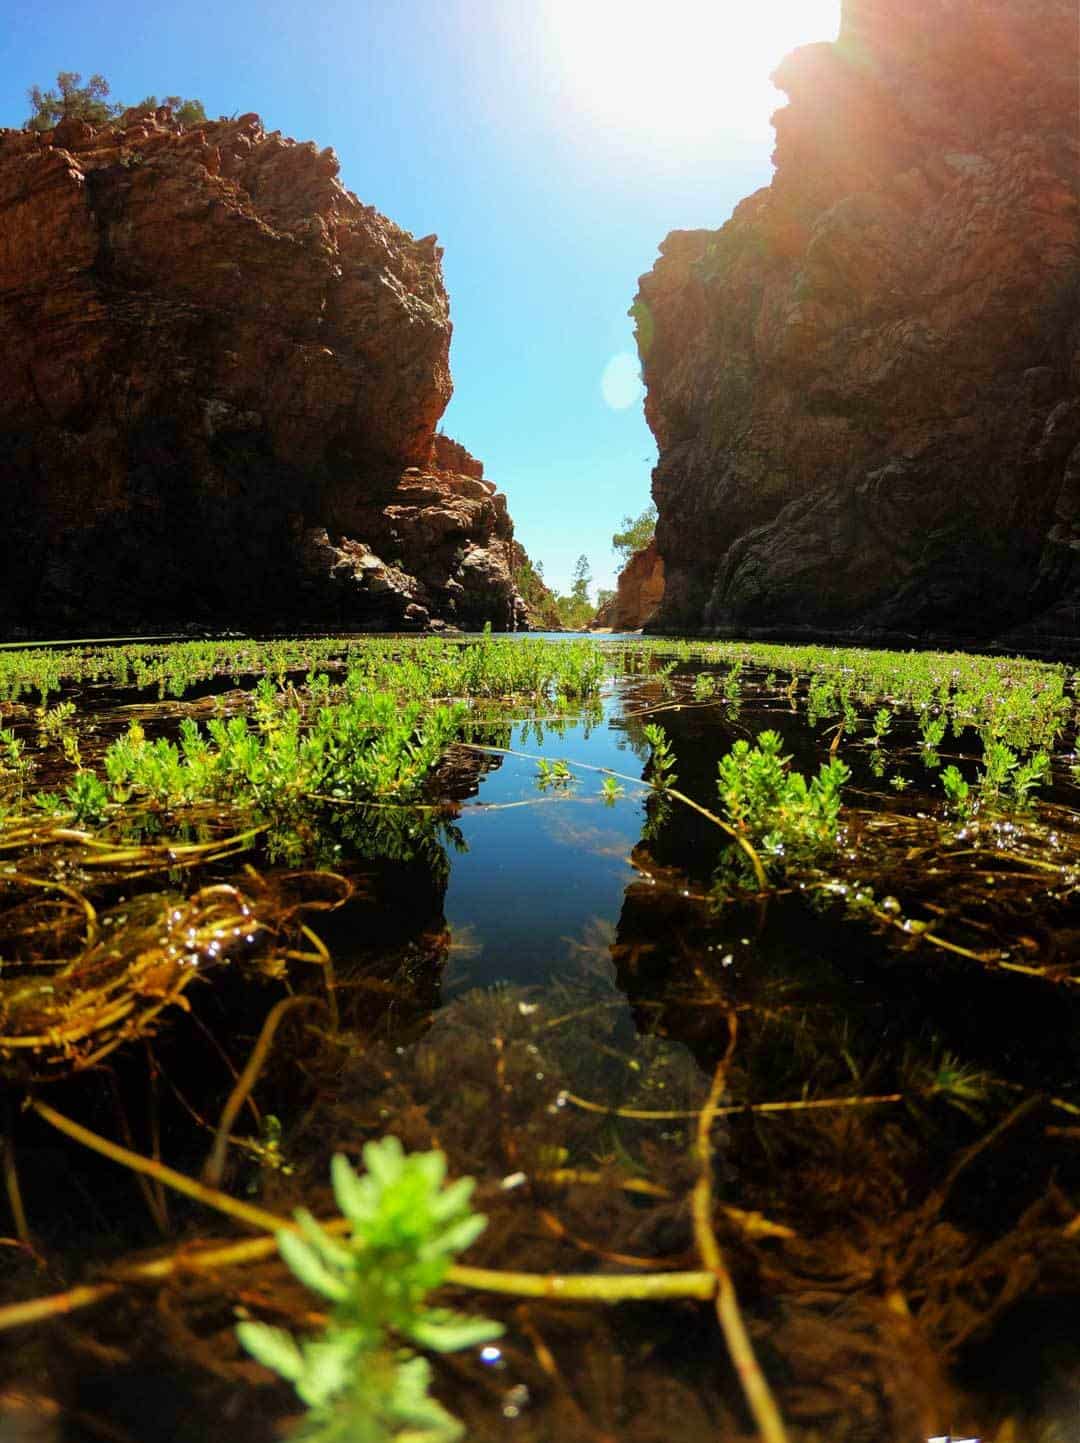
Ellery Creek Big Hole is a massive relief where you can swim, relax and stock back up food supplies as a storage room is available and the last opportunity to refill before Ormiston Gorge.

Section 7 – Ellery Creek to Serpentine Gorge
- Distance – 13.8 kilometres
- Start/ Finish – Ellery Creek to Serpentine Gorge
- Time – 7 to 8 hours
- Difficulty – Strenuous
As soon as you leave Ellery Creek, you will begin one of many rocky ascents.
Most of section 7 involves following a sharp ridge line past Trig Point and down into plantation-like sections of Mulga bush.
Section 7 is a fantastic opportunity to see rocky valleys dappled with the white trunks of ancient eucalyptus.
Despite the shorter distant of section 7, the continuous ups and down prove to be difficult on the knees but overall, this is a beautiful part of the Larapinta Trail.
Serpentine Gorge is one of the less visited places in the West MacDonnell Ranges so expect to see more wildlife and fewer people. Just remember as well, Serpentine Gorge is a sacred place and swimming is NOT allowed.
READ MORE: Looking for another epic multi-day trek in Australia? Here’s our brand new guide to hiking the Three Capes Track in Tassie!
Section 8 – Serpentine Gorge to Serpentine Chalet
- Distance – 13.4 kilometres
- Start/ Finish – Serpentine Gorge to Serpentine Chalet
- Time – 6 to 7 hours
- Difficulty – Strenuous
Section 8 is one of the shortest sections along the Larapinta Trail, however it is quite strenuous with a lot of ups and downs.
The highlight of section 8 belongs to the lookout at Counts Point and the long ridge traverse that leads up to it.
Descending can be quite rough on the knees so the best advice is to just take it slow on the down.
Once you are off the mountain, things are quite straightforward making your arrival into Serpentine Chalet is rather easy.
Section 9 – Serpentine Chalet to Ormiston Gorge
- Distance – 28.6 kilometers
- Start/ Finish – Serpentine Chalet to Ormiston Gorge
- Time – 8 to 10 hours
- Difficulty – Strenuous
Another classic section along the Larapinta Trail and by far my favourite despite it being one of the most strenuous hikes.
Before you leave Serpentine Chalet, make sure all of your water bottles and packs are filled to the brim as there is no water until you arrive in Ormiston Gorge.
As soon as you leave, you ascend along a narrow trail mostly through sparse mulga patches followed by incredible but spikey fields of spinifex grass.
The Inarlanga Gorge is not only sacred, but it is one of the best-kept secrets in the West MacDonnell Ranges to which is full of old cycads, gums and ancient rock formations.
The Inarlanga Gorge acts as a passageway to the distant Waterfall Gorge some 2.5 hours away.
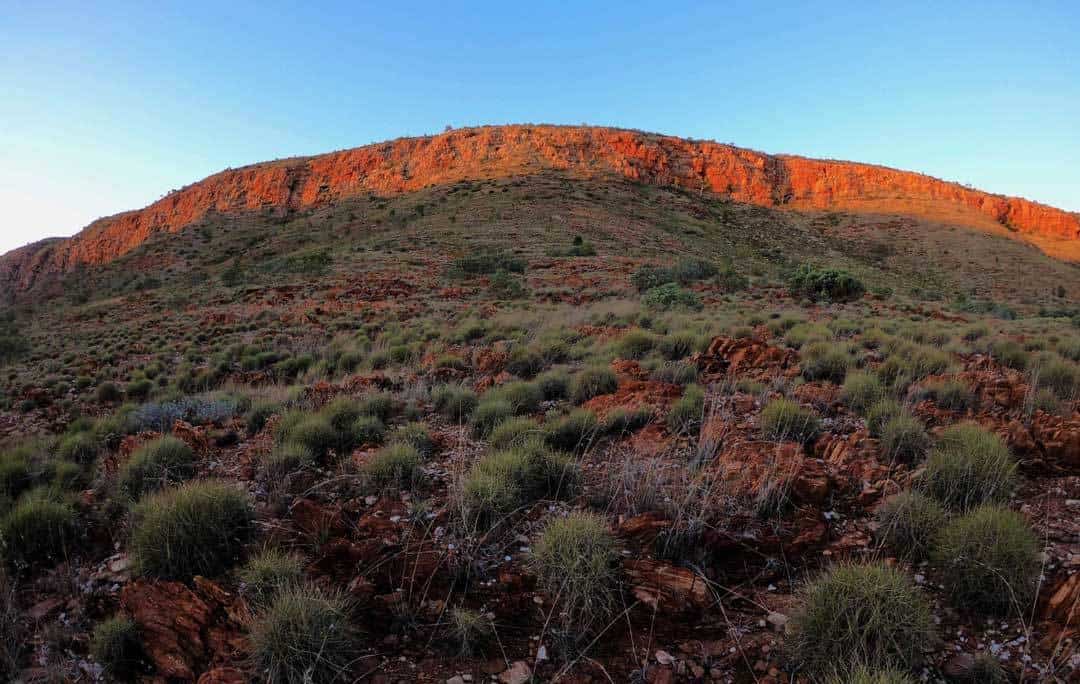
Hiking parallel to these ranges during sunrise is truly spectacular as the surrounding ridge lines receive a dose of dark orange mixed in with the colors of the desert and the further benefits of hiking early in the morning means that there are fewer flies!
Given that this is one of the longest sections along the trail, there is an option to camp at Waterfall Gorge with various tent sites on each side of the gorge.
At Waterfall Gorge I happened to be running very low on water supplies as I had already drunk ¾ of my supplies and I still had 14 kilometers to go until the next refill point.
Luckily I came across a stagnate pond of water at the base of Waterfall Gorge where I scooped water out as a micro-bat swooped me and thousands of insects swamped to my headlight.
I ended up boiling around 7 liters of water over a period of 2 hours (my gear isn’t all that flash) and with a few spoons of powdered electrolytes, I was good to go the next morning.
Another top tip is to put lids on your water bottles especially when there are sugars in them…ants love it.
The climb to Mount Giles is the steepest part of the Larapinta that doesn’t require the use of your hands. It’s one of the hardest steep ascents of the trail.
Mount Giles delivers impressive 360 degree views and phone reception in certain places.
The summit of Mount Giles will give you the first views of Mount Sonder only a few days of trekking away.
Coming into Ormiston Gorge, things get very sandy as a section requires following a dry creek bed all the way to the Ormiston Gorge Kiosk.
Ormiston is a piece of paradise as you now have the opportunity to cool off in the wondrous waters of this ancient place and refill your food supplies for the final few days leading into Mount Sonder.
Ormiston Gorge has a few sidewalks to consider such as the White Gum high above the waters of the gorge and a longer hike known as the Ormiston Pound Walk which requires you to sign into the rangers book at the Larapinta trailhead.
At this point in time, you’re probably craving a burger or cold drink, trust me you would be.
Ormiston Gorge Kiosk is the last place to get hot food or cold drinks before you return back to Alice Springs.
Section 10 – Ormiston Gorge to Finke River
- Distance – 9.9 kilometres
- Start/ Finish – Ormiston Gorge to Finke River
- Time – 4 to 5 hours
- Difficulty – Moderate
Mount Sonder becomes ever so closer but there is still a ways to go yet.
Section 10 is the shortest stage on the Larapinta Trail with a few small ascents and short descents making it a perfect day to take your time getting into camp.
Hilltop Lookout is quite a nice spot and if you look hard enough you may be able to find the roof of the Finke River Shelter in the distance.
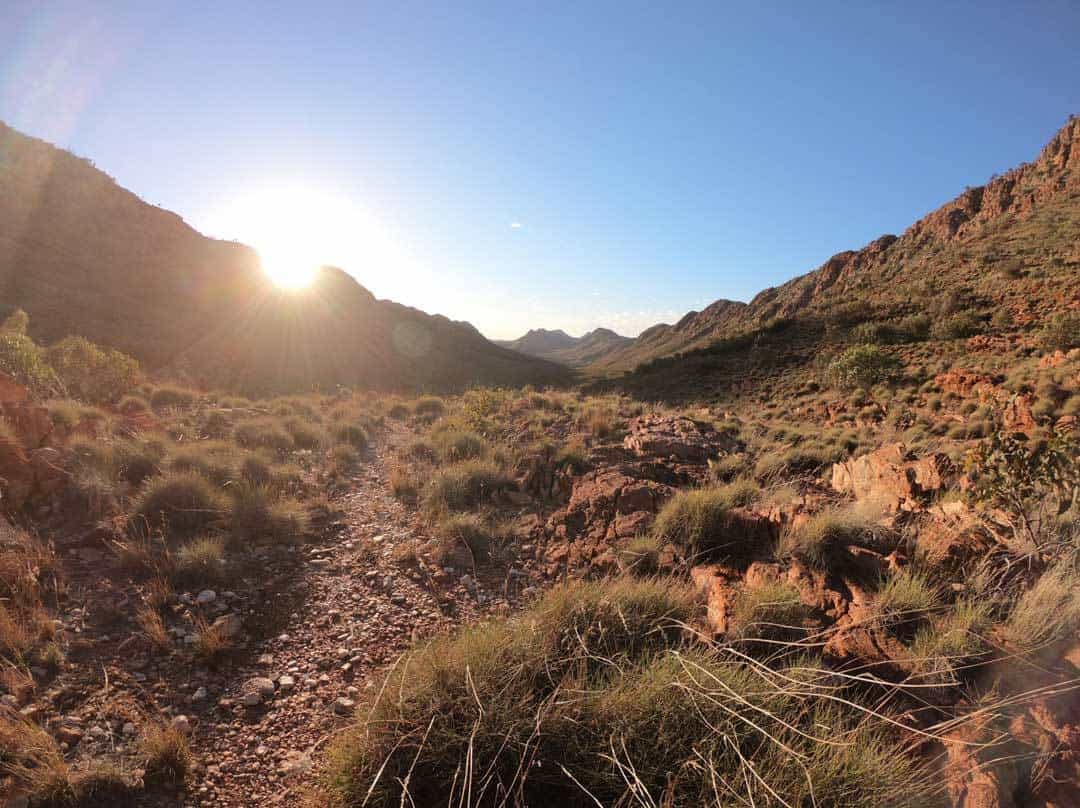
Finke River is a great place to set up camp as the shelter is nicely placed alongside the dry Finke River which at sunset is perfectly lit up by the sun’s rays.
Section 11 – Finke River to Redbank Gorge
- Distance – 25.2 kilometres
- Start/ Finish – Finke River to Redbank Gorge
- Time – 7 to 8 hours
- Difficulty – Moderate
Another long day on the trail but by hiking west, there are more descents than ascents.
There are a few opportunities to capture the sights of Mount Sonder to the west and the other times along the trail, you will duck in and out of small gullies followed by sections of dry riverbed before coming into Rocky Bar Gap.
Be sure to fill up your water supplies before continuing on to Redbank Gorge.
Section 12 – Redbank Gorge to Mount Sonder
- Distance – 7.4 kilometres
- Start/ Finish – Redbank Gorge to Mount Sonder
- Time – 6 hours return
- Difficulty – Strenuous
The last leg of the trail takes you on one last ascent to the summit of Mount Sonder.
The best time to do this section of trail is early morning so all you will need is a head torch, food, water and camera gear.
You can leave your gear at the campsite to save the hassle of carrying it to the summit as camping is not allowed.
Sunrise from the top is the perfect way to finish off an epic adventure and what better way to do so than sit on the top of Mount Sonder and look back over the hills and endless plains of Central Australia.
Getting Back to Alice Springs
Given that you are now 223 kilometers away from Alice Springs, you may need to pre-organise a lift back into town.
Or if you are confident enough, you can hitchhike back to Alice Springs.
What to Pack for the Larapinta Trail – Items That Will Get You Through
As always I recommend heading to your closest Kathmandu store to stock up on supplies in case you don’t have anything. Wear comfortable hiking pants or shorts and layers on top.
In addition to clothes, this Larapinta Trail packing list is what I used to take on the hike. Trip planning is essential when you hike Larapinta, so do lots of research and make sure you have everything you need.
First things first, get yourself an excellent hiking backpack. We recommend Osprey.
- Lightweight backpacking tent
- Sleeping bag and silk liner
- Worn in hiking boots
- Plenty of socks
- Food supplies to last at least 3 days
- Water supplies to last at least 2 full days
- Portable gas burner and lighter – here’s our guide to backpacking stoves
- A fly net
- Sunglasses, sunscreen and a buff
Things To Know Before Hiking the Larapinta Trail
The Larapinta Trail is not for the faint-hearted.
I have done plenty of hiking throughout my life but the Larapinta Trail takes the cake as the hardest one I have done to date.
I am not trying to scare you but this hike should be taken very seriously, at least one month’s worth of preparation is necessary to ensure optimum chances of completing the trail.
Here are some trip planning recommendations and things to consider.
Food Drops
Food drops are your best friends on this hike and the good thing is that you can have 3 boxes of any size of whatever you want in them stored away in storerooms for access when you arrive at the destination.
You are best off buying 3 large boxes that are rat or mice proof from a hardware store in Alice Springs.
Getting a key for the store rooms along the trail can be done from the information center in Todd Mall, Alice Springs for a deposit sum of $60.
This key will get you access to 2 of the 3 storerooms along the Larapinta Trail.
The first storeroom is run by Standley Chasm which is a private entity so you will not need a key, all you need to do is ask someone who is working at the café for access to the storeroom to get your supply box.
The 2nd box is located at Ellery Creek Big Hole (key required) and the 3rd storeroom is located at Ormiston Gorge Kiosk (key required).
What you put in these boxes is completely up to you but my recommendations are that you pack slightly more than you think you will need for each stage.
This is where careful planning needs to be considered from protein intakes to electrolyte intakes, everyone is different so plan accordingly.
You won’t need to put water in the boxes as it is available throughout the trail.
Water
Water is probably your equal best friend with the food drops.
Treat water like gold even if you are hiking during winter.
Water refills come in the form of tanks where water is trucked in from Alice Springs and is often treated water that sometimes during the warmer months or periods of time where the water isn’t used as much, chlorine tablets or sterilisation pens can come in handy to kill off bugs that might be in the water.
Hugh Gorge to Ellery Creek is a really big stage and there are no water refill points between the two places and you can’t even fill up your bottle in the creeks because it’s a desert.
Serpentine Chalet to Ormiston Gorge is the other section that has no places to refill your water bottles or packs so you will need to carry at least 10 litres of water on this section which equates to 10 kilograms of weight.
I didn’t carry enough on this section which lead me to boiling water from Waterfall Gorge where the water was green and infested with bugs but it did the trick.
You can also find water at the start of all trailheads which comes in the form of water in large tin tanks.
During peak season, water in these tanks are often used up by all of the hikers passing through but during the hotter months, there are opportunities to have a arms and face wash when there is more water available.
Shelter
Various locations along the Larapinta Trail such as trailheads have shelters which are elevated above the ground which are perfect for laying out a sleeping mat and sleeping bag.
If by chance shelters are full (very common during peak season) there are designated camping areas where tents can be pitched.
Safety
All safety precautions should be considered when planning to do the Larapinta Trail.
I took a Eperb (safety beacon) which is an emergency beacon that can be triggered in times of danger to let your registered contact know that you are in trouble.
Maps are super handy and important to have.
In your planning stages, be sure to print off a detailed map of the Larapinta Trail that shows everything from the trailheads, shelters, topography and distance as phone reception is not reliable along the trail.
Pack a decent first aid kit with painkillers, snake bandages and band aids to name a few.
Always let someone know where you are going or what section you are about to attempt.
This can be done by signing in and out of the trailhead shelters provided by Larapinta Trail in a protected book which includes pages with dates, time, name, sections and comments.
Always fill these in as park rangers check these daily during peak season.
Choosing a starting time is also crucial.
During the warmer seasons it is ideal to have camp packed up by 6am and ready to hike.
This should give you enough time to get some distance under your feet before the day starts to warm up.
Hiking in the cooler months can deliver the same temperatures but the mornings will be significantly cooler also proving ample time to get up and moving.
Trail Markers
Trail markers for the Larapinta Trail are blue arrows on a white background that are reflective attached often to rocks or steel poles.
Generally they are easy to find and can be spaced out every 100 to 200 meters.
Depending on which way you attempt the trail, markers will have how many kilometers you have done (if hiking from Telegraph Station to Mount Sonder) or how many kilometers to go (if hiking from Mount Sonder to Telegraph Station).
Each distance on the marker refers specifically to how many kilometers to go or you have done within the particular section and not the whole of the Larapinta Trail.
Phone Reception
Phone reception is limited along the trail apart from a few places where a few bars of signal are possible.
- This article is based on the experiences of Calumn Hockey to which it expresses his experiences on the Larapinta Trail. The Larapinta Trail will vary from person to person. This article doesn’t reflect the direct opinions of the Northern Territory Government or larapintatrail.com.
- Water tanks at trailheads can sometimes have a bug or two floating around in the water. The signs on the tanks state that the water should be boiled before drinking. My crew had no issue with water along the trail so it is completely up to you if you wish to treat your water before drinking.


6 thoughts on “The Ultimate Guide to Hiking the Larapinta Trail in Australia (2026)”
Great intel, thanks Calumn
this is an enjoyable adventure! Thanks for sharing this, I wanna go there and experience the fresh nature!
Thanks Calumn, your info has been most useful. I’ve got a better idea now of how to tackle this beastie.
Glad the article was helpful. Thank you and have a great hike. 🙂
Thank you for this insightful article. This hike looks to be a great adventure!
Only the dingoes near Simpsons Gap aren’t that great 😉
Definitely does look great. We were buzzed when Calumn wrote this one for us. We would love to do it one day. We will have to watch out for the dingos. Hope you get here to Australia one day to do the hike yourself. Happy travels Joanna