
Not sure how to design your campervan water system? We break down everything that you need to know to have the perfect van plumbing!
If you’re reading this, then you know that water is an absolute necessity for staying alive. And when you live in a van or RV for any amount of time you will quickly find that keeping up with your water system can be one of the most challenging tasks that remain on the forefront of your mind almost constantly.
As soon as you fill up your fresh water tank you have to start thinking about how much you use, where it goes and how long you can last before it’s time to find the next place to either fill up or empty your tanks.
And while your campervan electrical system provides you the power to enjoy many of the comforts of home while you are on the road, your water system truly gives you life on the road – plus a hot shower from time to time!
When completing a camper van conversion, there are many things you will want to consider when it comes to your water system. As tanks themselves can take up quite a bit of space, so can the plumbing to various appliances such as sinks, showers and toilets.
You’ll also need to account for wastewater and a way to monitor each of your tank capacities. Plus water weighs 8 pounds per gallon so you’ll need to keep that in mind too.
In this post, we’ll give you an overview of each component of a robust campervan water system and help you understand what you can and cannot do without.
In general, plumbing is not terribly difficult. And faucets, showers and toilets don’t have to be terribly expensive. Nor are the plumbing components to connect your water system together.
We’ll start with the basics of the entire water system and give you the framework to make the best decisions on how to plan the plumbing in your van.
DISCLAIMER: Building a water system in your campervan can be intimidating. We definitely recommend that you consult professionals for anything you do not fully understand or need help with on the installation. This post is intended to give you the outline and basic guidelines for how your water system works, what components you need to consider including in your setup and the basics of how to install these components. It is not intended to be a guide or installation manual.
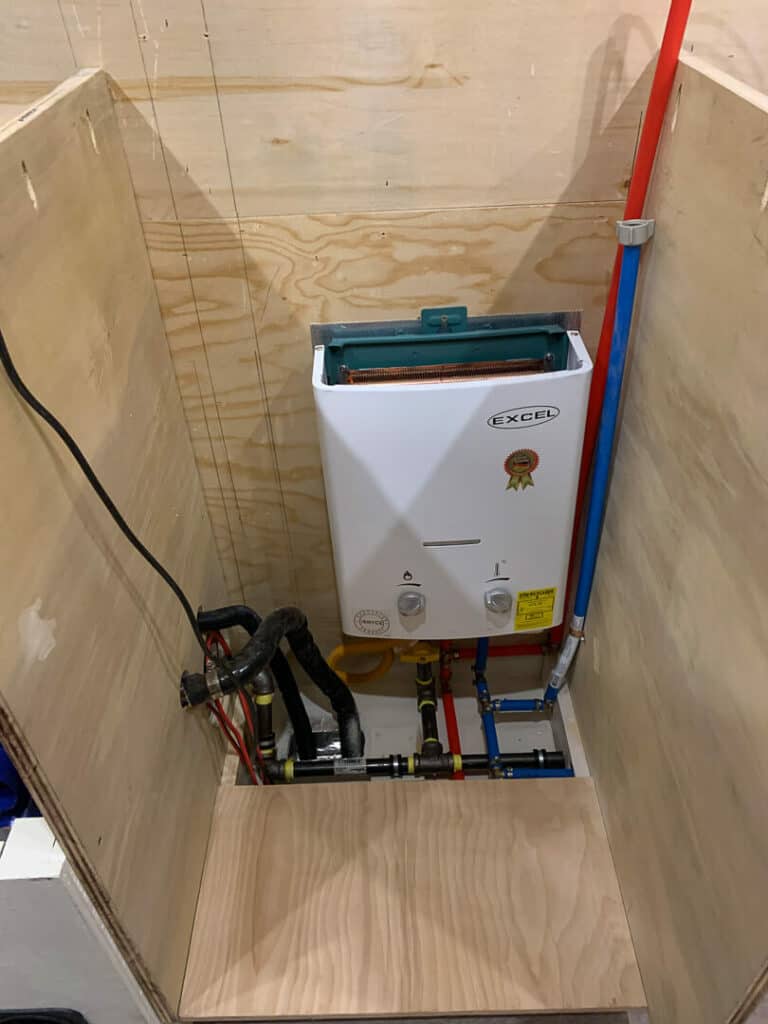
Table of Contents
An Overview of A Campervan Water System
Before we cover the basics of a campervan water system we want to go through what the most robust plumbing setup may look like inside a camper van. From there you can determine which components you want to include or not include in your camper van conversion.
Although we will cover each of these components in more detail below, these are the different appliances that you will want to consider when planning your campervan water system.
- Fresh water tank
- Water Pump
- Faucet
- Toilet
- Shower
- Hot Water Heater
- Grey Water Tank
- Black Water Tank
Your van’s water system could be broken into three sections, each of which serves a very important and distinct role.
Fresh Water Systems
The first aspect to consider in your camper van water system is your freshwater storage. When it comes to drinking water, you really cannot have enough. But at 8 pounds per gallon, water weight can add up quickly.
As can the size of your water tank. So you’re going to want to make some decisions in regard to how much drinking water you want to carry and how you want to store and access it. In general, we’d recommend that you design your van’s water system around the idea that more drinking water is always better.
Mounted Fresh Water Tanks
The first option for freshwater storage is one in which you purchase and permanently install a freshwater tank. These are sturdy and designed to be mounted and accessed from various places in your van.
You can find sizes that range from as small as 10-15 gallons up to as large as 40 or more gallons. Further, there are several styles of permanently mounted freshwater tanks.
A popular option for DIY campervan conversions is the wheel-well water tank. Depending on which van you choose, these are custom shaped to rest on your rear axle wheel well thus maximizing the space inside your van.
Other options are rectangular in shape and can be mounted virtually anywhere. Whether you want to install it in the main living space beneath a bench, for instance, or in the rear of the van is up to you.
But wherever you install it you will want to consider how you are going to access it both to refill it when necessary and to run the plumbing from it to your water pump and various plumbing components.
Portable Water Tanks
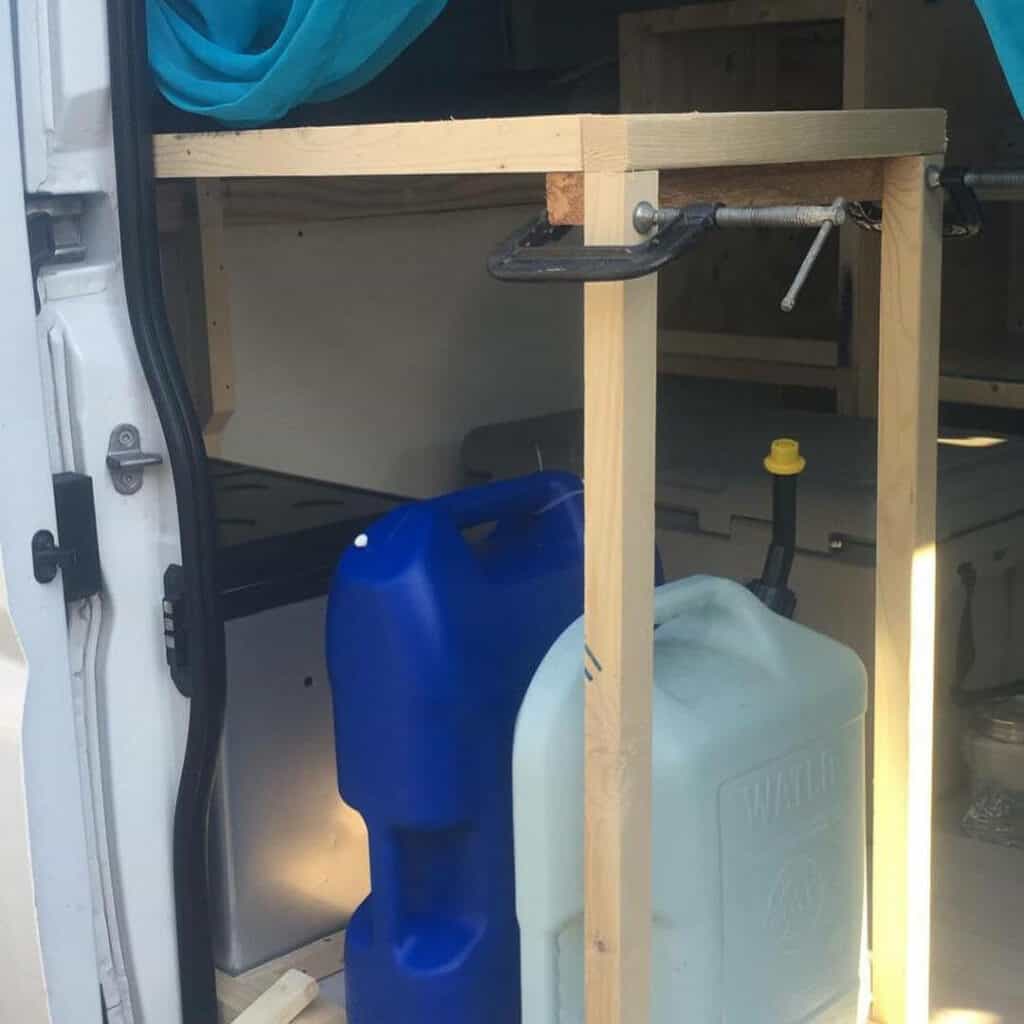
If you do not want to commit to the cost and space required to install a permanent water tank, you can go with a barebones portable freshwater system. This can be as simple as a 5-gallon fresh water jug stored underneath your counter into which you run a hose to a foot or hand pump and into your faucet and/or toilet.
You may store additional tanks nearby and simply swap the house to each new container when the previous one is empty. And if you are going very bare-bones you may keep a 5-gallon water container with a USB-charged electronic pump strictly for drinking water.
Portable water tanks are difficult to use and not highly encouraged simply because you have to consider refilling them far more frequently than larger mounted tanks. But they are great because they are portable and can quickly be carried into many places to refill with potable water where larger water tanks are not able to be filled.
The takeaway: Planning to install a 20-40 gallon mounted water tank is your best option for long-term van life, particularly if you intend to spend a lot of your time off-grid. We are big fans of the wheel-well water tanks that have substantial water capacity and allow you to optimize the space inside your van build.
Water Usage
The next aspect to consider in your campervan’s water system is how you want to use the water you carry. While drinking water is the simplest form of consumption, you also want to consider other ways to use the water and how to move it through your system.
This is where we’ll cover basic options for faucets, toilets, showers and water pumps.
Water Pump
Regardless of how much water you choose to carry and whether to store it in permanently mounted water tanks or smaller, portable tanks you have to consider the best water pump to move the water where you would like.
The simplest water pump is an electric USB-charged pump that fits over standard 5-gallon water containers. If you were going ultra-light in your van build this may be an option for you.
Or you may consider this an option to separate and store additional water dedicated just for drinking. These water containers can be refilled with potable water in most grocery stores and a simple water pump like this one uses minimal power and is quickly recharged.
Manual Water Pumps – Hand and Foot Pumps
The next step up, and more common among basic van conversions, is either a foot or hand pump. These are affordable and simple to use.
With a foot pump, there is a pedal near the floor that you step on to create the pressure that draws water out of your water tank. These are typically coupled with faucets only. Although there are pedal pump options for RV toilets you can install in your van as well.
Hand pumps work in a similar fashion. The only difference is that instead of stepping on a pedal you move a throttle back and forth with your hand to prime water to move into your faucet.
Both foot and hand pumps are simple options, but they are not incredibly efficient as they cause the water flow to pulse and squirt out of the faucet. But they do not require campervan water system electrical connections and are more affordable than 12v electric pumps.
12 Volt Electric Water Pump
The industry standard among the recreational vehicle community and most common in a DIY camper van conversion is the installation of a 12-volt electric water pump in line with your water tank.
These are simple electronic devices that draw little power but use an internal motor to draw water from your fresh water tank through the pump where it is then pushed into every plumbing appliance you have installed.
These pumps are great because they run on little power and turn on and off with the flip of a switch. They come in various sizes, allowing you to select more or less powerful pumps, and many can be run on empty water tanks without damaging the pump.
They also provide a steady flow of water for as long as you ask for it from your faucet, shower or toilet, which helps to conserve water. And water quality can be increased if you filter water between the tank and the pump.
However, they do require a 12-volt power source so they will not only need to be plumbed into your water system but also accounted for in your electrical system. They are also more expensive than their manual counterparts and depending on which model you choose the pump vibration may be a little annoying.
But in an ideal campervan water system, you will rely on these highly effective devices more than a manual alternative.
The takeaway: Planning to purchase and install a 12-volt electric water pump is likely the most convenient and sustainable option for pumping water to your sink, toilet and/or shower. They are commonly used, affordable and relatively easy to install.
Faucet
The next most common component in the process of water usage in your campervan is a faucet. Larger RVs and trailers may have 2 separate faucets dedicated to the bathroom and kitchen, respectively. However, in a van with less overall space, you will likely only consider one faucet to handle all of your water delivery needs.
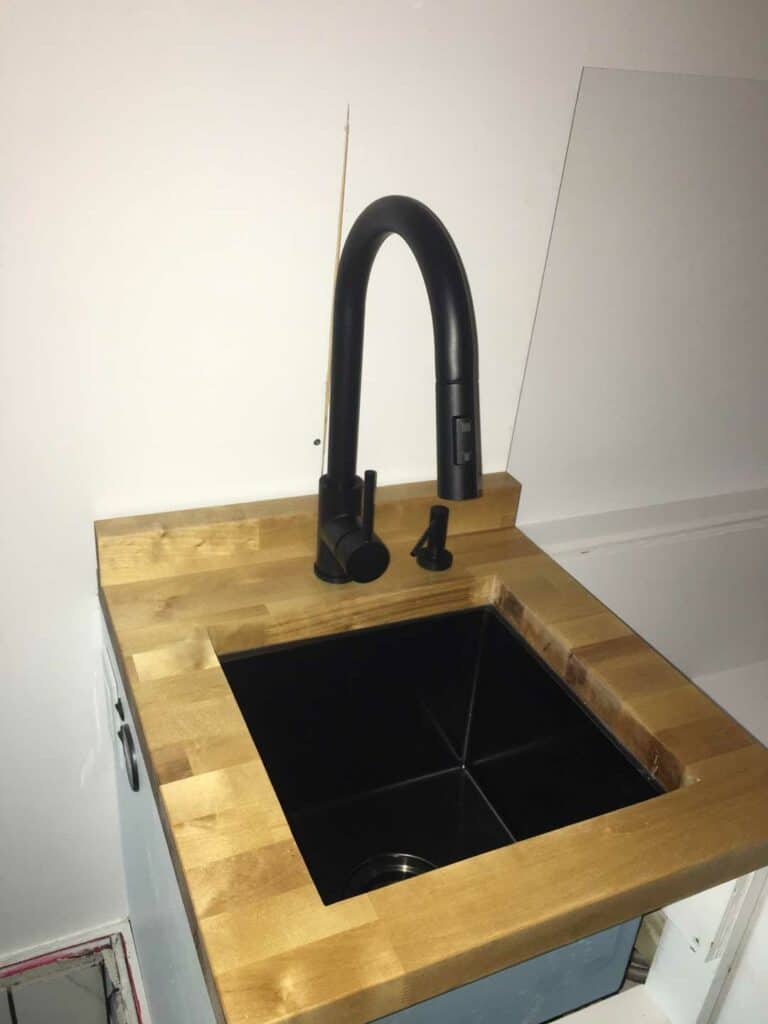
Faucet options are endless. And you can check out this post for the best options that we recommend for your van conversion. But essentially you’ll want to account for having a sink with an attached faucet.
Whether you buy a complete RV faucet and kitchen sink combo or opt for a residential sink and faucet with more customizable options, you’re going to want to have the ability to wash your hands, dishes and food inside your van.
Of course, the most barebones option would be to simply pour water from a container outside. But we feel it is a more affordable and convenient option to plan to incorporate a sink into your build.
They are also relatively easy to install, particularly if you opt to not include a hot water system and stick strictly with a cold water inlet.
The takeaway: A faucet gives you the ability to access fresh water with the flip of a handle. When coupled with the largest, deepest sink you can fit inside your van you will find these are particularly useful when washing dishes. You can also build or buy sink covers that create more counter space when you are not using the sink.
Toilet
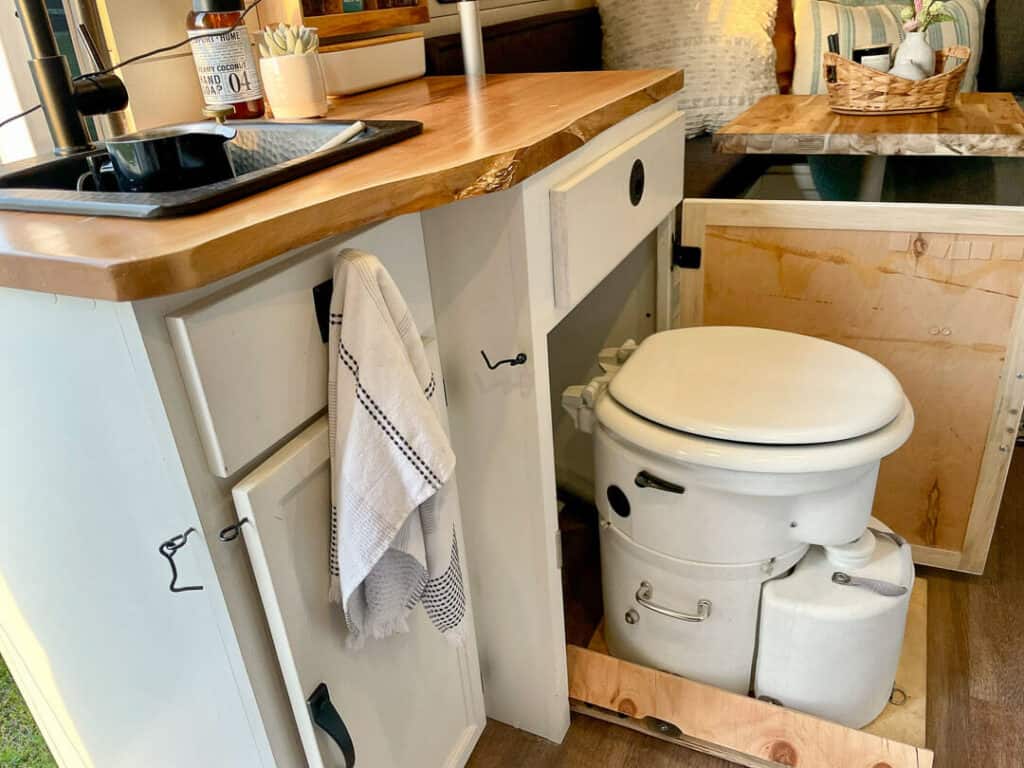
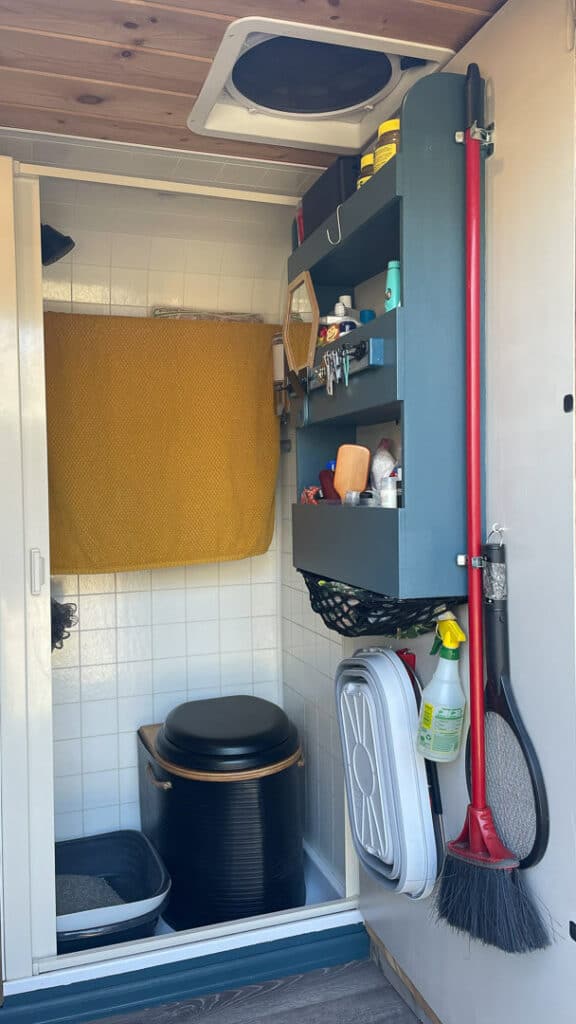
While using the restroom is a human necessity, when it comes to van life there are many options for including or not including a toilet in your van build. If you opt to include a toilet, you will find that there are both plumbed RV-style toilets and toilets that do not rely on water, such as composting, cassette and bucket toilets.
In van life, both composting and cassette toilets are increasingly more common and popular. While they involve larger price tags, because they require neither plumbed water nor wastewater storage, the convenience of these toilets typically makes up for their upfront cost.
It is not common to include a plumbed toilet in a campervan. These are more common in larger RVs and trailers. But if you planned to include one in your build you would need to consider plumbing your fresh water tank to your toilet so that you can flush the toilet.
And then you will also need to consider plumbing the wastewater into a black water tank for proper storage and disposal.
The takeaway: You likely will not need to consider plumbing your toilet into your campervan water system. But if you opt to, be sure to consider an electric water pump for flushing and a separate black tank for storage and disposal of wastewater.
Shower
The next major component of water usage inside your campervan is the shower, with additional consideration of a water heater. While more advanced van builds and pre-made Class B RVs may include a wet bath (toilet and shower combination), it is not common for many van dwellers to build an indoor shower into their van conversion.
However, nearly all van lifers have an outdoor shower option that may or may not be plumbed into their water tanks directly.
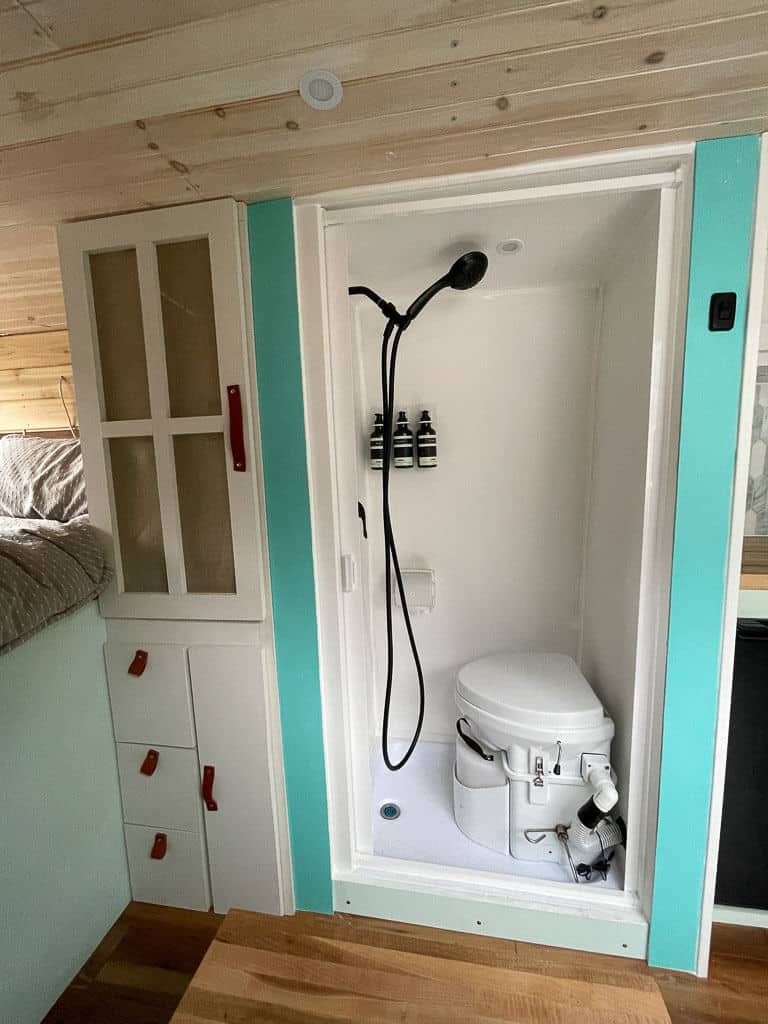
Indoor Showers
Indoor showers will require a waterproof shower shell and pan. This is the shower stall itself and water should be confined to the space such that it does not get all over the inside of your van.
There are some creative space-saving options for these that include drawer showers that pull out of a closet and collect water beneath you as you shower. Or there are traditional shower stalls like you would see in a house or apartment, although significantly smaller!
Regardless of what kind of shower you build, when it comes to plumbing you will need to have a 12v electric water pump to deliver water into your shower with hands-free operation, a showerhead to dispense the water and plumbing to a gray water tank for wastewater collection and disposal.
You will also want to consider whether or not you want to tie a hot water heater into your shower system. This would involve additional plumbing between your water pump, hot water tank and showerhead.
Outdoor Showers
A more popular option for van life is to set up an outdoor shower. Not only does this save space inside the van for other priorities, but also it keeps you from having to add additional plumbing for grey water – not to mention not risking water leaking inside the camper.
With an outdoor shower, typically you will place it at the rear of the van. That way you can open the rear doors of the van and use magnets or another form of shower curtain to enclose a private space.
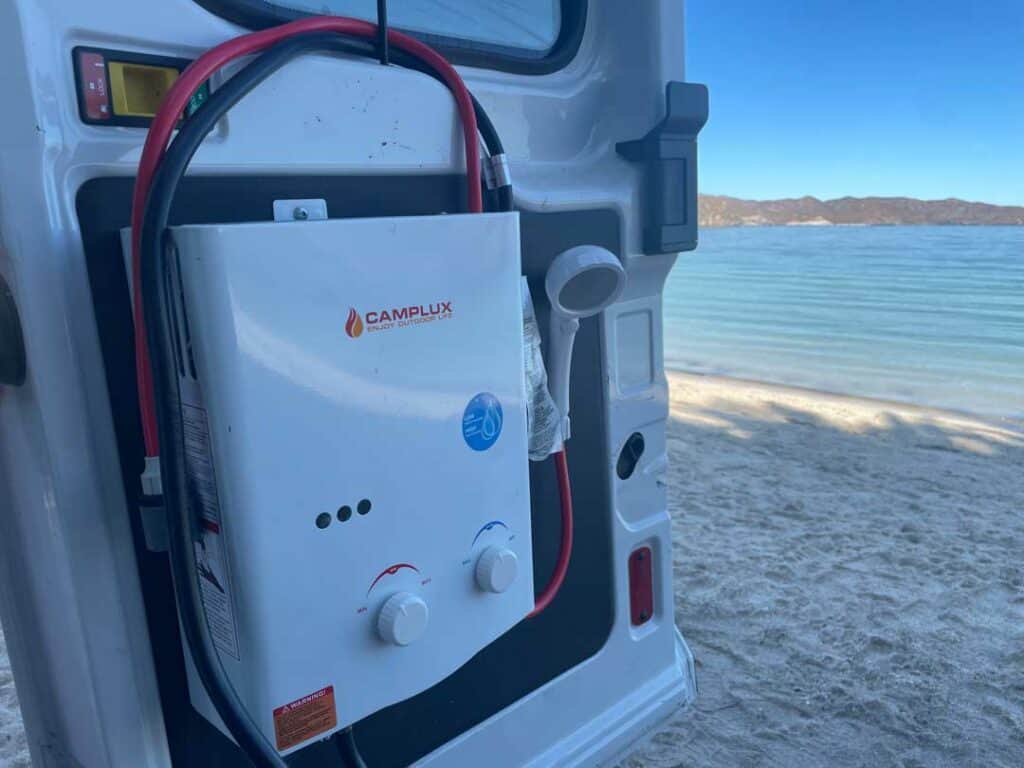
Popular outdoor shower options still involve a 12v electric water pump and many incorporate an on-demand tankless water heater for an instant hot water shower.
A tankless water heater is usually located in the rear of the van near the water tank in such a way that plumbing is minimal. You will either pump the water from the tank into the pump or directly to the showerhead.
Or you will need to add water lines into the heater and to the showerhead if you choose to add a heater.
Regardless of which option you choose, plumbing is minimal and does not rely on needing additional grey tank capacity to collect and dispose of dirty water.
An even simpler and more affordable shower option involves installing 4” PVC pipes on the top of your van. Paint them black to absorb heat from the sun and install a spigot to gravity-feed water to your shower head.
The takeaway: There is only a minor difference in your plumbing system if you choose an indoor over outdoor shower option. This simply involves adding plumbing to your grey tank for wastewater disposal. Whether you choose an indoor or outdoor shower depends on personal preference and you will have other considerations to take in mind for the structure and function of the shower in either case.

Water Heaters
The final component in your campervan plumbing system is an optional water heater. Larger RV-style water heaters have a hot water tank that stores up to 6 gallons of water and takes up that much additional space in your camper van.
What is even more popular these days are propane-fueled tankless on-demand heaters. With these, you will plumb your cold water from your water tank into the heater where it is heated to provide instant hot water to both the shower and/or sink.
The takeaway: A common DIY camper van conversion includes a hot water system with a tankless water heater due to the minimal size they take up and the fact that they do heat water very efficiently. But if you go this route you’ll need to have a plan for a great propane system to fuel your water heater.
Wastewater Storage
The final aspect of your campervan’s water system is your grey water storage and disposal. Just because you have a large freshwater tank and all the great appliances plumbed together doesn’t mean you can forget about where all of that dirty water will go once you’ve used it.
When it comes to collecting wastewater there are two more tanks you need to consider, known as your grey and black tanks.
Grey Water Tanks
A grey water tank collects all wastewater that comes from your sink drain and shower. It should NOT hold any human waste from the toilet. If you have either a sink and/or indoor shower then you will need to install a grey water tank in your van.
Like fresh water tanks, when it comes to grey water tanks there are two primary kinds that you can invest in.
The first is a mounted tank, which will be more permanently installed and larger than the alternative. The second is a portable tank that can be removed and emptied manually.
If you are aiming for a less advanced plumbing system you can go back to the portable container method. Simply set a 5-gallon container beneath your sink and hook a hose to drain the sink water into the bucket.
However, a better option is to plumb a grey tank into your grey water system. These vary in size, from around 15 gallons to 30 gallons, and are relatively easy to install.
Grey water tanks will collect used water from both your sink and indoor shower if you opt to install one. While they are more expensive and require more effort to install, they will extend your stay in the wild between RV dump stations and they usually fit quite well beneath the van itself attached to the chassis.
Just remember to take into account that water weighs 8 pounds per gallon regardless of whether it is freshwater or wastewater so you’ll want to account for both the space and weight of a fixed grey water tank.
When it comes to the proper disposal of wastewater in your grey tank, we recommend a hose nozzle or ball valve that fits a standard garden hose. In this way, you can simply attach the hose to the nozzle and open the valve to allow the wastewater to flow into a proper sewer connection at an RV park or dump station.
This bypasses the need for bulky RV hoses and Shrader valves that are common in larger recreational vehicles. It is simple, affordable and incredibly convenient for dumping the grey water tank as often as you need.
The takeaway: The simplest option for collecting and disposing of wastewater from your sink is through a portable container. However, it is far more convenient and gives you much more time between disposals if you invest in plumbing a grey tank into your campervan conversion.
Black Water Tank
A black water tank is exclusively dedicated to human waste from a plumbed toilet. So if you are going to bypass a plumbed toilet and opt instead for a composting, cassette or portable toilet then you won’t need to account for a black tank in your camper van conversion.
However, if you do opt for a black tank then you will need to have plumbing exclusively between the toilet and the black water tank.
There is also an option to include a black tank when it comes to a composting toilet. If you do not want to collect the urine in a small, portable container you can plumb the diverter into the black tank and thus you will not need to empty the tank as frequently as you would a portable container.
However, if you do install a black water tank you will want to commit to carrying a proper RV sewer hose that will allow you to dump your black tank while not contaminating any other hose you use for either fresh or wastewater.
The takeaway: It is not likely that you will install a black water tank in your DIY camper van conversion. It is more likely that you will bypass a plumbed toilet and instead only require a grey tank in your build.
Camper Van Water System Setup Options
Now that you have an idea of what kind of components you need to consider when designing and installing your campervan water system, we want to give you a few ideas of different versions you could use as the framework for your van’s plumbing.
Bare Bones Plumbing Setup
This setup is for the minimalist who is very budget-conscious and willing to trade convenience for a minimal build cost. If you are looking for a quick and easy way to tackle your van’s plumbing system by bypassing permanent plumbing solutions, this is a basic framework for you to build upon.
Key features: You will still want a sink and faucet of some kind for washing dishes. But you’ll use either a foot or hand pump to prime the faucet instead of a more expensive 12v electric pump because you’ll likely draw water out of a portable water container.
Likewise, you’ll drain water from the sink into a portable container beneath the sink and empty it as often as necessary. You also won’t have to worry about plumbing a toilet or shower.
To save money and keep the toilet simple you may have a portable camping toilet or bucket toilet that you empty regularly. And you’ll use a solar shower outside your van to keep from having to plumb the shower. You’ll become adept at finding public shower facilities when needed.
- Plumbed sink and faucet
- Hand or foot pump
- Portable fresh water tank
- Portable grey water tank
- Portable or bucket toilet
- Outside solar shower
Most Common and More Robust Setup
This camper van water system setup is a fairly standard setup regardless of what type of van you choose to build out. It requires minimal plumbing and can be installed relatively easily. Use this framework to build upon if you want more permanence in your system that will extend your time between refills and wastewater dumps.
Key features: A step up from the barebones setup, you’ll add a 12-volt electric water pump to make it much easier to draw water into your sink. You’ll also have a fixed freshwater tank that will hold many times more water than potable water containers.
As you will be using more water, it’s necessary to install an adequately sized grey tank to store wastewater from your sink. You still don’t need to plumb a toilet, so you won’t have that or an associated black tank.
But you will want to add a plumbed connection between your water pump and an on-demand instant hot water heater. From there, hot water will be plumbed to your shower and potentially your faucet so you can count on a long hot shower from time to time.
And because this system still includes an outdoor shower you don’t have to plumb the shower back to the grey tank.
- Plumbed sink
- 20-30 gallon mounted fresh water tank
- 12v electric water pump
- 15-20 gallon mounted grey water tank
- Composting or cassette toilet
- Plumbed on-demand hot water heater
- Outdoor shower
Ultimate Water System Setup
For the ultimate water system in your camper van conversion, you won’t have to worry much about water or finding a place with a little privacy for your hot shower. Your water systems will involve more plumbing as you will add a shower indoors along with your sink.
So you will want the largest grey tank you can fit and afford. But you’re also going to want to add the largest mounted fresh water tank as well so you don’t have to stop so frequently to find water.
Add the 12v electric pump to your system to move water with ease and connect the instant hot water heater for warm water in both your faucet and shower.
Key features:
- Plumbed sink
- 20-30+ gallon mounted fresh water tank
- 12v electric water pump
- 15-20+ gallon mounted grey water tank
- Composting toilet or cassette toilet
- Plumbed on-demand hot water heater
- Indoor wet bath shower
Tools, Materials and Process for Plumbing
Most of the plumbing in your water system can be done with simple tools and adapters that make it failsafe and easy to install.
In addition to the parts that come with each appliance you choose to install in your water systems, you’ll want to consider budgeting for and studying how to incorporate the following tools and materials into your design.
Note that the length of the pipe that you choose to use depends on the placement of your fixtures, water tank and drains.
- Flexible 1/2” diameter hose (variable length)
- Adjustable clamps (vary by need)
- Sharkbite fittings (vary by need)
- 1/2” diameter Pex tubing (variable length)
- Required sink fittings and PVC pipes
- Drain
- P-trap
- Plumber’s Putty
- Plumber’s tape
- PVC/Pex Pipe Cutter
- Screwdrivers (Phillips & Flat Head)
Pex piping is increasingly common as it is flexible and durable and quite easy to cut and work with. We’re also big fans of Pex because you can use Sharkbite fittings to create the perfect watertight seal between fittings and connections.
A simpler solution is to use more flexible tubing and adjustable clamps to tighten down the connections. But we have found that while these are great in some circumstances, the fittings can corrode and adjust over time making them prone to leaking.
Sharkbite adapters on Pex tubing are virtually foolproof and watertight indefinitely.
Wrapping Up
Because water is so essential to sustaining van life on the road, you should put a fair amount of thought into the kind of system you want to install.
From a basic system that relies on portable containers to a more robust one that has mounted tanks and plumbs both hot water and cold water, the choice is yours on how comfortable you want to be.
You’ll also want to consider how much water you want to carry, both on the freshwater and wastewater sides of the system, as water can be heavy. But we’re under the belief that more water is almost always a good thing and we’re fans of the ultimate water system setup.
DISCLAIMER: Some of the links in this article are affiliate links, which means if you book accommodation, tours or buy a product, we will receive a small commission at no extra cost to you. These commissions help us keep creating more free travel content to help people plan their holidays and adventures. We only recommend the best accommodations, tours and products that ourselves or our fantastic editorial team have personally experienced, and regularly review these. Thanks for your support, kind friend!

